Luke Fergusson of the Hobby Room got in touch recently asking if we’d be interested in a hosting a painting tutorial he had put together for the new Star Wars: Imperial Assault game from Fantasy Flight. I have been following The Hobby Room’s progress on Instagram for a while now and have been constantly impressed by the standard of their work, enthusiasm and willingness to share tips and information with the hobby community. Those dudes have the right attitude, produce good quality hobby materials and I hope we can host more of their tutorials here at Corehammer in the future. Check them out on Instagram here: @thehobbyroom…over to Luke for the tutorial…
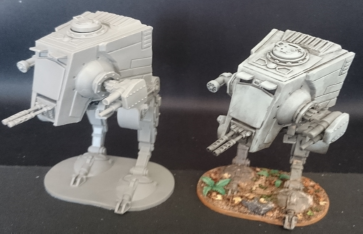
Welcome. Over the past few months I have discovered more and more great Star Wars themed, table top games thanks to my local independent store. X-Wing is my new mistress, being a game you can play with ease but also holds great depth… After being inspired by other artists to paint the odd ship, my eye has been caught by the amazing miniatures from the ‘Star Wars, Imperial Assault’ game. I literally picked this game up two days ago and haven’t even glanced at the rules. So far I have gone straight to the stunning ATST, which is for me an iconic Star Wars miniature.
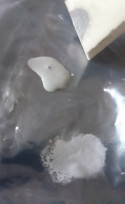
After cleaning the model of mould lines, I undercoated it with Halfords Grey Primer. When that had dried I covered the whole model with a thin layer of Nuln Oil/Agrax Earthshade mix. Both from Citadel. Once dried I did this again but just for the lower half of the legs.
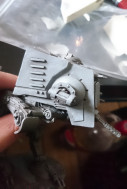
Using Administratum Grey and one of our own fine grade hobby sponges (any fine grade,artificial sponge should work) I worked the paint on a pallet and then slowly built up the tones on the ATST, concentrating on the panels and background details. Softly softly, is the rule here, building up layers softly and slowly. This will give you more control while using this technique. When happy with the result I moved onto the next tone…
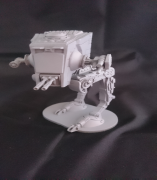
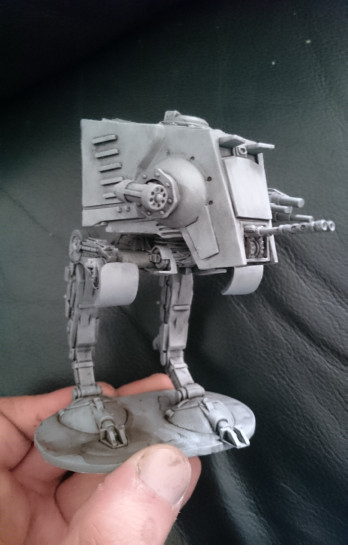
This step I repeated the same technique as the previous step but this time with Celestra Grey and concentrating on edges and highlight areas. Dragging small amounts of paint, in downward motions can help add a weathered texture to the paint work and overall look. I then brushed on some Nuln Oil to the weapons and the odd mechanical looking details. At this stage I also filled in the eyes with black paint. To add another layer of weathering I ripped off the top of a recycled sponge giving it a irregular texture. I used this to lightly dab Leadbelcher silver paint to areas on the model I thought would receive wear to mimic chipping.
To maintain the whole Star Wars theme I kept this light, as not to stand out more than the cinematic grey look. Be careful to practice the dab on a pallet to get the pressure right as it’s always better to build up the effect slowly as its always easier to add more than remove. Once dried, with the same sponge give the chipping effect a going over with Nuln Oil.I forgot to take a picture… but after this I sprayed on some Agrax Earthshade to the lower legs and brushed on some of our own Soot Tone 2 weathering pigment to the rear vents dragging downward to add another area of weathering.
Apart from adding weathering pigments to the ATST and then a little more chipping after that, it’s mostly finished. Onto the base. People have noted that I spend twice as much time doing the base than the model…my reasoning for this is that I wanted them to look cinematic, and the film references I used obviously showed high quality sets and background scenes. So naturally I wanted my bases to look as detailed as possible. And with the extra time given by painting the ATST in simple techniques I can spend a bit more hobby time making them look just how I want.
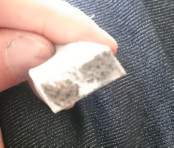
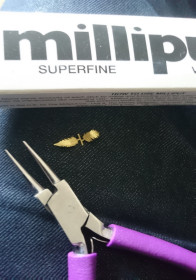
Milliput is a great product, a two part putty that is pretty much a self setting putty that can even be set underwater. It can be sculpted, sanded, sawn and cut and is just brilliant. If you try out one product this year I would strongly suggest this as a five star tool, for your kit. Later I will attempt a Milliput Rancor if Fantasy Flight don’t release one before I get the chance.Using the putty I attached details using our slate basing kit and some etched brass plants I found on the internet.
You can use plastic plants but I felt in this case brass would be better. Plastics, I feel are OK on displays but for bases they tend to chip or pull free, if knocked too much. Brass on the other hand can be sculpted with tools to specific shapes, either for visual reasons or to avoid breakages.
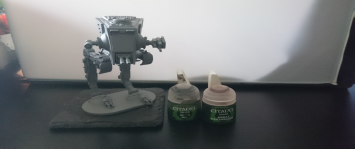
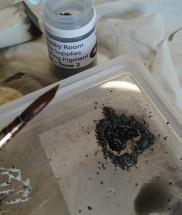
Using The Hobby Room basing kits, the Slate tub and the new forest texture I have filled in the rest of the base, adding a lot of detail. The slate can be fixed with Super Glue or Milliput but the bedding must be fixed with PVA, then once dried it needs fixing in place with a slightly water thinned PVA. Using Weathering Pigments from our range, Mud Tone 1 and Mud Tone 2. I lightly mixed the pigments with a good quantity of water. Then lightly with a brush I carefully applied it in small amount to needed areas adding more to lower parts and areas that would pick up more dirt.
I used a small hair dryer to speed up the process then blended out the pigments with a fine grade sponge. I used a pencil to recreate, damaged metal by dragging the graphite edge across ‘moving parts’ and ‘extreme edges’.
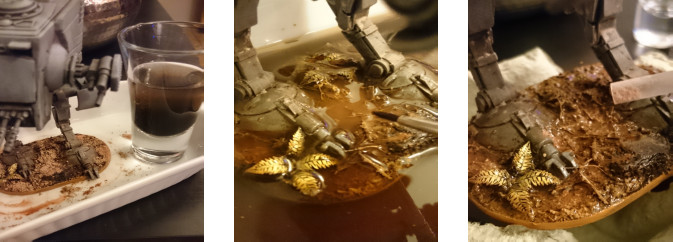
Firstly, I scattered pigments as randomly as possible over the now painted forest texture. I did this all in a water container and then, mixed in a shot glass mix of water and brown
wash, about 30% wash. Then the wet mix was added to drown the base and cover the pigments. The pigments were teased with a brush to slightly mix the colours and break them down. I drained off the liquid and added pigment as I saw fit. In retrospect this was an unnecessary stage, but I wanted to show this, as again, this technique can be built up slowly and if bathed again the pigments can be reworked until you are happy with the result. After it had dried completely I used Super Glue to glue down three tones of small leaf litter in various random positions I then primed the brass leaves with painton primer and a few different tones of green acrylics.
I painted the base rim with the same base colour I painted the forest texture to start with, tying in the whole base scheme.
After this picture was taken I added a final Light green to the leaves and the ATST is done….

Very nice!
😀