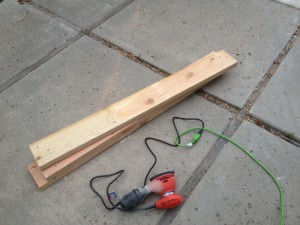
In the last installment of building the table we were mostly done. If you recall the table was assembled other than the supports to hold the playing surface. We made the decision to disassemble the table, sand and stain the boards and reassemble it. Sanding the boards is not difficult it is just time consuming. I threw on the headphones, queued up a random playlist of punk and hardcore and got to work. I recommend using a random orbital sander and 220 grit sandpaper. If you don’t have one you can pick up a cheap but good sander for about $30 at most hardware stores.
Author Archives: Chris Kohler
Building a game table. Part two
Authors note: All measurements are given in imperial. Given that Warhammer is played in inches I will assume everyone is familiar with inches and feet. You can convert everything to metric easily with your favorite online conversion tool if needed.
As you may recall from part one I am using plans from a now defunct website called drunkdwarves.com. I wish I could find those dudes and thank them. If anyone knows the guys who were behind that site thank them for me.
The supplies you’ll need to build this table are as followed:
- 2 4×4″x8′ posts
- 6 2×6″x10′ boards
- 3 2×4″x10′ boards
- 32 1/4″ – 5.5″ long Carriage bolts
- 32 1/4″ nuts
- 32 washers
- 12 90* 1″ metal angle brackets and at least 24 1″ pan head wood screws
You’ll also need a mitre or circular saw, hand sander, drill, straight edge, pencil and measuring tape. The total cost for all the boards and hardware was about $75USD.
You will need to cut the lumber into the following sizes:
- 2 4×4″x8′ posts into 4 4×4″x39.5″ posts
- 6 2×6″x10′ boards into 4 2×6″x49″ boards and 4 2×6″x100″ boards
- 3 2×4″x10′ boards into 5 2×4″x49″ boards
An early morning call to Ben let him know that today was the day we’d start the table. I drove past his place to pick him up so we could go grab the mitre saw we needed to borrow and grab a breakfast burrito for him. After securing the saw and burrito we headed back to my house to begin the project. Ben’s brother Dan had mentioned earlier in the week that if he had time off he wanted to join us to help. I shot him a text message and asked if he was available and if so to head over.
Continue reading
Building a game table. Part one
I got my start much in the same way many other gamers did. A couple blisters of miniatures, a handful of dice, a basic grasp of the rules and some eager friends. We played on kitchen tables with books and soda cans for terrain then eventually graduated to an unfinished plywood board resting on folding card tables or saw horses with some half decent scratch built terrain. As my interest grew and skills improved, I became a better painter, better gamer and better terrain maker. I never managed to create a nice table to play on. It was still just plywood placed on folding tables. It was easy to store and didn’t take up valuable space in the small places I usually lived in.

