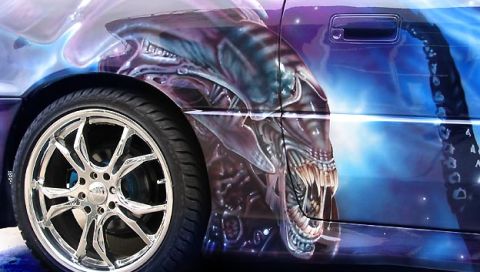
Follow this guide right, and you’ll have all the kit to paint a massive alien queen on the side of your Mum’s new Punto!
So you’ve read up on what kind of compressor you need, and you know why you need one. Nice work. Next step’s the airbrush, this thing’s gonna get the paint on to the model. Read on, and let Corehammer impart its combined knowledge and experience.
Still with me? Good. First of all, how the fuck does an airbrush work? Its easy, you see that pot of thick gloopy paint yeah? Well that’s just pigment held in suspension in a liquid, or medium. There’s a lot of pigment and not that much liquid, so its pretty thick and sure as hell not going near your airbrush like that. But, thin it down enough, so it’s a milky consistency, and lo and behold, it will go through the airbrush, carried by that compressed air we talked about last time. The air picks up the liquid with the paint held in it, and sprays it on to whatever it is your painting, the liquid dries, leaving your paint where it settled.
Now, buying an airbrush is as much of a nightmare as buying a compressor, there’s a plethora of manufacturers, each making tens of different models. Here at Corehammer, we use a mixture of Badger, Iwata and Harder & Steenbeck models and we’ll go into some of the opinions shortly.
Ideally, you want a gravity fed airbrush, the paint goes above it in a hopper, and flows down into the airflow and gets fired out the end, preferably in the direction you want it, and not all over your Apple Mac as one of us experienced not so long ago.

The modular nature of the H&S is spot on, so easy to flip between needles.
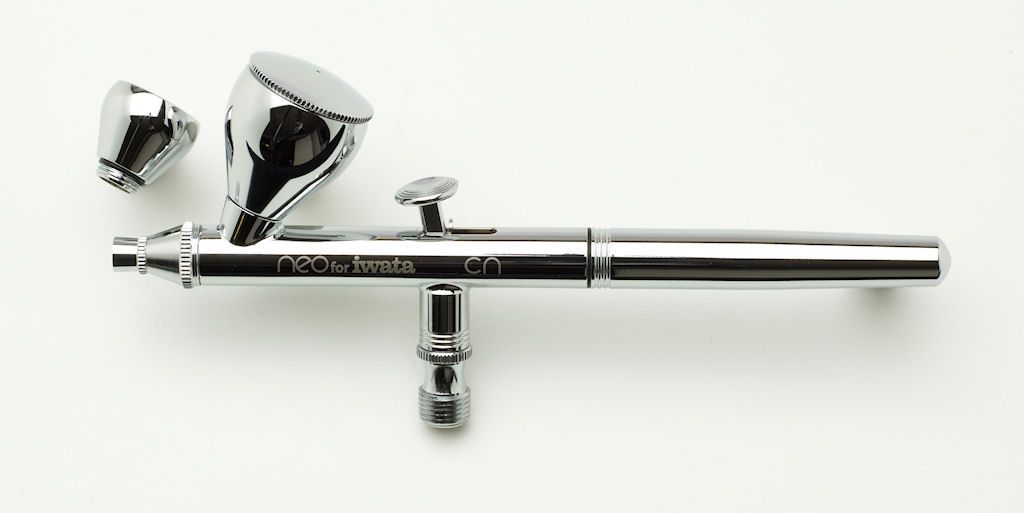
Corehammer OG and author of the Brew & Brush blog Kev Walsh recommends the Iwata Neo, – “If your budget is under £100 for the brush alone then the absolute best thing you can buy is an Iwata Neo. Extremely simple to use, gives a nice spread, and can be used for moderately closeup work. It’s a brilliant piece of kit for it’s price.”
“If you can stretch to it though, I’d go for the Harder & Steenbeck Evolution two in one. Comes with two needles/nozzles. a 0.4 and a 0.2. The 0.4 will sort you out for 75% of your work, once you have your consistencies and pressures nailed it’ll get up close without any problems. 0.2 is a lot finer, obviously, and it’ll take some work to get it nailed but when you do you’ll be able to paint details you thought an airbrush would never achieve.
This is the brush I went for recently following Kev’s advice, and am more than happy with the build and flexibility of the two needles. Changing the needles is the work of seconds, unlike most other manufacturers, if it’s even possible.
When we talk about needles, they’re just that, a pointed needle that regulates the airflow out of the end of your airbrush. The thinner the diameter of the needle, the finer the spray so you can do more detailed work like Kev mentioned.
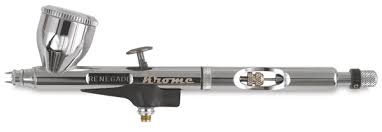
Badger Badger Badger, MUSHROOM MUSHROOM!
Another dual needle brush is the Badger Krome, as used by Chris M who recommends this for much the same reasons as the H&S above – “I’d been reading a few reviews and watching a lot of awesome paintjob vids and I think Les was using a Badger Krome in a fair few of them. So I did a bit of looking about, decided to up my game and picked one up new from eBay. It comes with two needles and tips, a .21 and a .33 so it’s good for detail work which appealed to me. Instantly, the difference compared to the cheap ones was staggering. Much more control and it’s even easier to break down to clean which I always found a complete clart on. The one downside about it is that the nozzle tips are floating, so they don’t screw in. Obviously they can be easier to lose, but it does mean if you’re heavy handed then it’s a blessing since you don’t have to screw it on. One cool thing is that it’s got a micrometer trigger setting, which is essentially a dial on the back. It sets the maximum distance you can pull the trigger back, so if you’re doing basecoating or similar it’s pretty handy. With some practice, the detail you can get with the fine nozzle is great and I’d really recommend it overall.
Iwata Neo, excellent entry level airbrush, possibly a better actor than Keanu Reeves although this claim has not been substantiated.
A lot of Corehammer have the Iwata Neo, though Badger is also a well represented manufacturer within our halls. Ive also had the pleasure of using the Iwata Revolution, which is now residing with the Boardmonster after a trade. It has a .4 needle, and is built like a tank. There was no way I would have parted with this except for the need to spray finer details.

This is the Revolution, absolute work horse this thing. Comes in a nifty case too, like diamonds in a James Bond movie.
While the brush itself is flawless, and ideal for tanks, base coating, whatever, you just cant get up close to do say a fade on an arm for example, without some over spray which was the exact point I realised I needed a finer needle. If fine detail isn’t a necessity, you can track one of these down for around £80, and live happily ever after, believe me.
I did say I’d mention those free airbrushes you’ll have got if you bought the AS18 or the AS183, Corehammer is divided on these things it seems.
Chris M recommends keeping them to use as learning tools – “In that the intro ones are good to learn the ropes on, break, get mucky and bugger up. Once you’re serious about it then it’s worth investing in something decent, as better results are instant if you’ve got the basics down.
While I’d recommend putting them right on eBay, and selling them as brand new without using them to recoup some of your outlay. I rapidly grew frustrated with them, they pushed me to the edge of selling the lot until Byron at Element recommended the Iwata Revolution to me. I cannot put in to words the difference between trying to use a cheap airbrush and using a decent one properly.
That’s pretty much it, you want a gravity fed airbrush, but you need to think about what you need to do with it, will you need the finer point, or are you happy to use the thicker needle for the way you work? Would a dual needle design be worth investing in, they’re a bit more expensive, but with that comes the flexibility to cover all bases. It’s really all down to how you work and what you want to do in the future. If you stick to brands like Iwata, Badger and Harder & Steenbeck, and you bear the above points in mind, you should be fine.
Next time we’ll go over the paints you can use, how to use them, and some tips and tricks to make your life a bit easier and that learning curve less daunting, as well as stuff like hoses.
The world of airbrushing is a confusing one to get into and not exactly cheap even for the very lowest options. I admire the people out there that have had success using the free brushes you get with the AS186 compressor, mine broke within a month so I just upgraded right away. Good write up, lad.
Pingback: Kmoon, actually any good? – Airbrushing for less. | COREHAMMER