
Authors note: All measurements are given in imperial. Given that Warhammer is played in inches I will assume everyone is familiar with inches and feet. You can convert everything to metric easily with your favorite online conversion tool if needed.
As you may recall from part one I am using plans from a now defunct website called drunkdwarves.com. I wish I could find those dudes and thank them. If anyone knows the guys who were behind that site thank them for me.
The supplies you’ll need to build this table are as followed:
- 2 4×4″x8′ posts
- 6 2×6″x10′ boards
- 3 2×4″x10′ boards
- 32 1/4″ – 5.5″ long Carriage bolts
- 32 1/4″ nuts
- 32 washers
- 12 90* 1″ metal angle brackets and at least 24 1″ pan head wood screws
You’ll also need a mitre or circular saw, hand sander, drill, straight edge, pencil and measuring tape. The total cost for all the boards and hardware was about $75USD.
You will need to cut the lumber into the following sizes:
- 2 4×4″x8′ posts into 4 4×4″x39.5″ posts
- 6 2×6″x10′ boards into 4 2×6″x49″ boards and 4 2×6″x100″ boards
- 3 2×4″x10′ boards into 5 2×4″x49″ boards
An early morning call to Ben let him know that today was the day we’d start the table. I drove past his place to pick him up so we could go grab the mitre saw we needed to borrow and grab a breakfast burrito for him. After securing the saw and burrito we headed back to my house to begin the project. Ben’s brother Dan had mentioned earlier in the week that if he had time off he wanted to join us to help. I shot him a text message and asked if he was available and if so to head over.
Remember the old adage of measure twice cut once. We measured all the boards and made marks with pencils and straight edges to note where to cut. We also wrote on the boards to know which part was the keeper and which was scrap in case we forgot in our cutting frenzy.
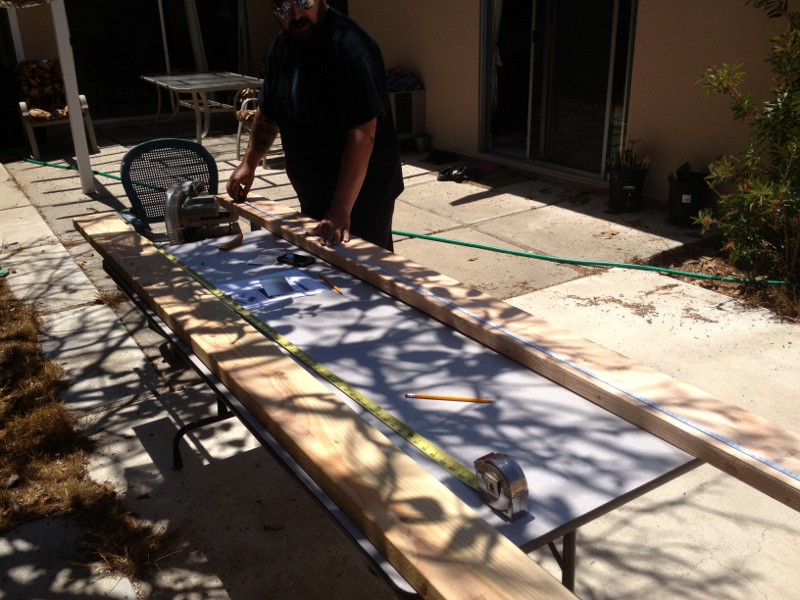
Measure twice, cut once and if possible double check each others work.
Once the boards were measured we started the cutting. I can’t stress enough that you should be very careful during the measuring and cutting stages. You don’t want to measure wrong and ruin one or more of your boards. You also don’t want to lose any fingers or other body parts when cutting. Dan arrived shorty after the measuring was done and helped with the cutting.
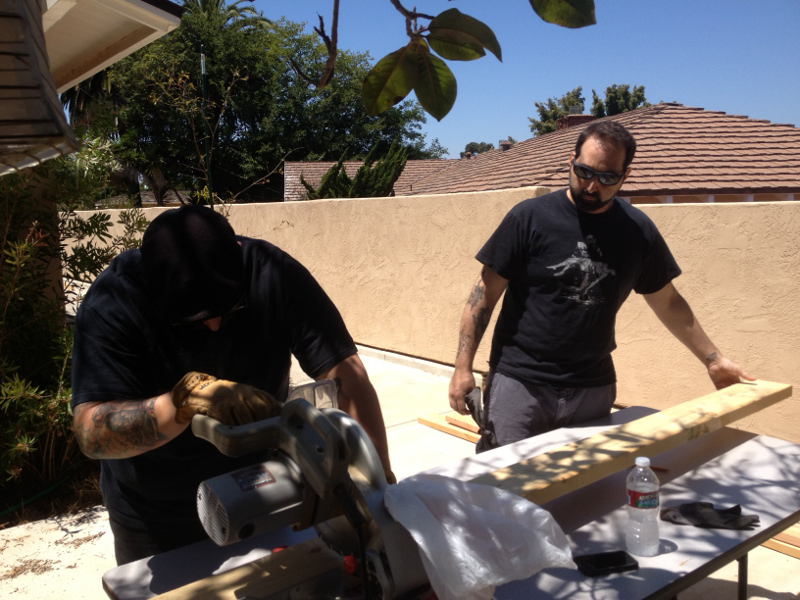
Ben mans the mitre saw
About fifteen minutes into the cutting we were all really stoked as we could see the pile of cut boards growing and at one point someone mentioned that we should build a second table and then offer our services to other gamers building tables for them. I think the sawdust was getting to our heads.cliff hanger
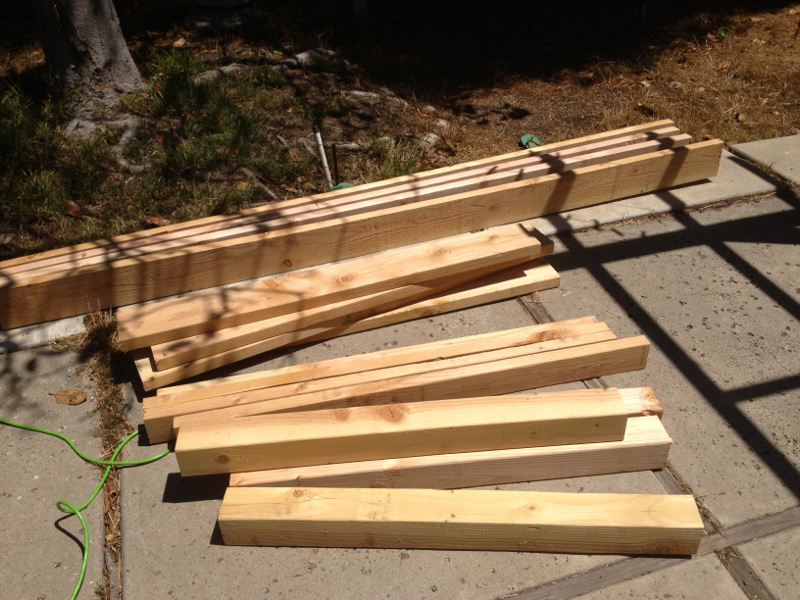
A pile of freshly cut boards
Once the boards were all cut we started on the task of assembly. We measured 14″ from the bottom of the four posts that would form the legs of our table. This is where the top of the bottom rung would sit. To make things simple we started with the one of the short sides of the table. Placing the two posts on our work bench we put one of the 2x6x49″ boards over it. We lined up the board and measured where the two holes would go. This is where we encountered our first stumbling block. The drill bit wasn’t large enough to go through both the board and the post. We tried to drill through the board and part way into the post then move the board away and go through the rest of the post. Again, the drill bit wasn’t large enough to make it through the post. A trip to the hardware store was planned for a new longer bit. We stopped at the closest hardware store and found nothing. Unfortunately this caused us to drive to the much further away hardware store and they had the bit we needed in stock. It wasn’t terrible but took up an hour of valuable time. We wisely picked up two in case one snapped but that did not happen during the assembly. Getting back to work we drilled two holes for the carriage bolts on both sides of the board on the post and put in the carriage bolts and a washer and nut for each bolt on the other side. I recommend when assembling that you drill your holes and put in the bolts before moving on to the next. This keeps your parts where you want them and makes putting in the next set of bolts much easier. With both sets of bolts in place we had the start of a table. We did the other side and took a short water break.
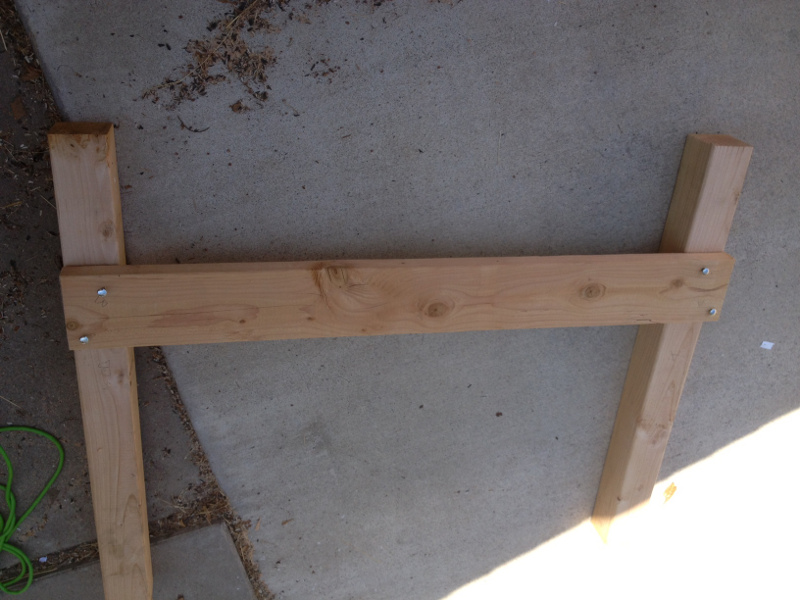
The first part aseembled
With the two short sides completed we faced our next challenge. How do we hold up both short sides, the long board on both sides and drill more holes? Ben to the rescue. He grabbed a pile of scrap wood from our cutting and put it under the long boards to make it easier for Dan to drill the holes. The procedure went smoothly putting up both long boards.
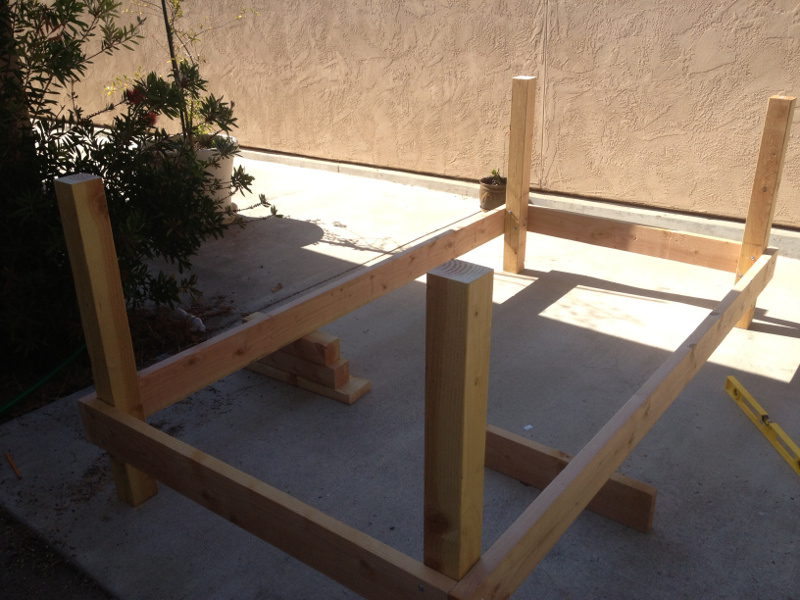
The lower part assembled
After the lower part was assembled we foolishly took the entire thing apart thinking it would make the top part easier to assemble. We were wrong. So 45 minutes later we had reassembled the lower section and regrouped with a new plan. For the top of this table, you want the boards to stick up an inch or two to provide a lip to hopefully prevent dice from rolling off the edge of the table. We figured an inch and a half would be perfect since our tabletop was half and inch thick. We measured the boards and duplicated the drill and bolting process like we did for the lower level.

Almost finished
Why a lower and upper level of boards you ask? The lower level serves two purposes. Firstly it helped makes the table more solid and gives it more support. Secondly it gives you a place to either add another top to make a storage shelf or a place to put your feet up if you are a spectator watching from a chair. We will be going with the former so we have more space to store scenery or armies.
At this point you could tighten your bolts and put the 2x4x49″ boards on the top level with the 90 degree brackets to hold your table top and call it a day. Since we are trying to make a nice table we were not done yet. We decided to disassembled the entire thing again to sand all the boards and stain it but not before enjoying some victory Cokes.

Victory! We celebrate with Cokes.
Coming in part three: Sanding, more sanding and staining