

This is how you want your tank to look right? then put down that glue right now and read on.
You’ve just spent £100 on a Spartan Assault Tank, THE super heavy in the current 30k meta. This thing gets your moon men where they need to be, safely, quickly and packs a massive punch with 2 sets of quad linked lascannons, whilst looking absolutely baller.
I’m going to tell you now, that out of the bag, that kit cannot be built properly. I don’t care how much of a modelling magician you are, or a complete newbie, those pieces do not fit together, as a quick Google search will tell you. This kit is notorious, right across the 30k scene, for its inherent issues involving the tracks.
I’m now going to spend 10 minutes just telling you how to make them fit together perfectly, what bits you need to cut, where to file, so you don’t waste your hard earned cash, your tracks will look good if you follow this guide carefully.
1. Lay out the track pieces in a line, make sure they’re all there, you should have 2 of each as shown on the instructions. You should get them prepped, filed down, and soaked in warm soapy water, same with the two side pieces for the hull, get all that release agent off.
2. Deep breath, now begin the build. Fuck what the instructions say, you need to begin laying on the tracks with the front small right angle piece that sits on the front wheel, dry fit that, the lower front track piece, and the flat piece with the tiny angled lip that goes upwards on to the top section of the tracks. Play about with this, that tiny lip bit needs to just hook over the flat section, get the feel for where they go, then stick them down, preferably with something like epoxy resin.
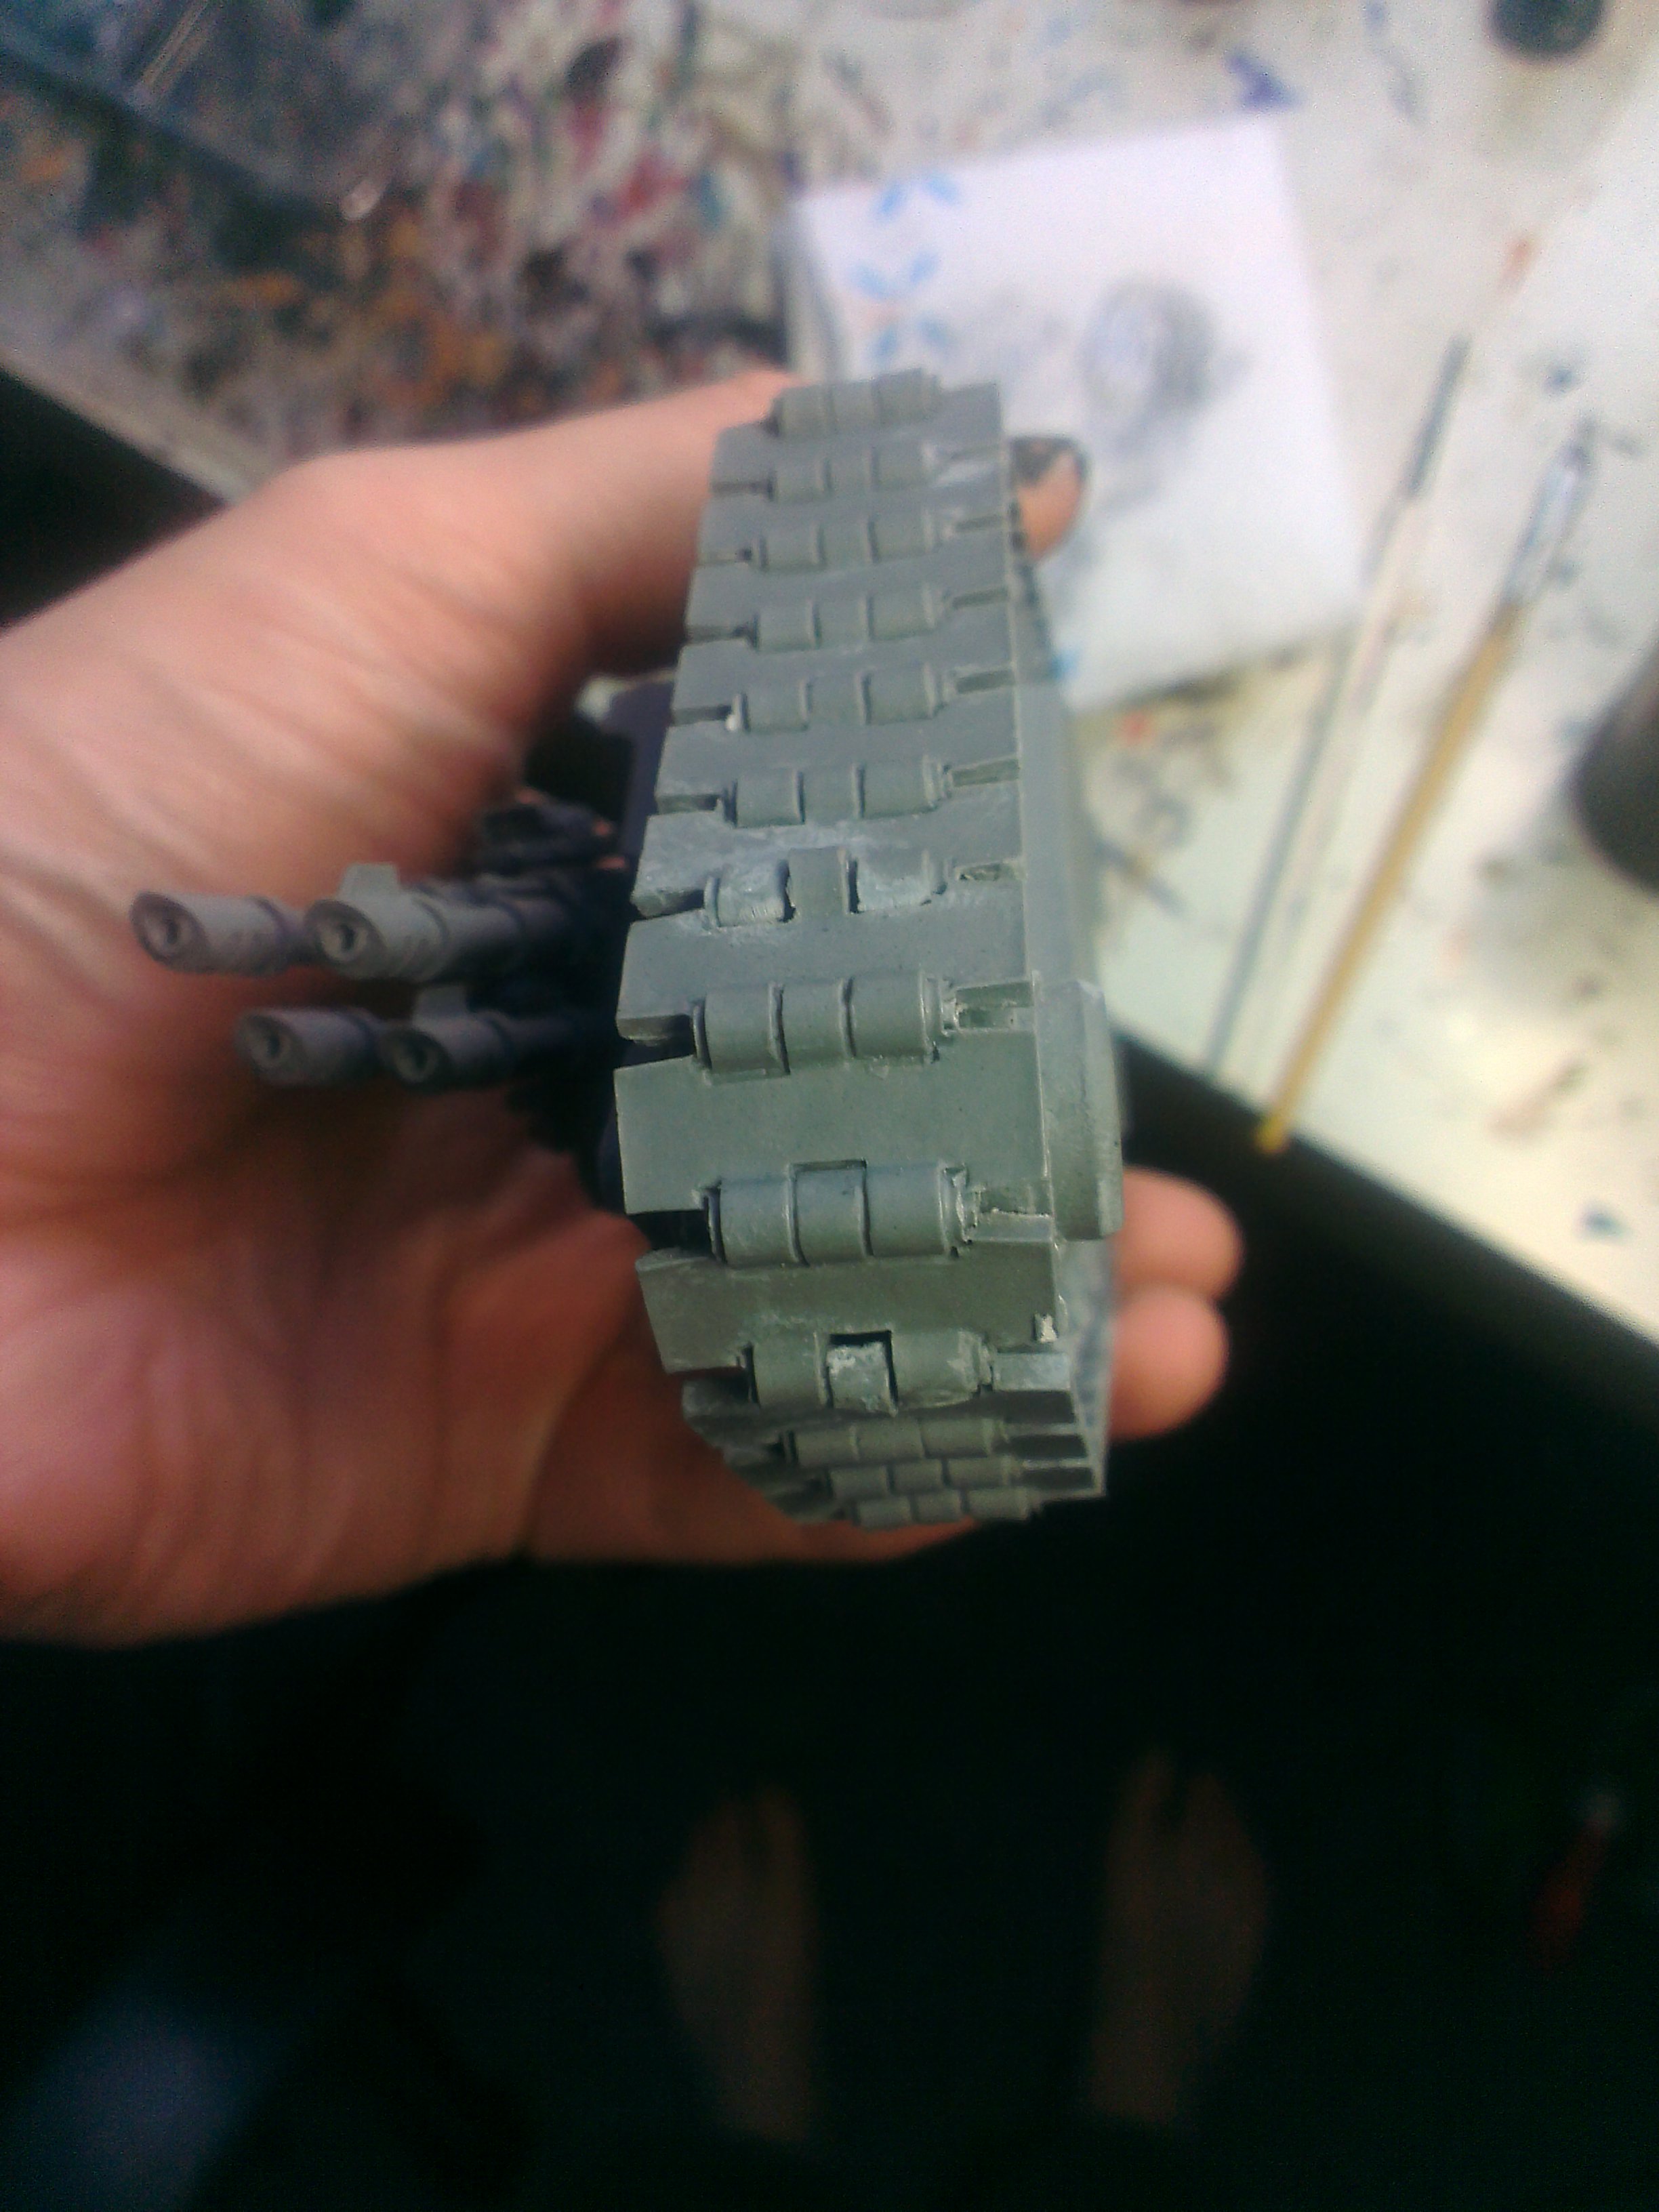
Start here.
3. Now, lay down that long flat piece, that fits to the tiny lip we just glued, and runs right along the top edge of the tracks, dry fit it, now glue it down.
4. This is where you need to start fucking about, as the track pieces are too long for the model, I shit you not. Now, see that large bent bit? Right, that’s going across the bottom, and up the lower rear track section but you need to CAREFULLY clip off the front track link piece, reducing the lower run by 1. Take your time, use sharp clippers and file down the edges. Dry fit it, realise its not angled correctly, then use the old hot water technique and bend it to the correct angle, then glue it.
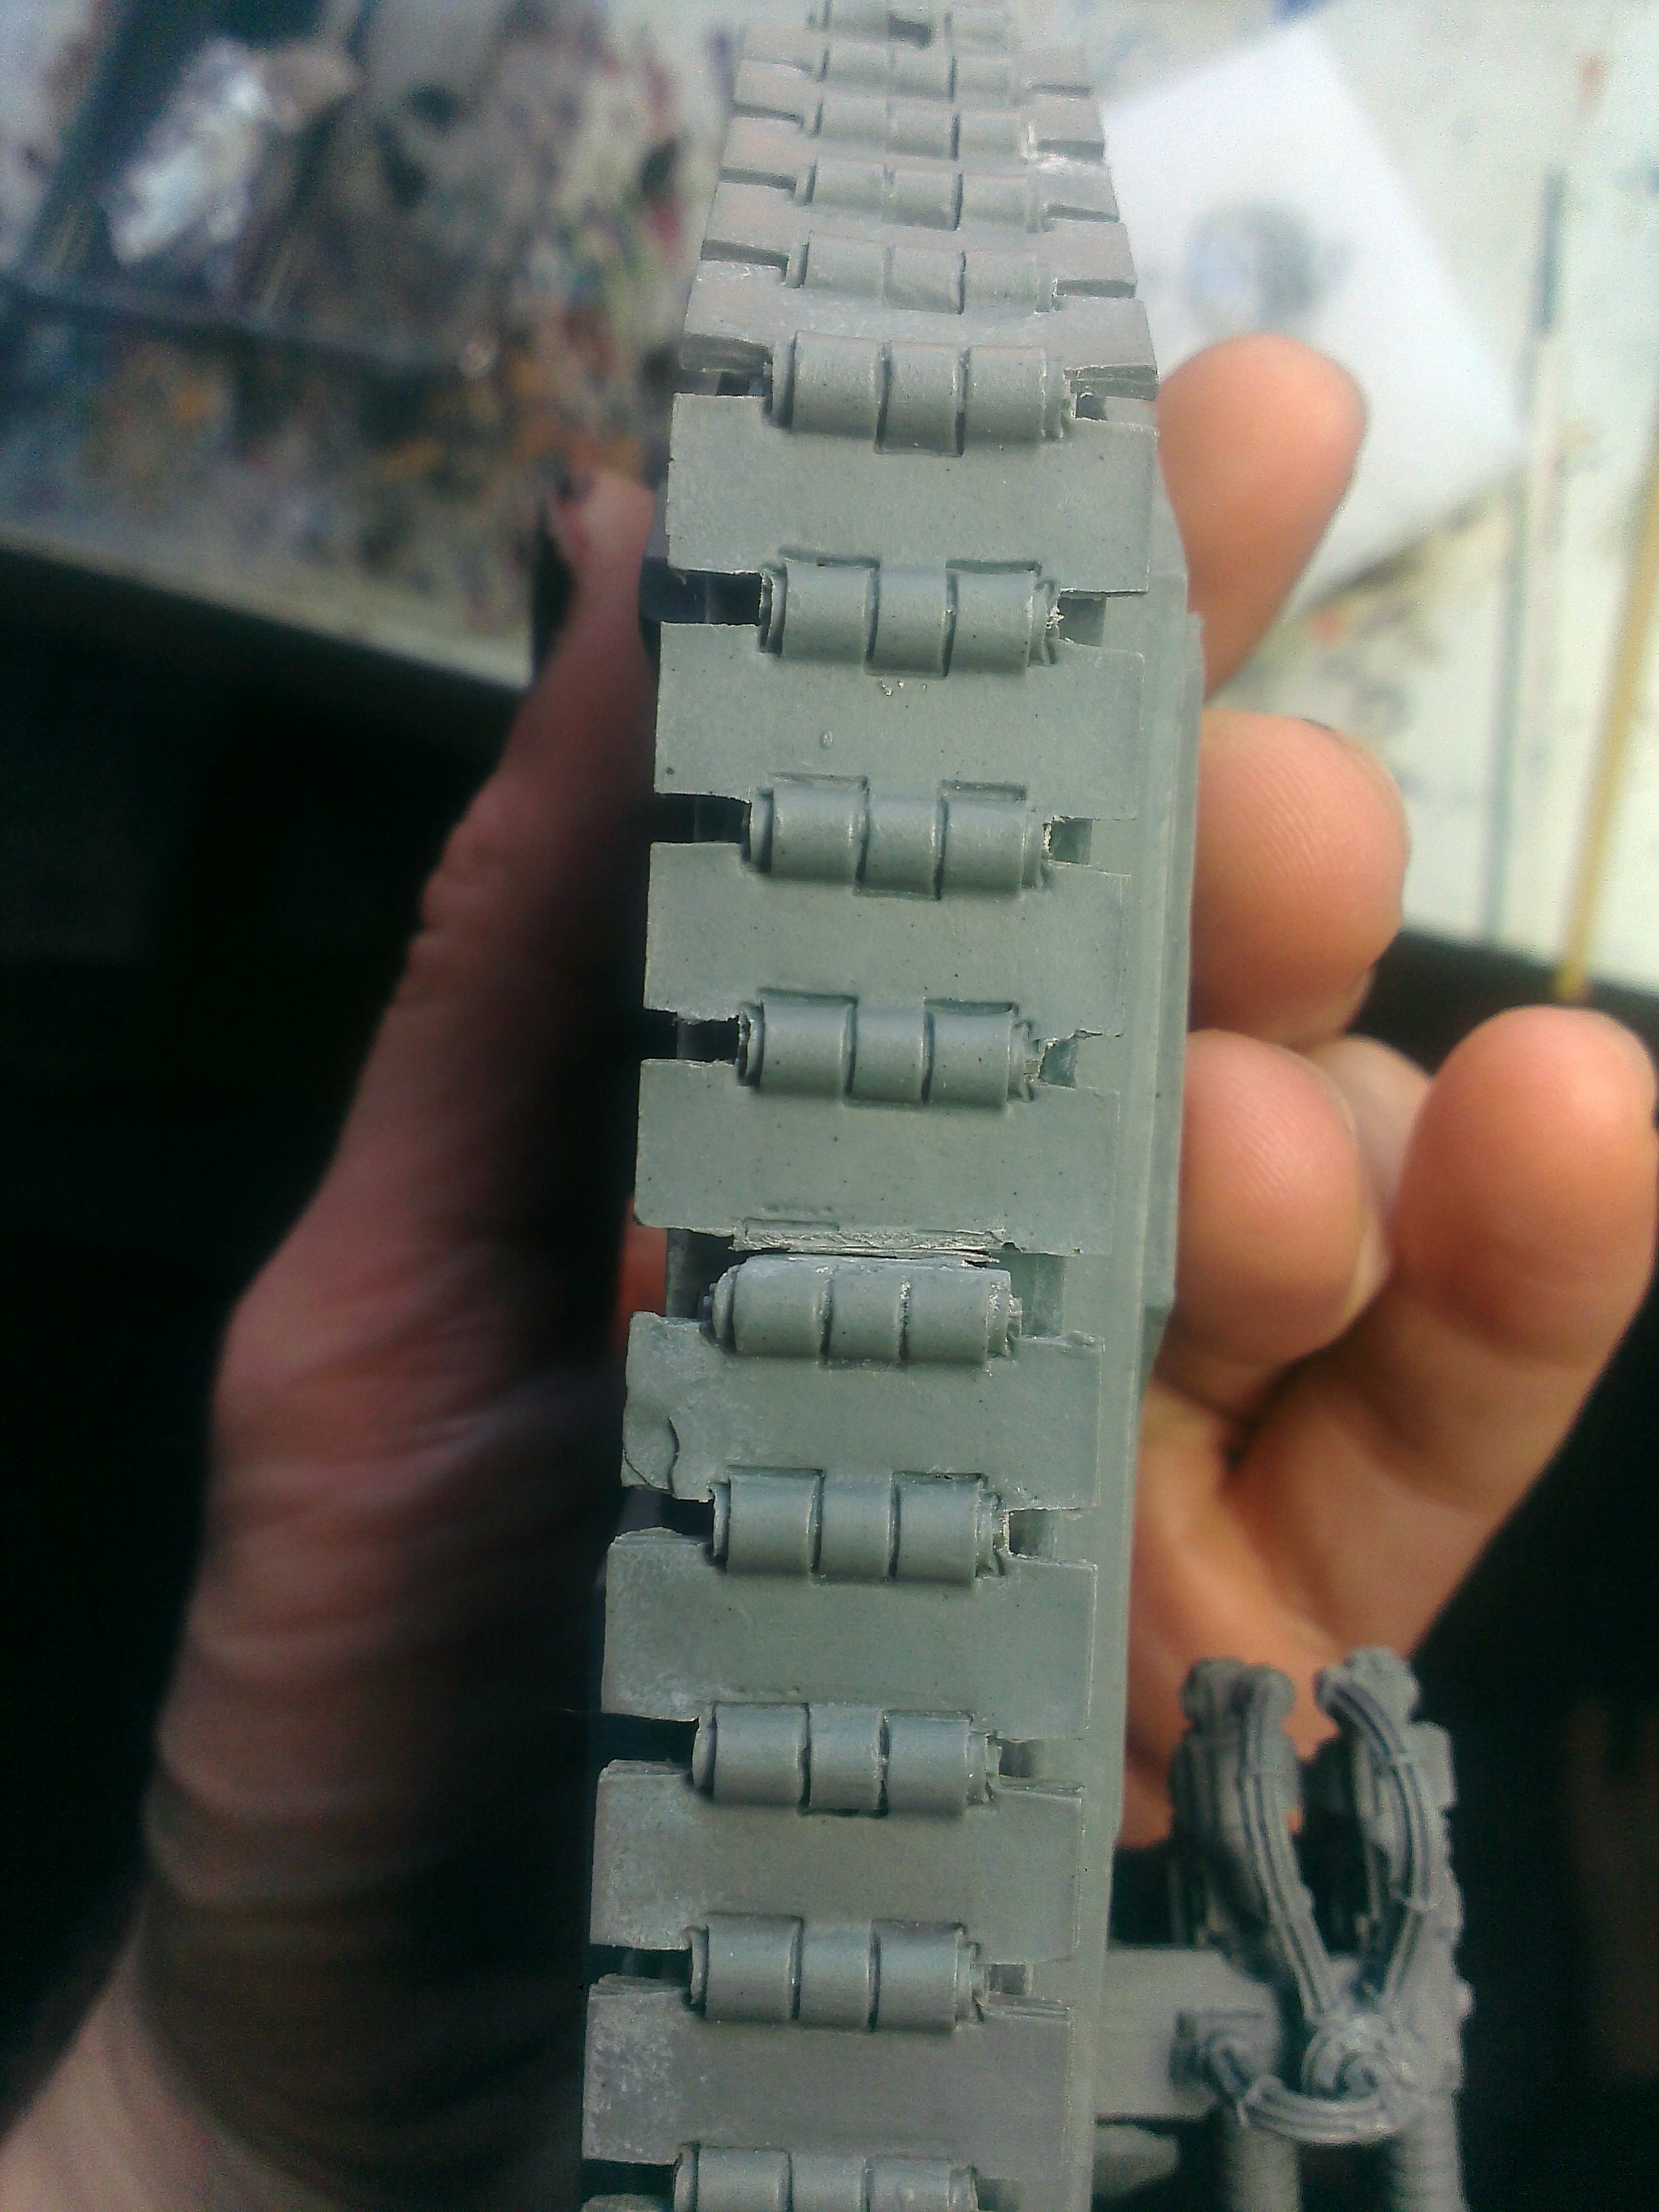
This is the flat run at the bottom with the piece clipped out. Fits perfectly.
5. You’re almost done, you’ll see that the final piece has a lip on both ends, you’ll also notice that this doesn’t fit. You need to cut off the two end pieces, one from either end, again, carefully, filing down where you cut, and taking off the back mount as well as you go so it fits up smoothly against the other sections, this will now fit inbetween the top flat run and that angled bottom piece perfectly.
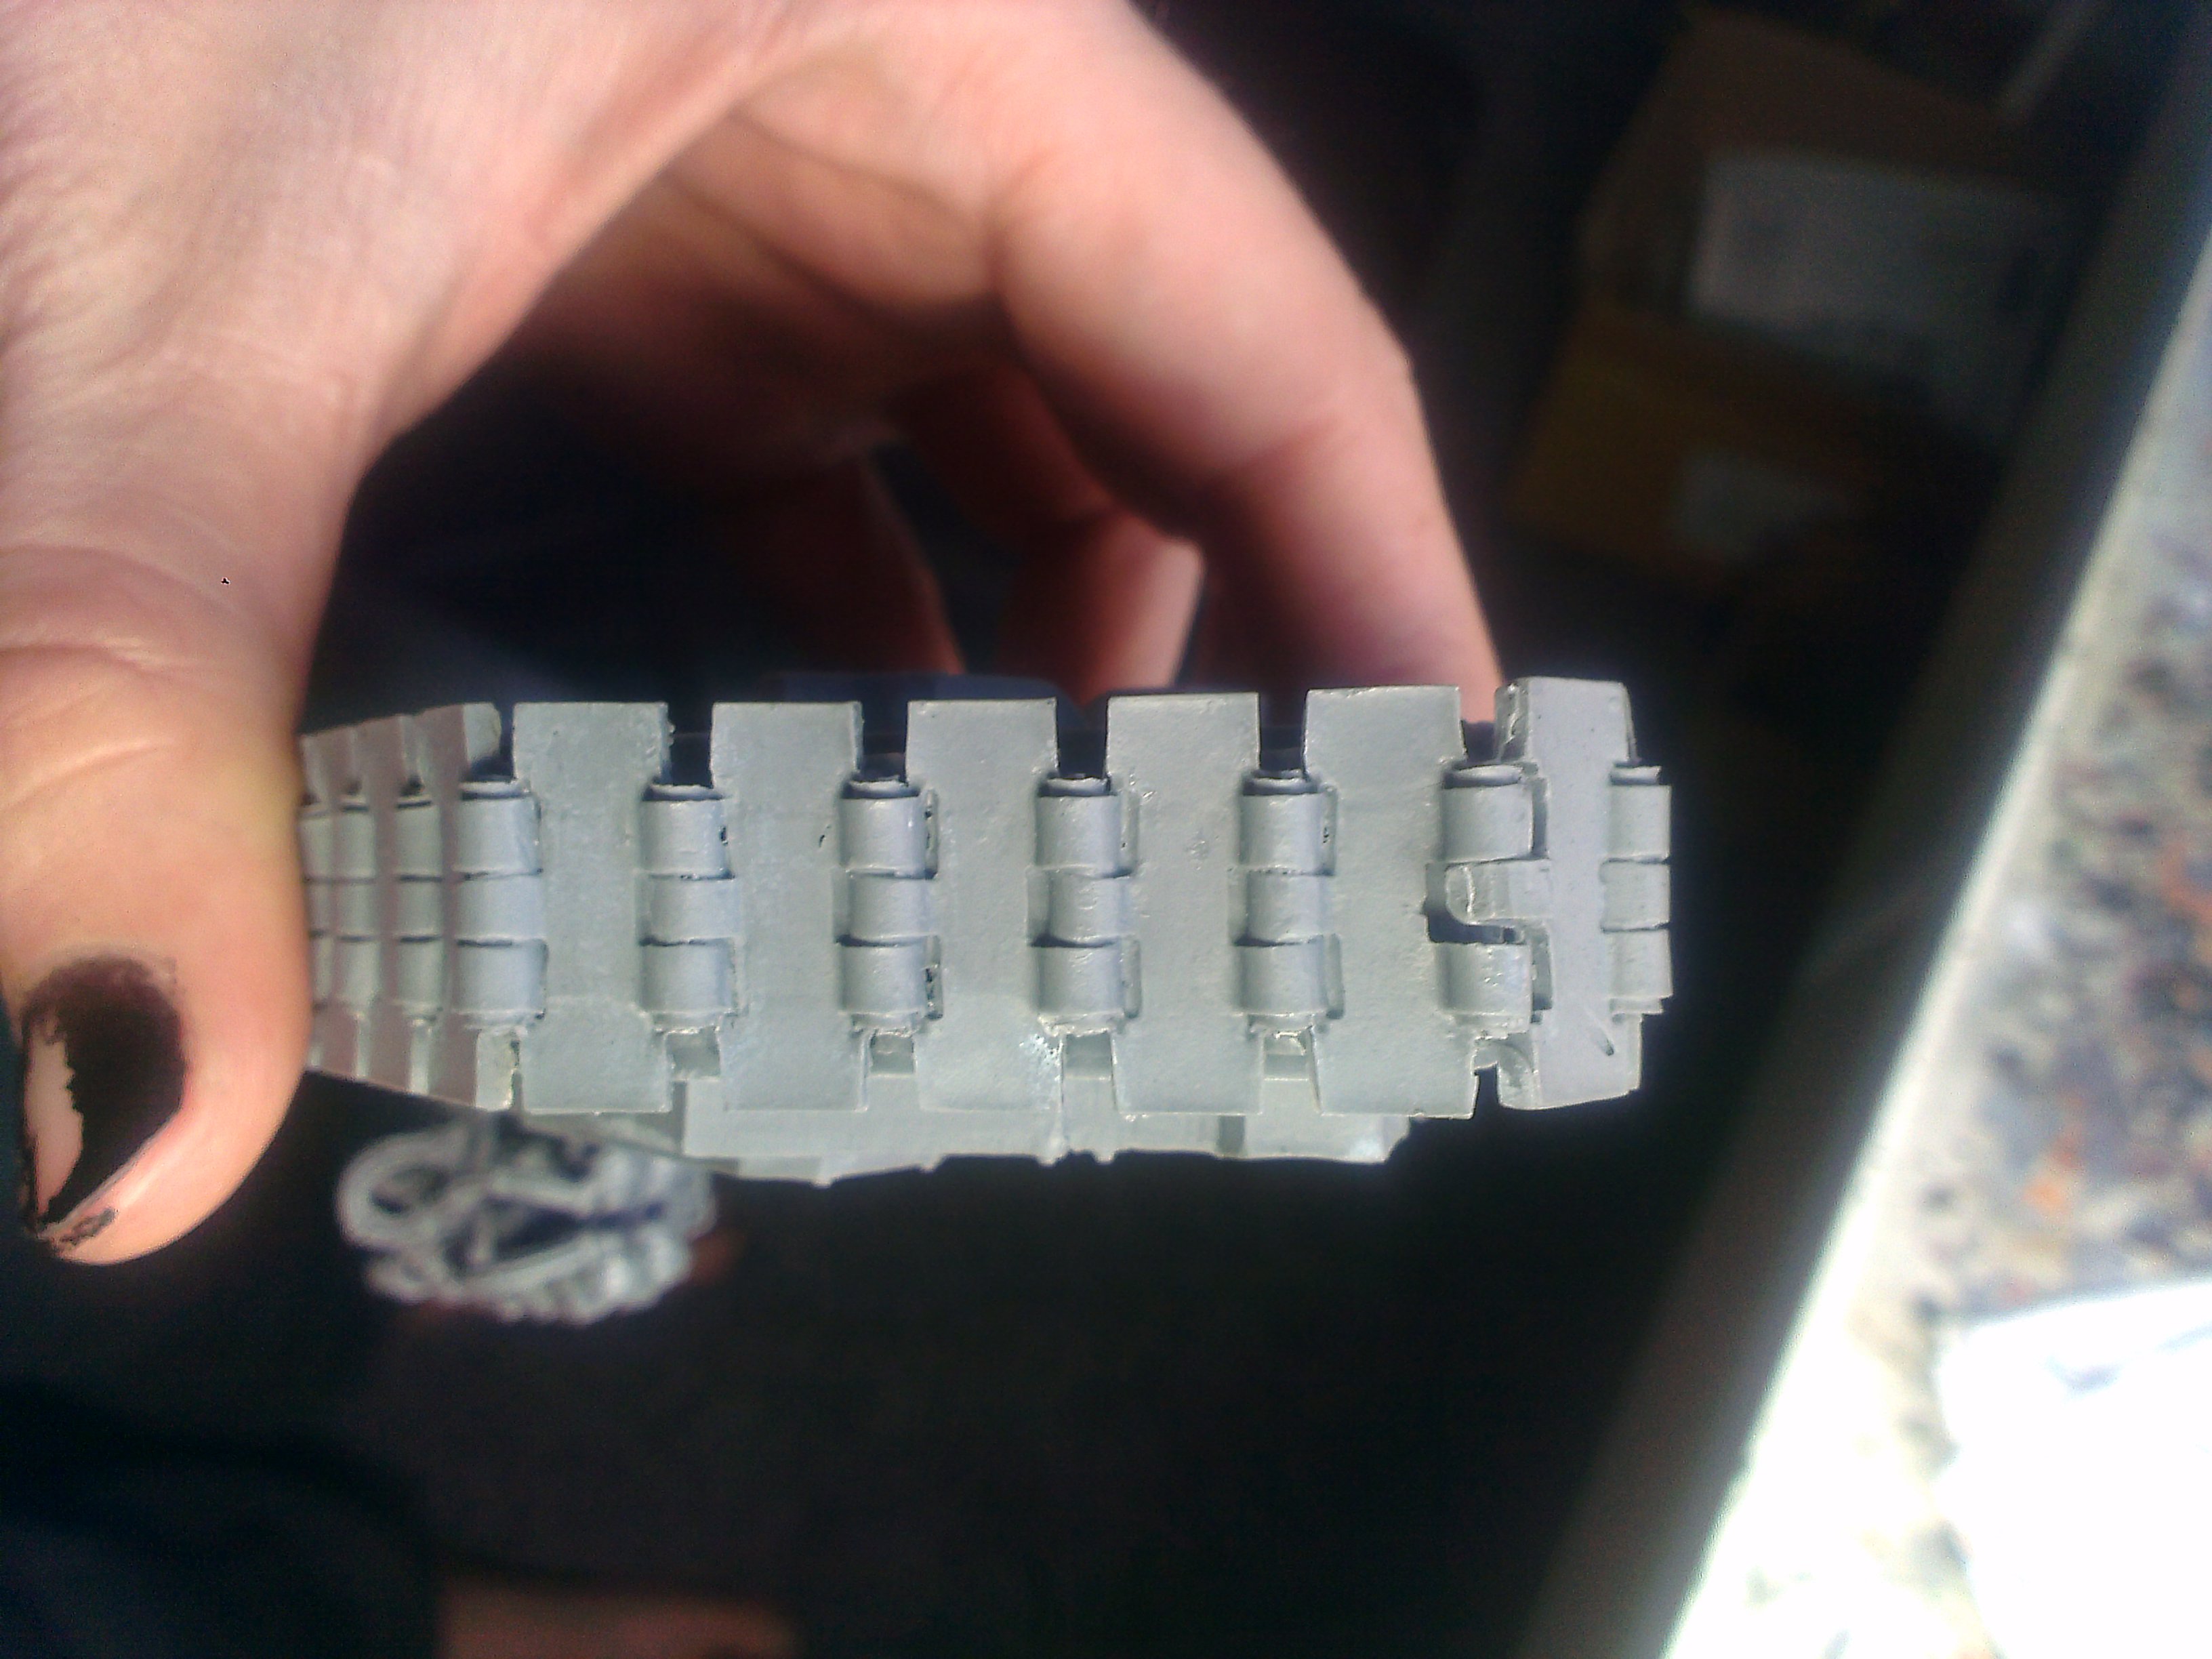
Last piece trimmed back by one link each end, fits just right.
That’s it, problem solved. The rest is fairly self explanatory, take your time, and use the resin tips i mentioned in the Fellblade article if needs be. You’ll likely need to use hot water on the left and right panels for the exit, as they’ll be warped, but a few dry fits and you’ll have them nailed.
If you’re painting the interior, leave the sides off and the top off, paint them like that. I’m intending to prime the lot in pieces once I’ve painted the interior, the doors should mask off any rogue spray, base in legion colours, then assemble so you can get your legions colour into the crevices. Scrape off any paint/primer on the bits you’re gluing though, and give them a rough file. so it gives the glue something to stick to.
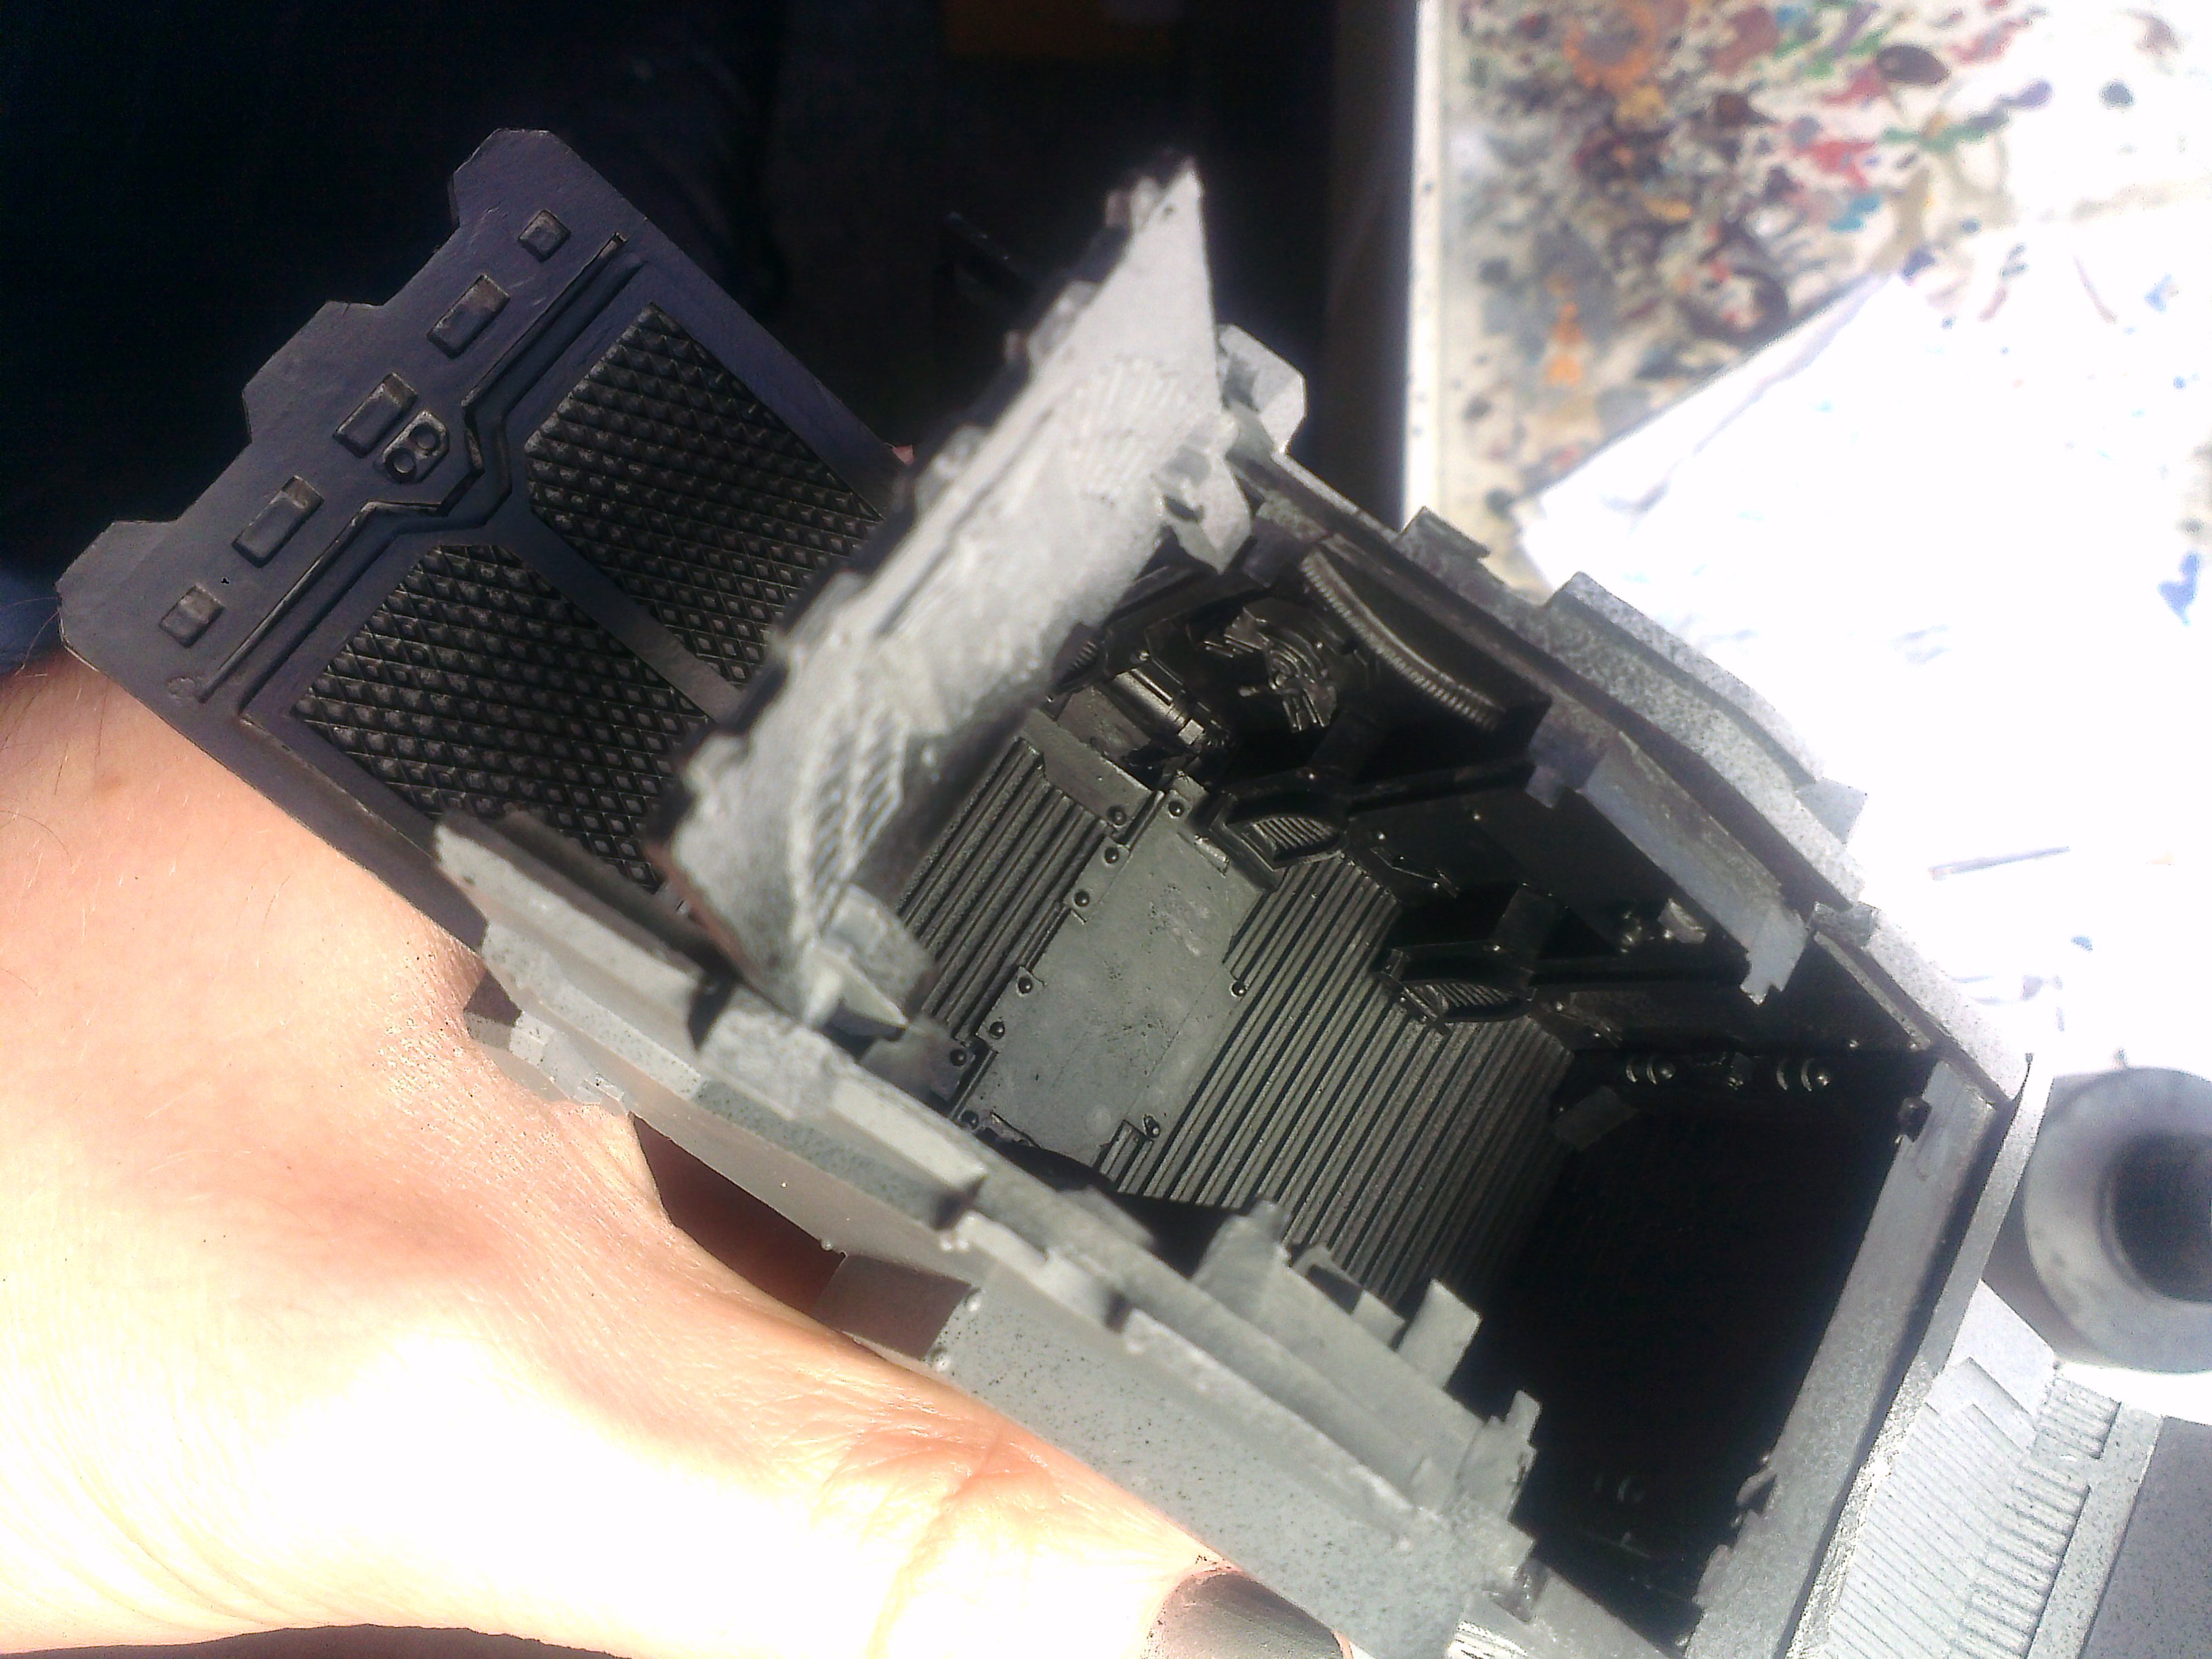
This is the entrance ramp primed for painting, Ive left the rest bare, and will prime/base that as one later.
Don’t let the reputation of this tank put you off, you can get it together properly with a bit of work.
Bloody hell, I thought the Chimera and Leman Russ had it rough.
Also I am saddened by this talk of a 30K meta, even if it be in jest. The more things change, the more they stay the same…
Im only going off the eye of Horus guys, I dont have a clue how to play 30k let alone what the meta is. I just build and paint shit.
I’m sure Forgeworld does this to fuck with people. Pretty sure Meccanno used to do a similar thing with their instructions in the 1930’s to encourage problem solving.
I doubt that Forgeworld have that on their agenda though.
PS – Moonmen should the default name for all races/factions in 40k. Infant, let’s just rename 40k ‘Moonmen’ instead.
Theyre notoious for it, and this isnt a complex kit, its the pieces that dont fit. I wouldn’t mind if it was a hard kit with minimal instructions if you got the right pieces but you dont. Hopefully someone at Fw can explain one day.
This shows real extsepire. Thanks for the answer.
I just finished 2 Spartans and apart from the tracks the kits were a doddle.
The first kit, the tracks were too long by half a track and the second kit they were too long by two thirds of a track, so not quite as simple as removing one whole track but I’m glad I read your article before I started putting them together.
I reckon it’s something to do with the cooling of the resin of the different parts during production, the bigger the bit the more it shrinks, which is why the chassis is marginally smaller than the tracks (maybe…)
I think the main issue is the tracks are multi purpose to fit all the FW land raider variants, but yeah, its likely there’s shrinking involved in that too. The new kits have the tracks moulded on already to save us the headaches thank fully! Glad the guide helped though.