I’m a big believer that no matter how good the paint job, every model looks half done until it’s based. Clear flying stands mitigate this to an extent but I still prefer a proper base and like the extra dynamism this can lend to a model. To see it in it’s habitat if you will. I also dislike the idea of dropping a fortune on resin bases for an entire army. I can cope with a few for skirmish games, but for anything larger scale any hobby money is for paint and models right?
With that in mind my basing efforts have definitely improved over the years, from the ubiquitous Goblin Green with flock in the early 90s to today’s efforts, and so far I’ve resolutely ignored requests for a step by step. Partly because I get engrossed and forget to stop to take photos and partly due to a lack of any creative outlet. Well Corehammer’s the perfect outlet, I had a flying base that needed some attention, so time bust out the camera and get cracking.
It seems appropriate for a tutorial to steal literary ideas from Nolan, and start at the end in a Memento-esque fashion. (A film I highly recommend to anyone who hasn’t seen it)
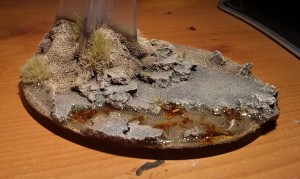
The finished article
I went on a bit of a nostalgia trip with a combination of papier mache and Dwarves through this base, it’s only fair to share the love:
–Jump cut in time–
Materials
Flying base
Cork Floor Tile (individually off ebay, or split a pack from Homebase with your mates)
The Metro “newspaper” (Free off the tram)
PVA Glue
Sand (5 finger discount from the nearest building site, make sure you dry it)
Rooibos teabag (Out the kitchen)
Aquarium gravel (or stones from outside)
Woodland Scenics Realistic Water
Army Painter Winter Tufts
Paints
Vallejo Black primer
Citadel – Dryad Bark (Base)
Citadel – Mechanicus Standard Grey (Base)
Citadel – Rakarth Flesh (Base)
Citadel – Nuln Oil (Shade)
Citadel – Waywatcher Green (Glaze)
Vallejo Model Colour – Brown Sand
Vallejo Model Colour – Desert Yellow
Vallejo Model Colour – Pale Sand
Vallejo Model Colour – Ivory
Vallejo Game Ink – Blue (for the water effects)
Vallejo Game Ink – Brown (for the water effects)
Tools
Old brushes
Masking tape
Superglue
Takeaway container (for the papier mache)
First step is to tear off some cork-board Experiment a bit with tearing direction, but always tear it rather than cut for a more natural edge. The straight sides work really well for paving edges or fallen masonry but for this I just wanted a few layers of rock strata building up towards the hill I was going to construct around the flight stem. I also threw a few smaller bits of cork in to create a river channel and dotted some aquarium rocks around for a bit of variety
By the time I realised I’d forgotten a picture of this step I had PVA everywhere.
Onto the hill. Bog standard papier mache, so just tear up a load of newspaper. Mix up some water & PVA in a 50:50 ratio and get your hands dirty. Build up the general shape with balled paper dunked in your mix and then spread a flat-ish layer over the top. It doesn’t need to be neat and you don’t want a flat surface for realism
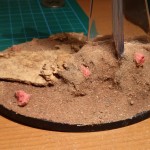
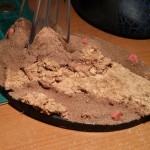
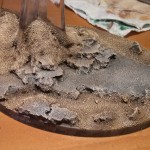
Once dried I super glued some more aquarium rocks into natural recesses on the hill to look like rocks exposed through the dirt by erosion. Next up is some texture. Crack out the PVA again, undiluted this time, and coat everything that’s not rock. Spread it about with an old brush and make sure to push glue into the crevices where dirt would build up. Cover the base in sand and leave to dry ready for painting. The PVA will shrink as it dries and contract , dragging sand thinner on exposed flat areas.
 |
 |
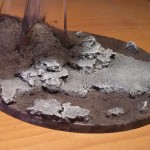
Now we’re ready for some paint. Do yourself a favour and prime in black, it’ll help with natural shadows if you miss any recesses. I prime using Vallejo’s black primer through an airbrush, no reason other than I can. Once primed start with the rock. that way any mess will get covered by the dirt colours when you start that. I based the rock here with Mechanicus Standard Grey, once dried I followed with a very liberal wash with Nuln Oil. next up was a dry-brush with Mechanicus Standard Grey just to lighten up the mid tones. Dry-brush this with Rakarth Flesh, and then a very light dry-brush with VMC Ivory on the highest areas and edges only.
Moving on to the sand. Pro-tip: don’t use your decent brushes for this, you will knacker them with your home made sandpaper. Use a cheap set for painting any scenery and keep your good brushes for painting the mini and you’re golden.
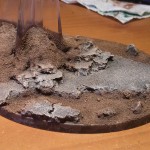
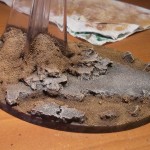
Base the dirt areas in Dryad Bark, don’t worry about an even coat, it will give a more natural look if it’s a bit patchy. Once dry I hit all the dirt with a heavy dry-brush of VMC Brown Sand using my biggest brush. You don’t have to be neat or even, in fact this is where being neither will get a better finish as dust will discolour surrounding rocks. That was followed by VMC Desert Yellow.
If I was adding flock I’d stop here to give an earthy tone for the flock to sit on. Because I want an arid landscape the next step was a light dry-brush of VMC Pale Sand, trying to avoid the edges of the river channel here with the lighter colours to keep that a bit darker in readiness for the water. Finally a very light dry-brush concentrating just on any large pebbles of VMC Ivory.
Last paint step is a bit of green algae/discolouration where water would pool and along the edges of where the water will be. This is just painted on with Waywatcher Green glaze.
Now to add a bit of vegetation in the form of grass tufts. No need to go crazy with these, a few placed thoughtfully in the lee of rocks, or hollows where water could pool is enough for an arid battlefield. Plus this will make the pack last longer. Now’s the time to seal everything so crack open your varnish. Unfortunately mine fogged slightly, which was only really evident on the tufts. I picked these up later with a quick dry-brush of green over the tips to add a bit more life.
Just before I masked off the base for the water effects I raided tea cupboard for the woodiest tea leaves I could find as river detritus. PG Tips would probably look OK but I found Rooibos to be the best looking out of my selection. These were stuck down and the base masked off, nothing fancy, just masking tape and a bit of Blu-Tac at the end where a leak later developed..
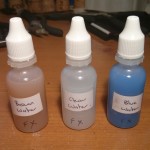
The water effects needs to be poured in thin layers as it contracts when it dries similar to PVA glue. To give it a bit more depth I first poured some water effects into smaller dropper bottles and dyed them with a single drop of Vallejo ink. One blue, one brown and kept one clear.
I then alternated layers one by one, building up slowly as the previous layer had dried. Once the final layer is dry carefully remove the masking tape. It will stick to the water slightly so peel it downwards to avoid lifting the water and the base sand. Final step is to tidy up your edging. I always prefer black just as I like the defined contrast it gives, but each to your own here.
The biggest extravagance was hands down the Realistic Water. I just wanted to play with it and it’ll get used for some Necromunda scenery at some point (In readiness for “It came from the Sump”). If you want to keep things on the cheap, leave it out. Other than that the only purchased items were all stuff I already had in anyway: A pack of Army Painter Winter tufts (£3.39) and a cork floor tile picked up off ebay for a quid, and trust me you get an awful lot of base material for a quid. Alternately just pick up a multi-pack from Homebase which works out at a quid per tile and share the cost across your gaming group.
The same techniques work just as well on smaller bases, and by using different sizes and shapes of cork you can end up with a wide variety of thematically similar bases.
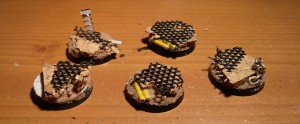
Throw in some bits and bobs you have lying around and you can vary the look massively. These are Necromunda bases I’m currently working on that are all cobbled together out of my PC spares box. Fan grilles, molex extension wires, ribbon cable and a chain I found when I moved into my new flat and will be painted in varying shades of grey set off with hazard stripes.

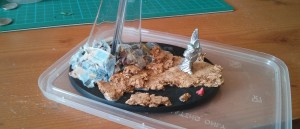
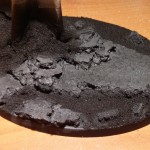
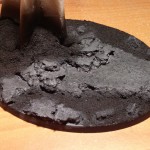
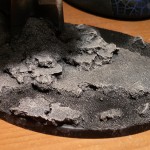
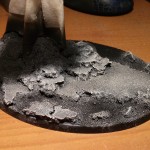
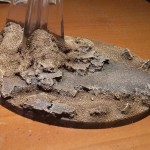
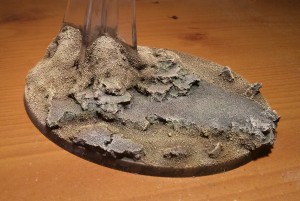
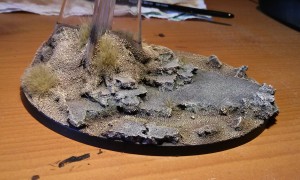
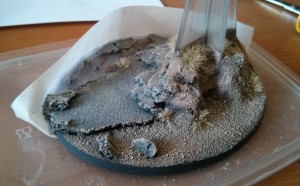

You can also get 4 cork dinner place mats from Ikea for around £1 if you don’t want to spend cash on a bunch of floor tiles.
That is great work on a scenic base. Subscribed for more!
Cheers buddy. Still got a few more plans for it, but I’ve managed to lose the watcher model who was going to be front & center!