It’s kind of weird thinking back to my first forays into painting miniatures at the age of 10. I wonder if I ever thought I’d still be at it 25 years later? Probably didn’t even spare it a thought if I’m honest. Anyway, here I am, and thankfully my skill level has increased a bit, and I’m older if not wiser. Having said that, some habits don’t change over time. I still paint with music on, and I still pull the brush bristles back into shape with my lips.
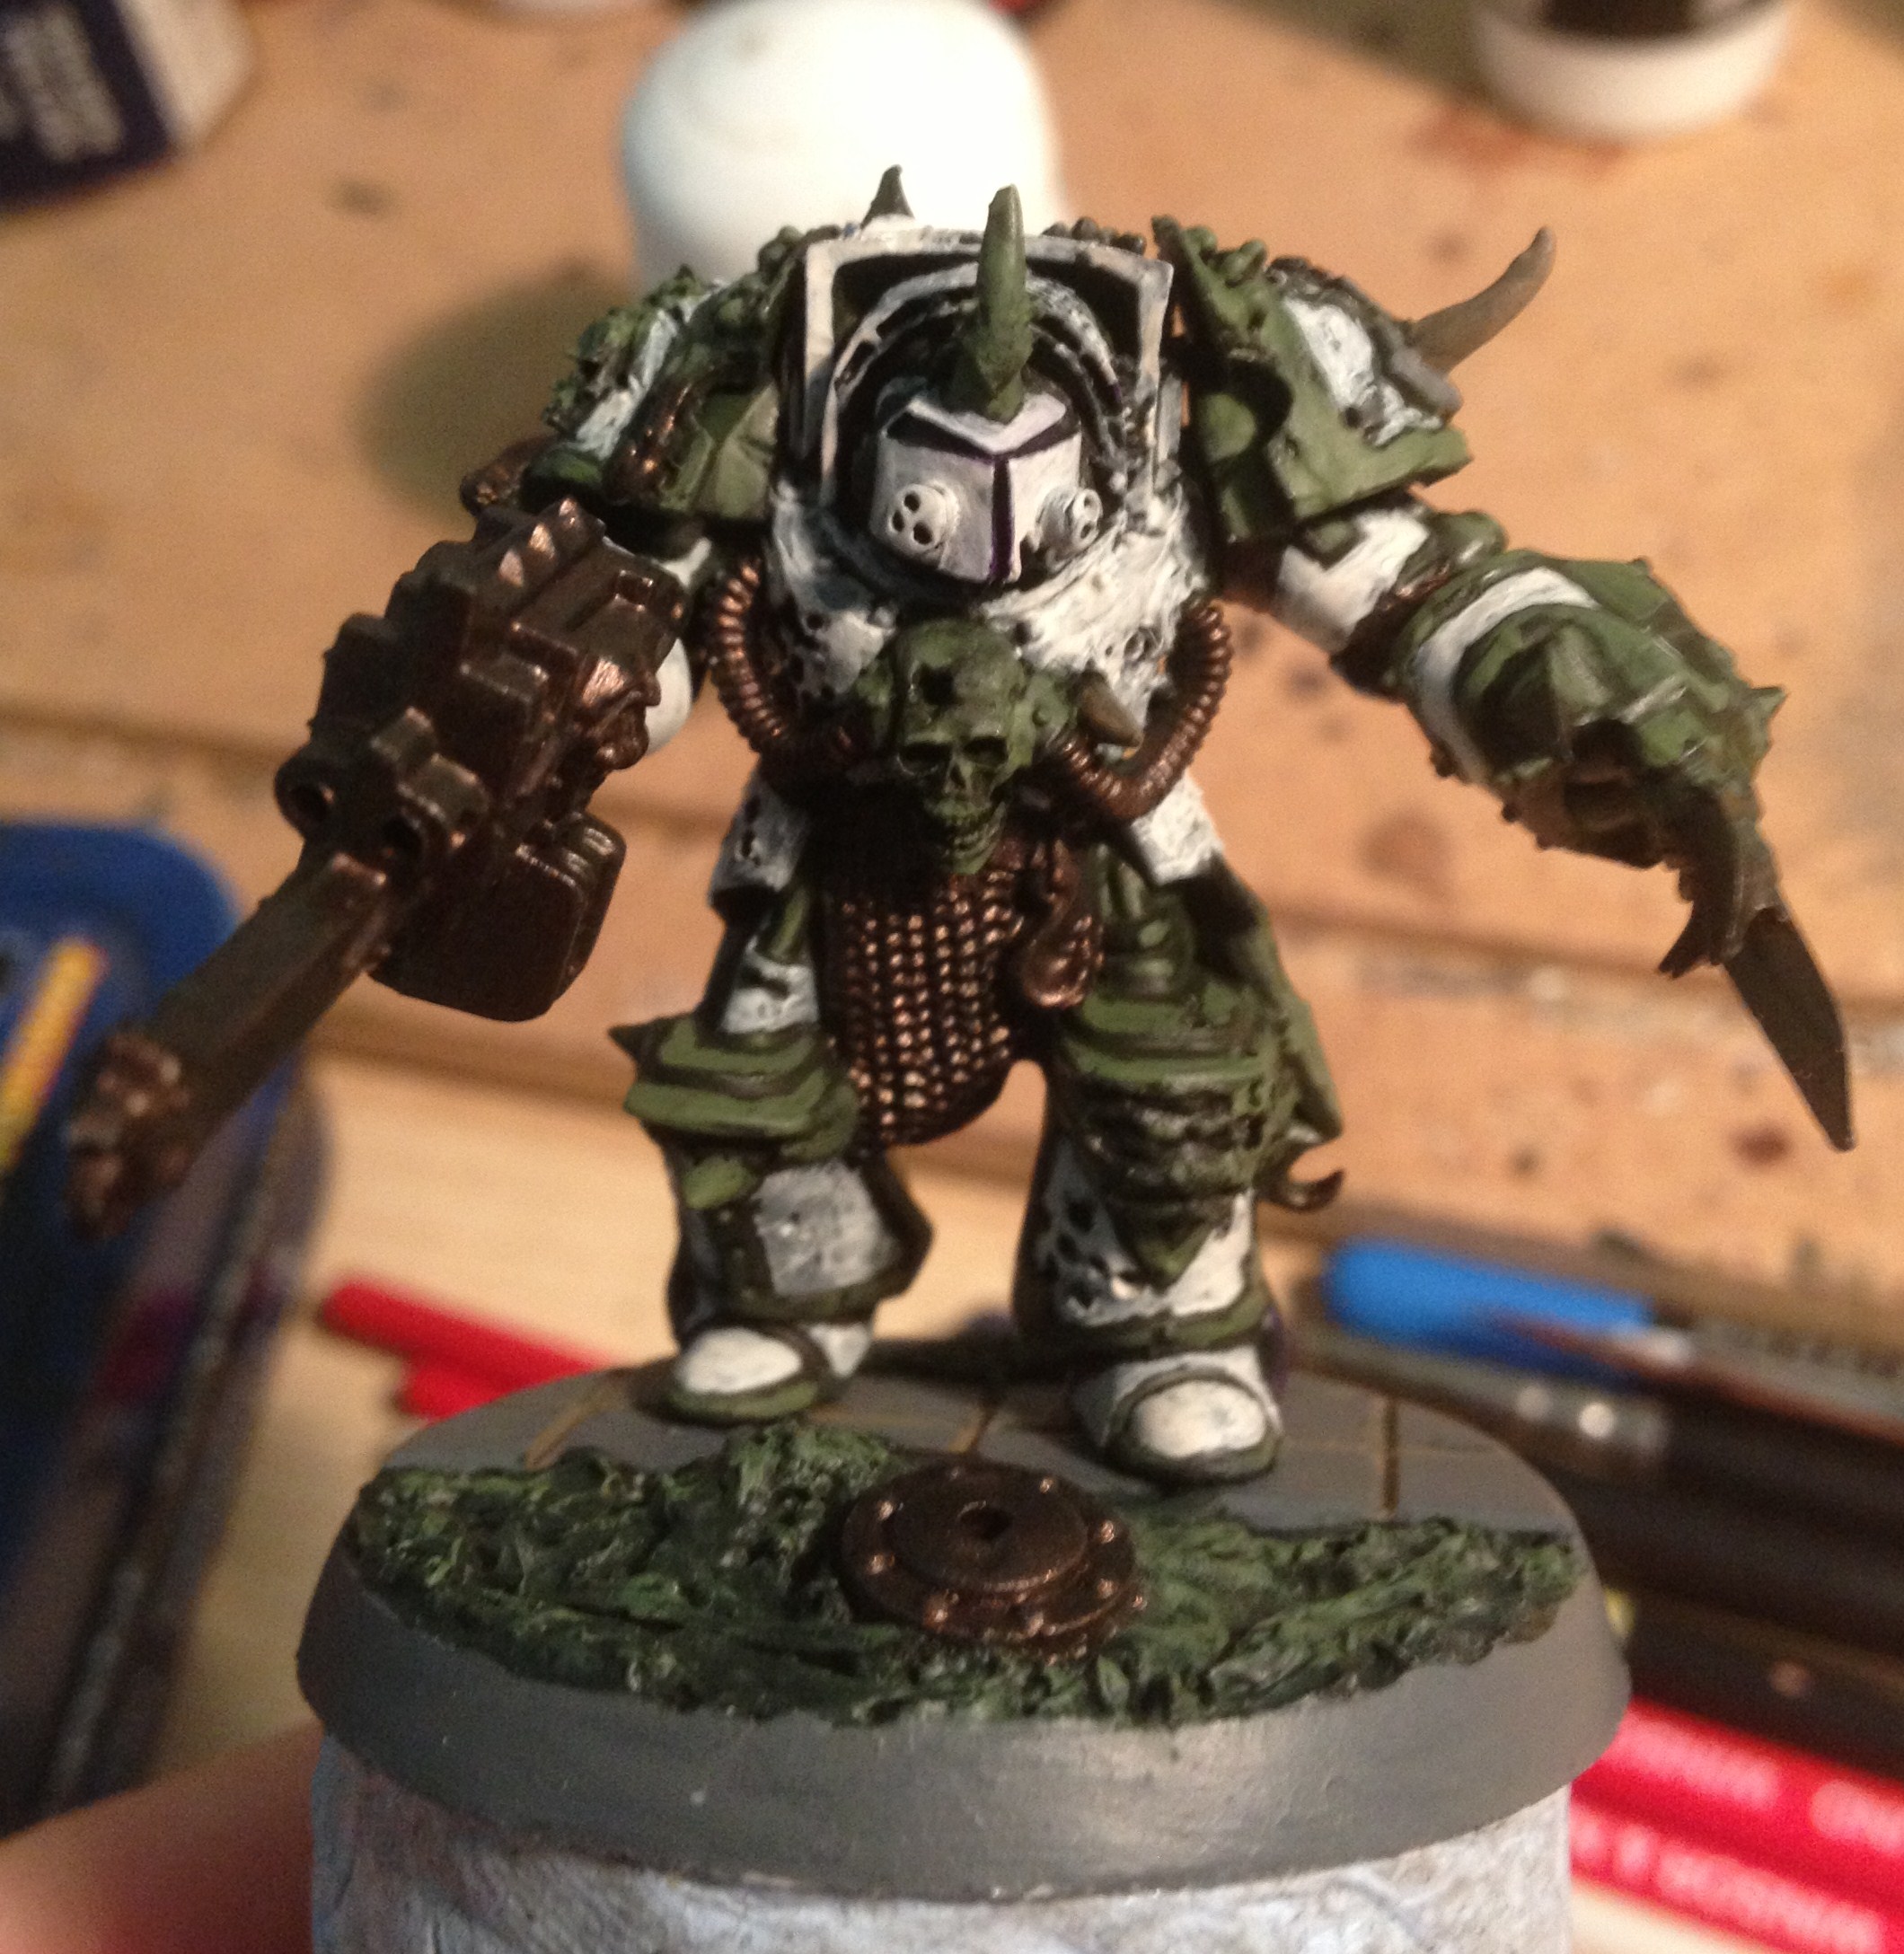
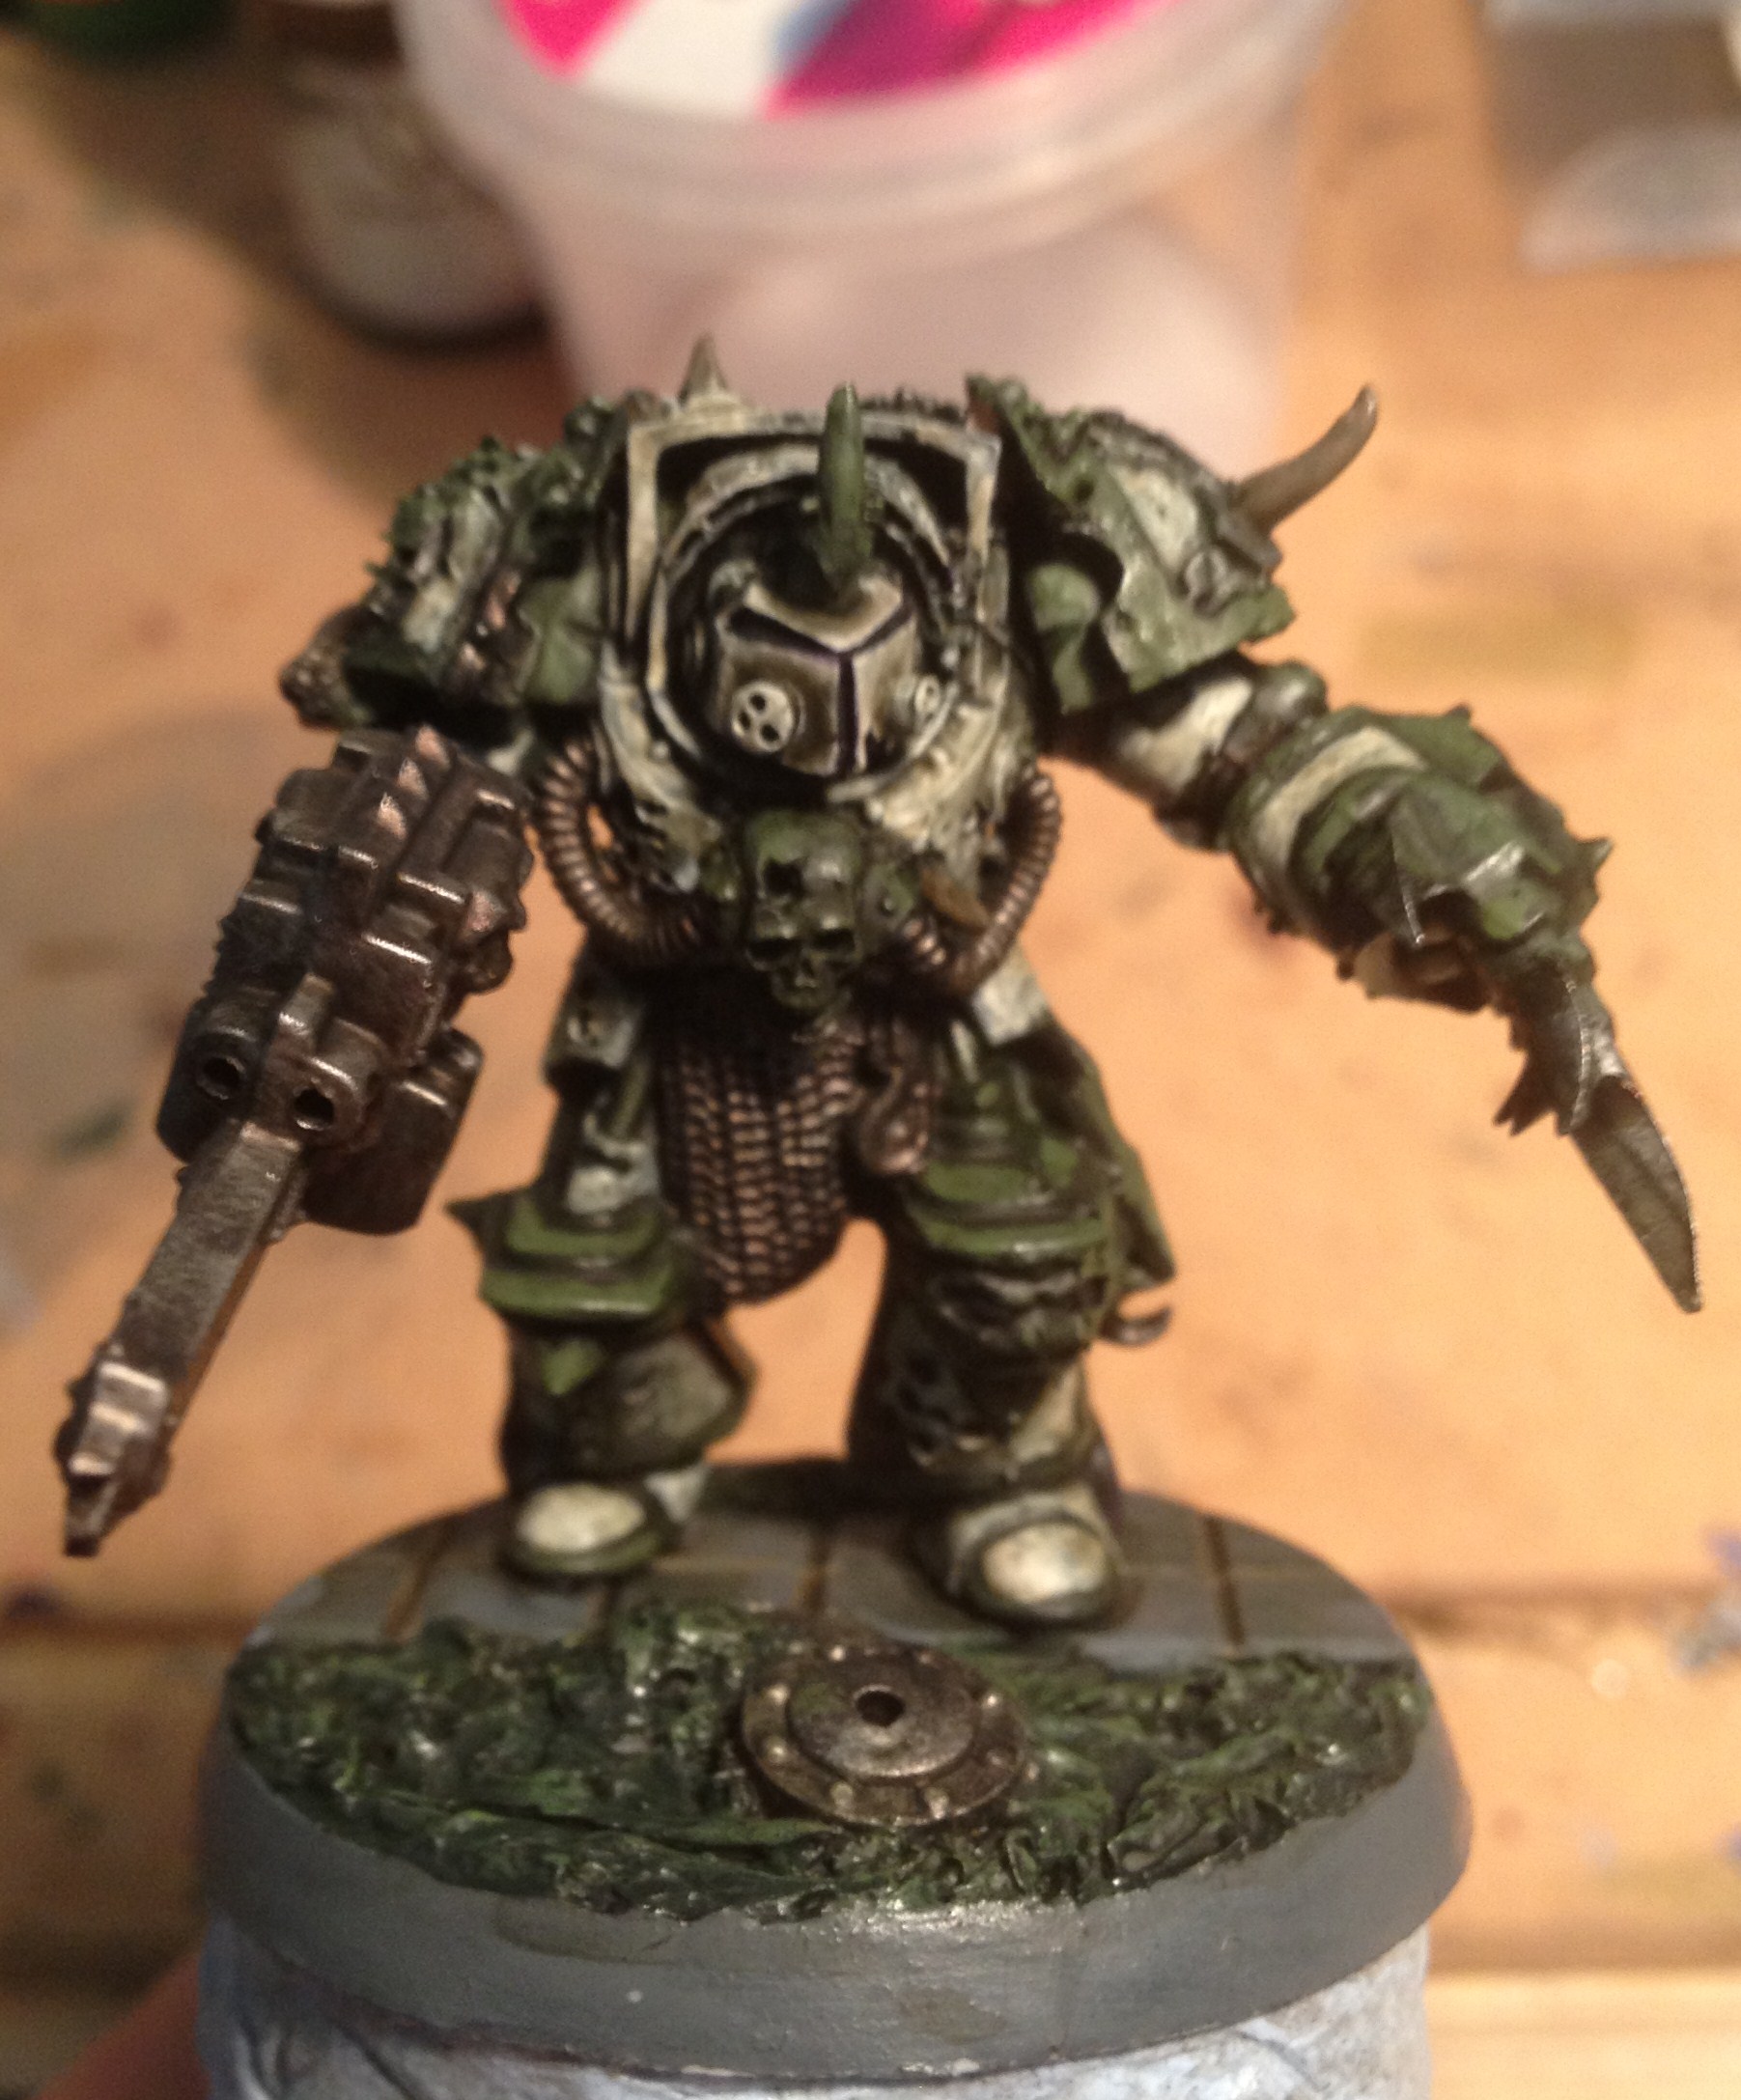
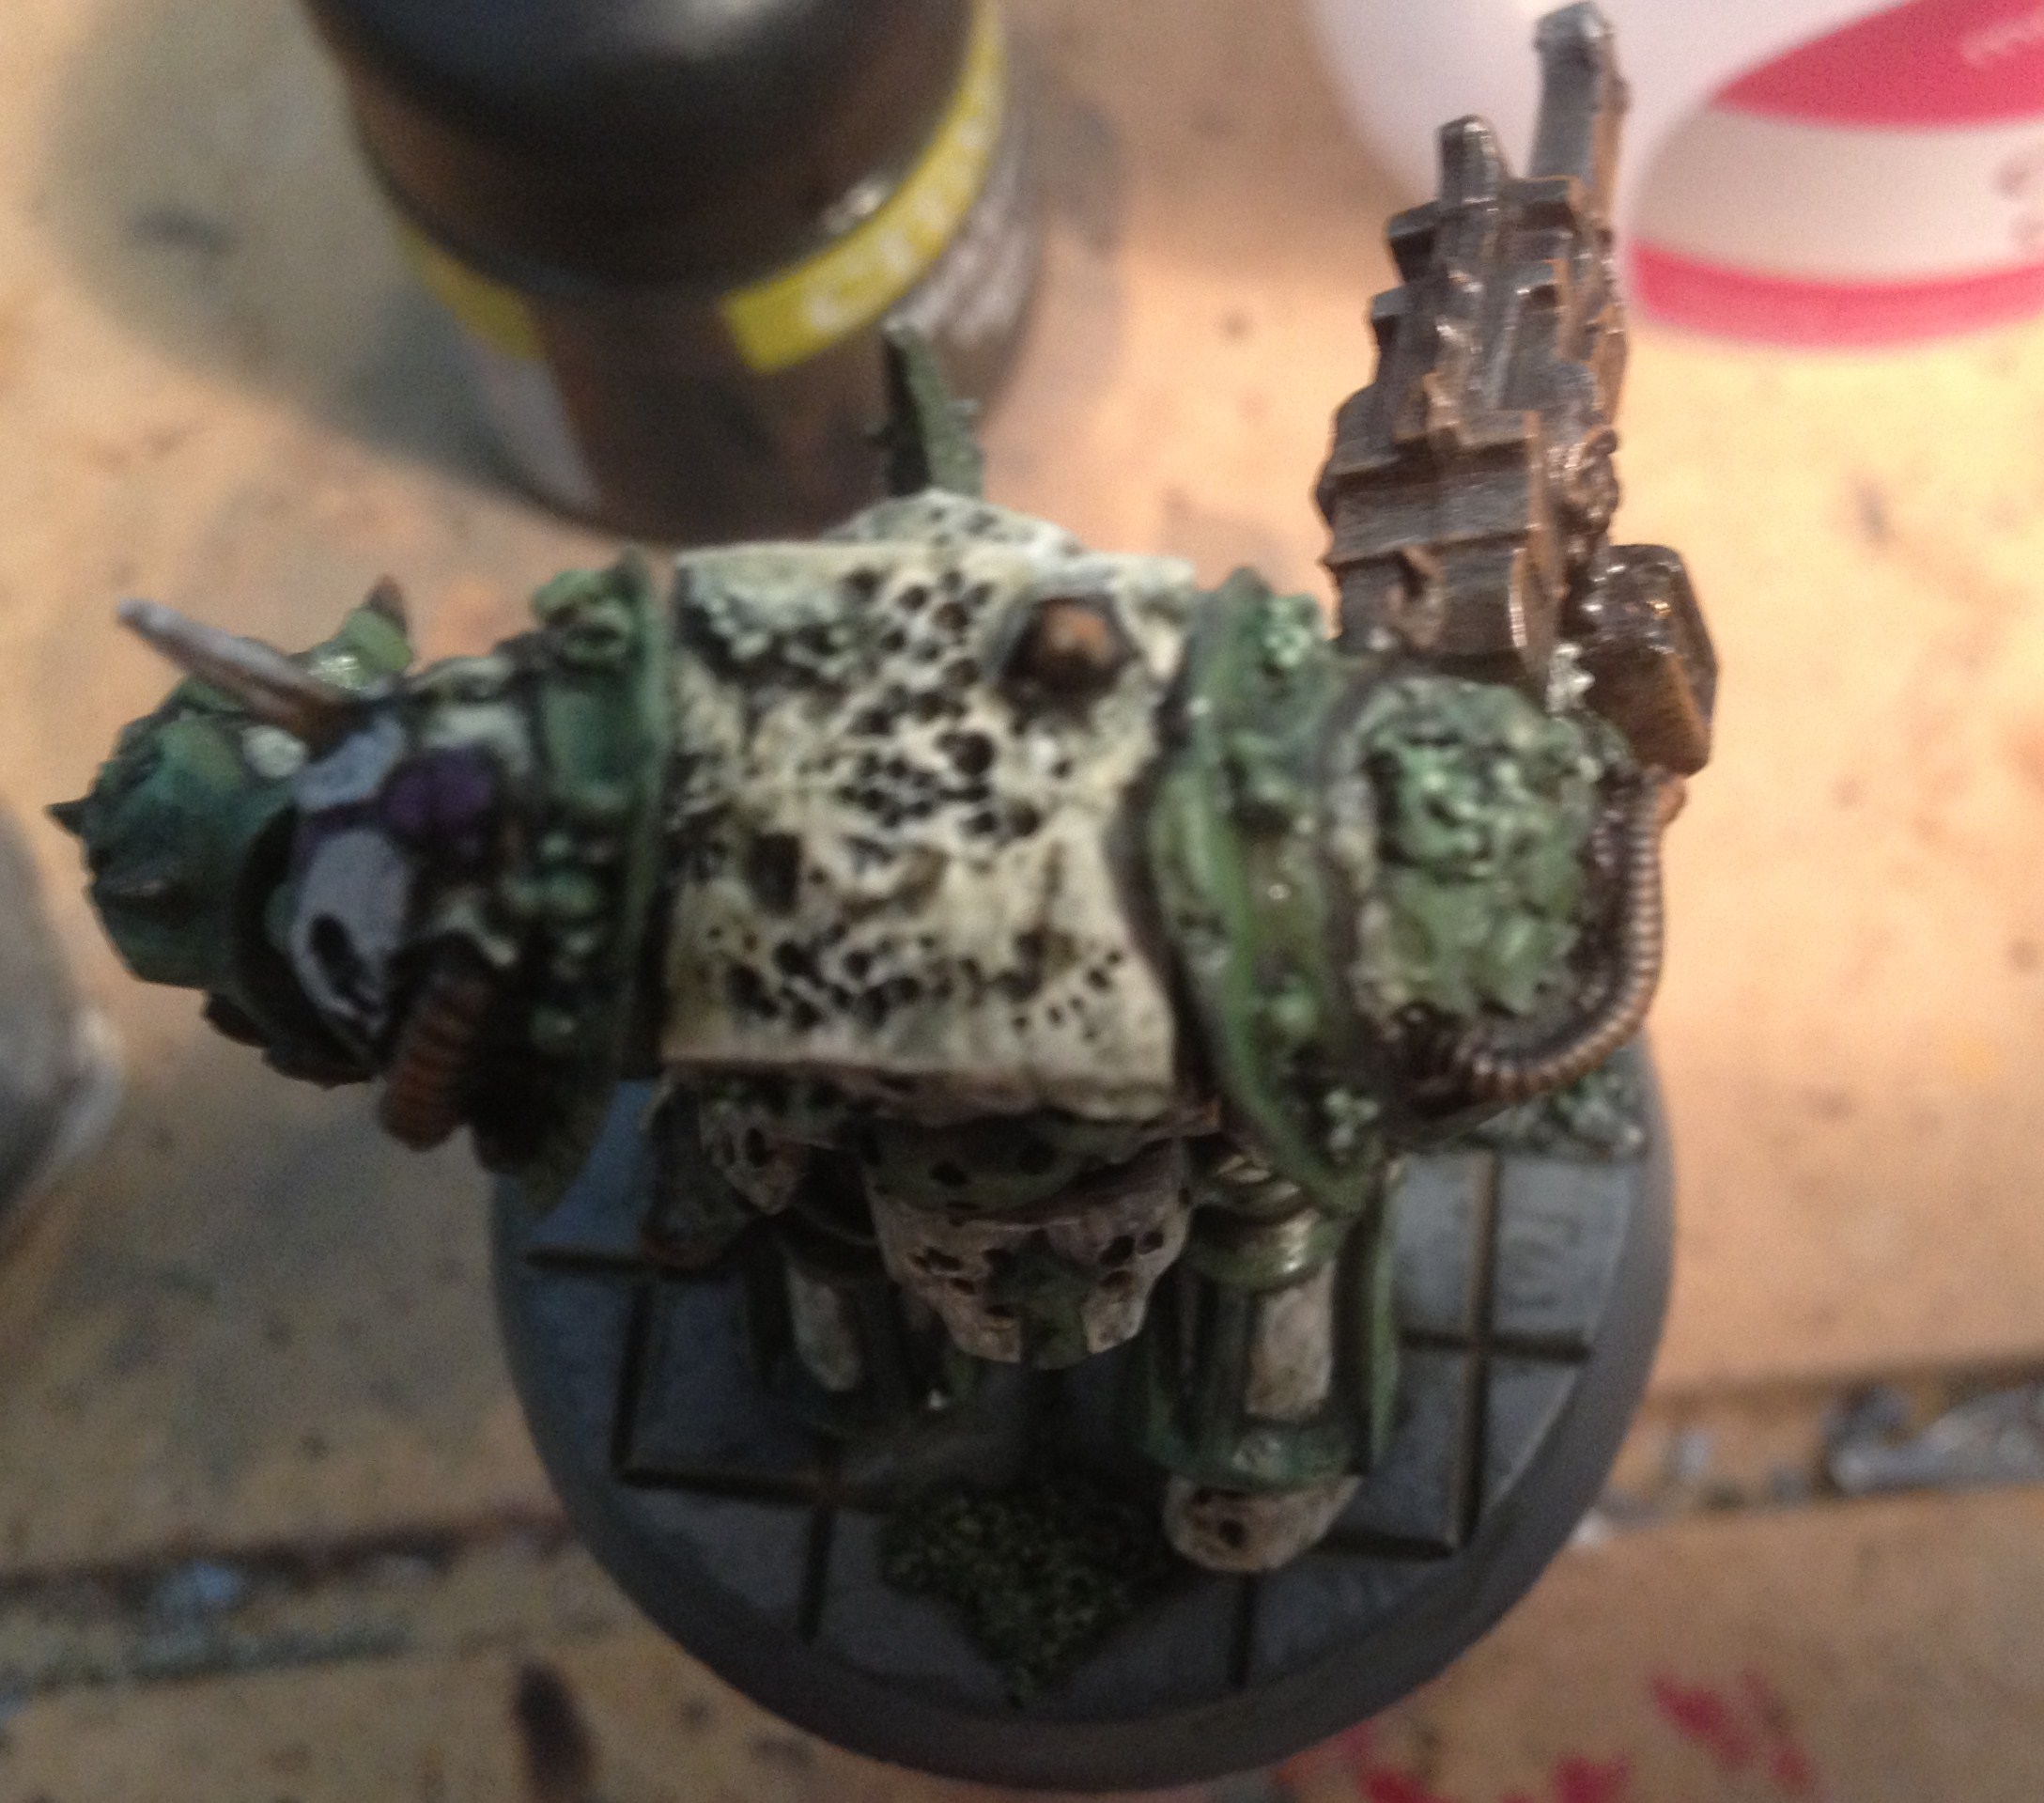
Anyway, enough of this nostalgic clap-trap. For my first CoreHammer article I’m going to talk you through my painting process. In this particular example, I’ll be painting a Games Workshop chaos marine in terminator armour, which I’ve spiced up a bit using Forge World’s Death Guard Terminator upgrade kit, and a Forgecraft resin base. I’ll be doing him in the pre-Heresy Death Guard colour scheme, as it’s a bit more exciting than doing him green all over, and more importantly, he’ll then fit in with the scheme for my army.
Here is a list of the paints that I used in this process:
Vallejo black primer
Vallejo Model Air (some name I can’t remember, but I ran out of it months ago) Green
Vallejo Thinner Medium
Citadel Foundation Dheneb Stone
Citadel Foundation Adeptus Battlegrey
Citadel Foundation Knarloc Green
Citadel Foundation Orkhide Shade
Citadel Foundation Gretchin Green
Citadel Foundation Khemri Brown
Citadel Foundation Calthan Brown
Citadel Foundation Macharius Solar Orange
Vallejo Game Color Off-White
Vallejo Game Color Ghost Grey
Citadel Codex Grey
Citadel Warplock Bronze
Formula P3 Pig Iron
Formula P3 Blighted Gold
Citadel Naggaroth Nightshade
Citadel Xereus Purple
Citadel Waywatcher Green glaze
Citadel Devlan Mud wash
“Murk” wash (home-made)
Step one – priming
Nowt new to see here, this was done using Vallejo Black primer through an airbrush. Although I do like this paint as it shrinks quite tight as it dries, and doesn’t obscure detail.
Step two – Base coat #1
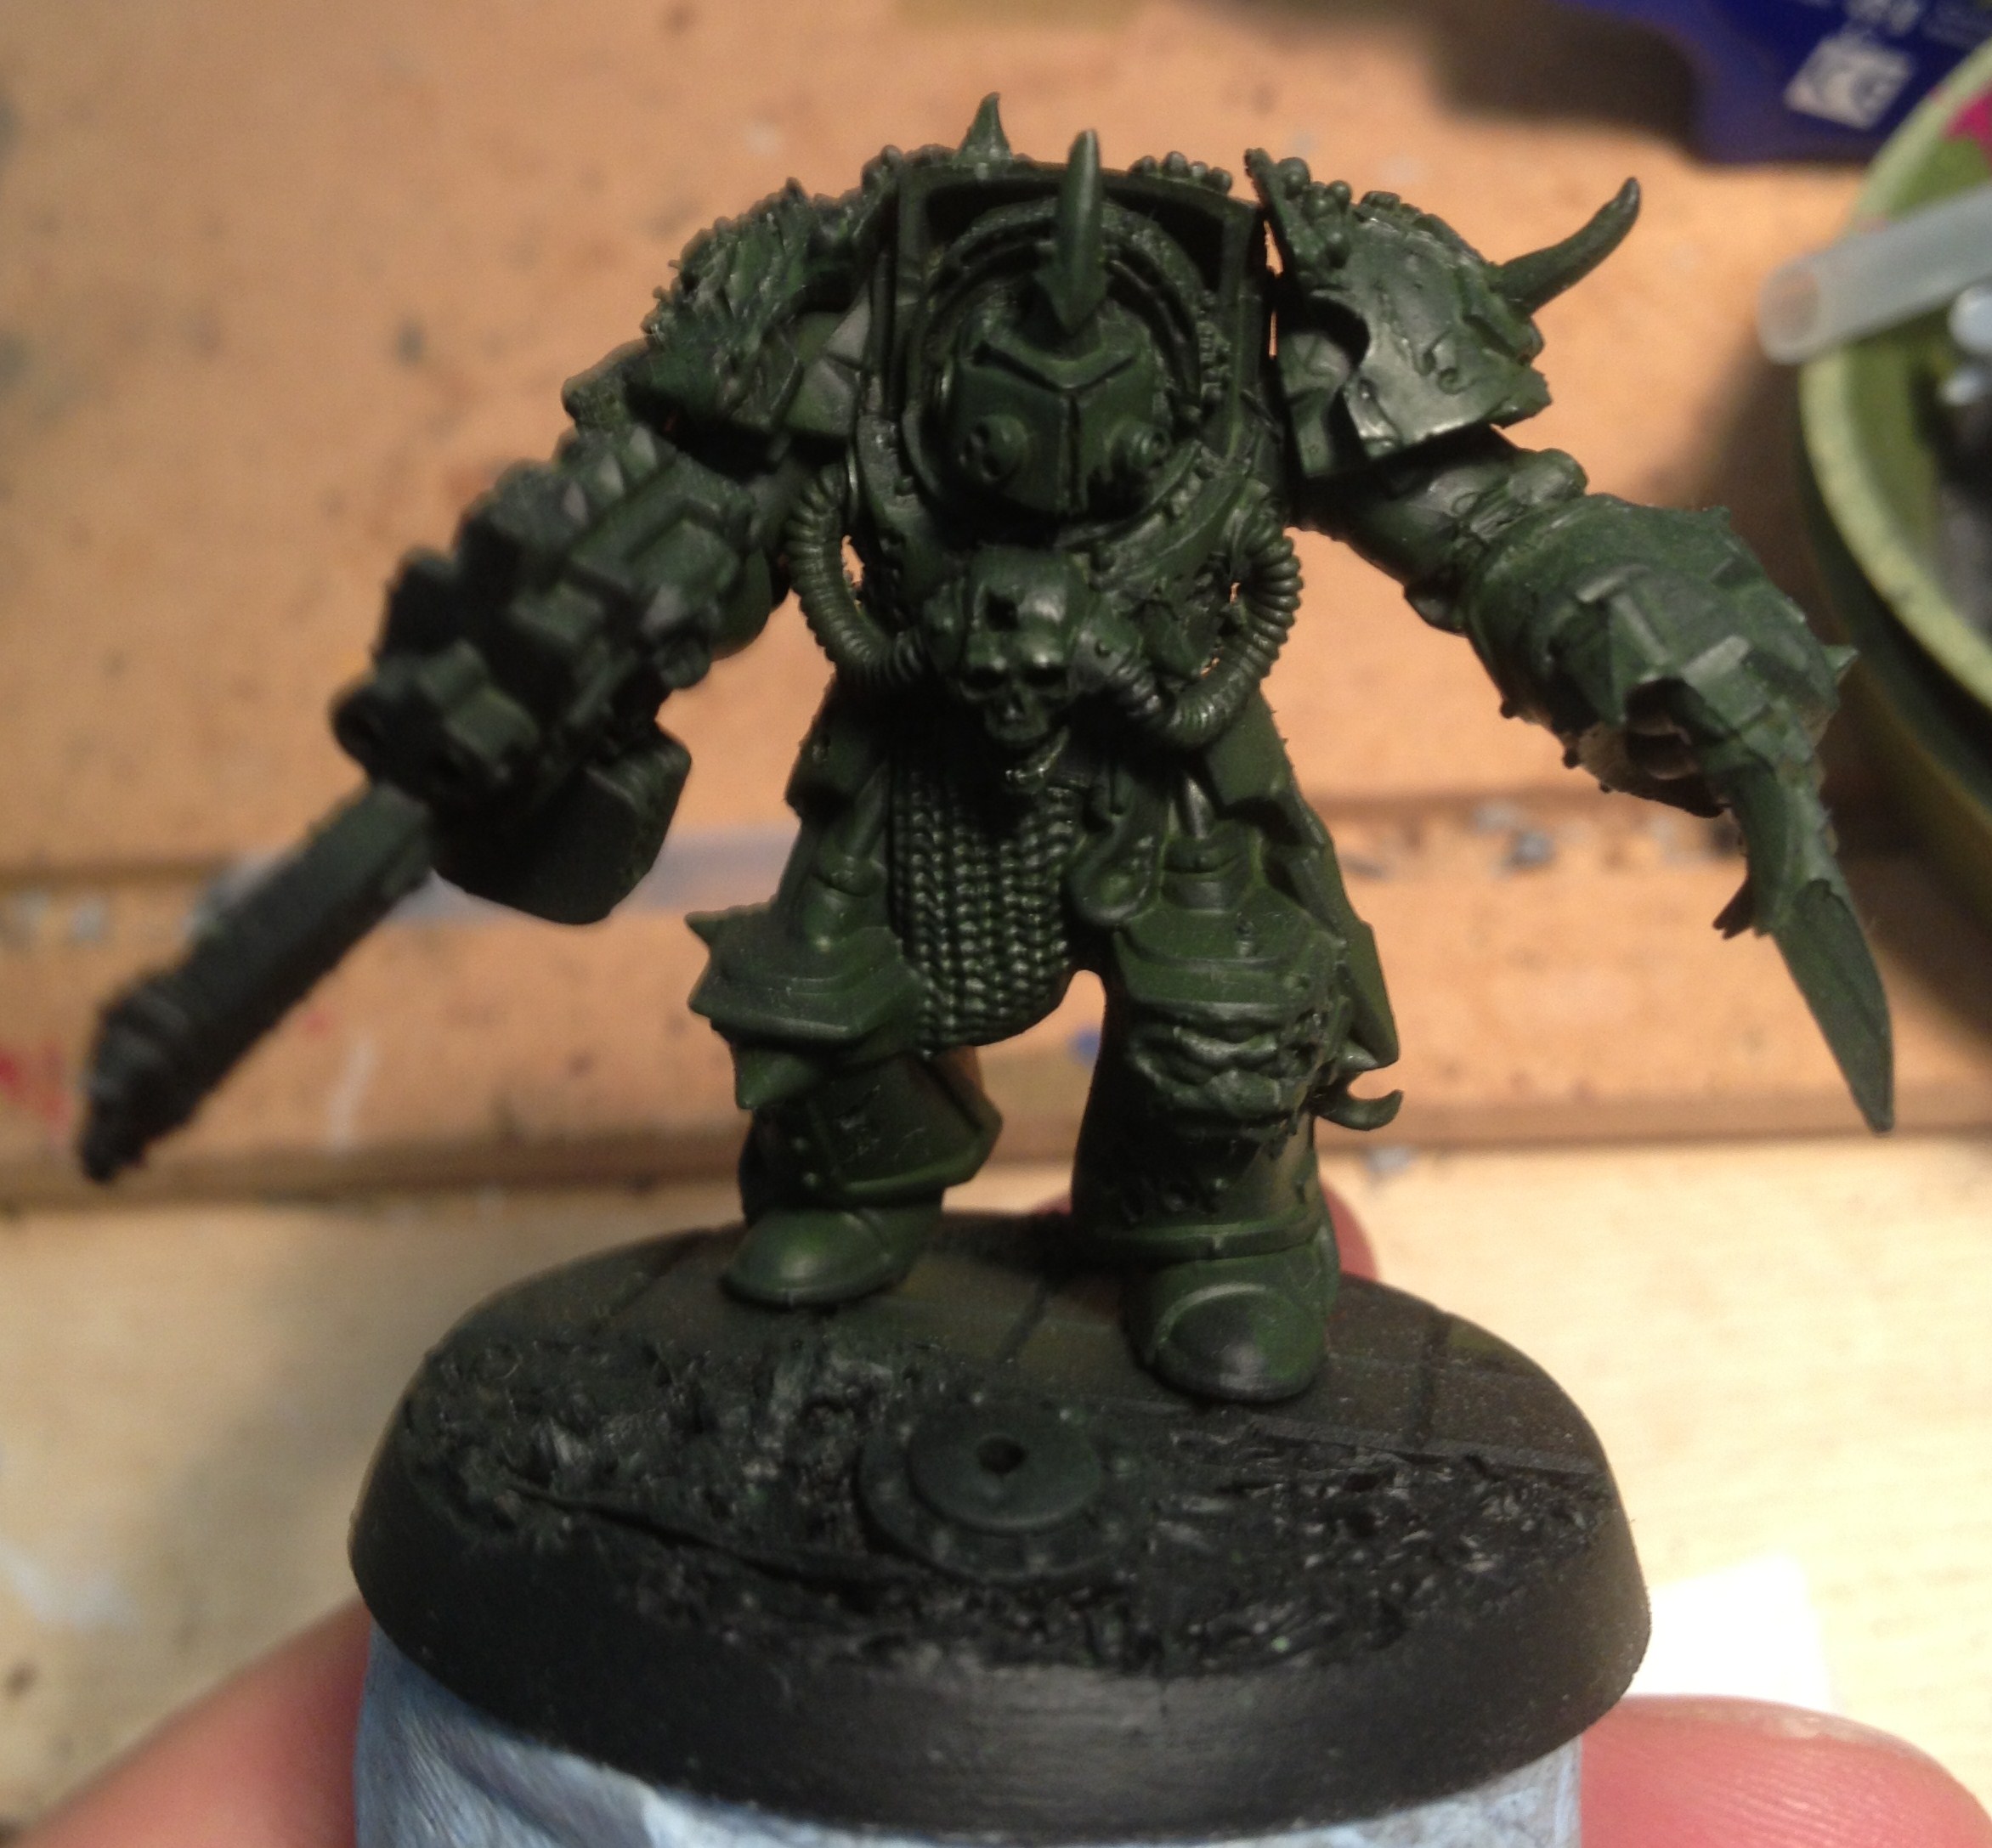
Basecoat
This was done by airbrush, covering the whole model asides from the bolter. I can’t for the life of me recall what it was called specifically, but you can see from the picture the type of colour I mean. I sprayed this on months and months ago, and then successfully left the model in a box for about 9 months. Which I regret.
Step three – Wash #1
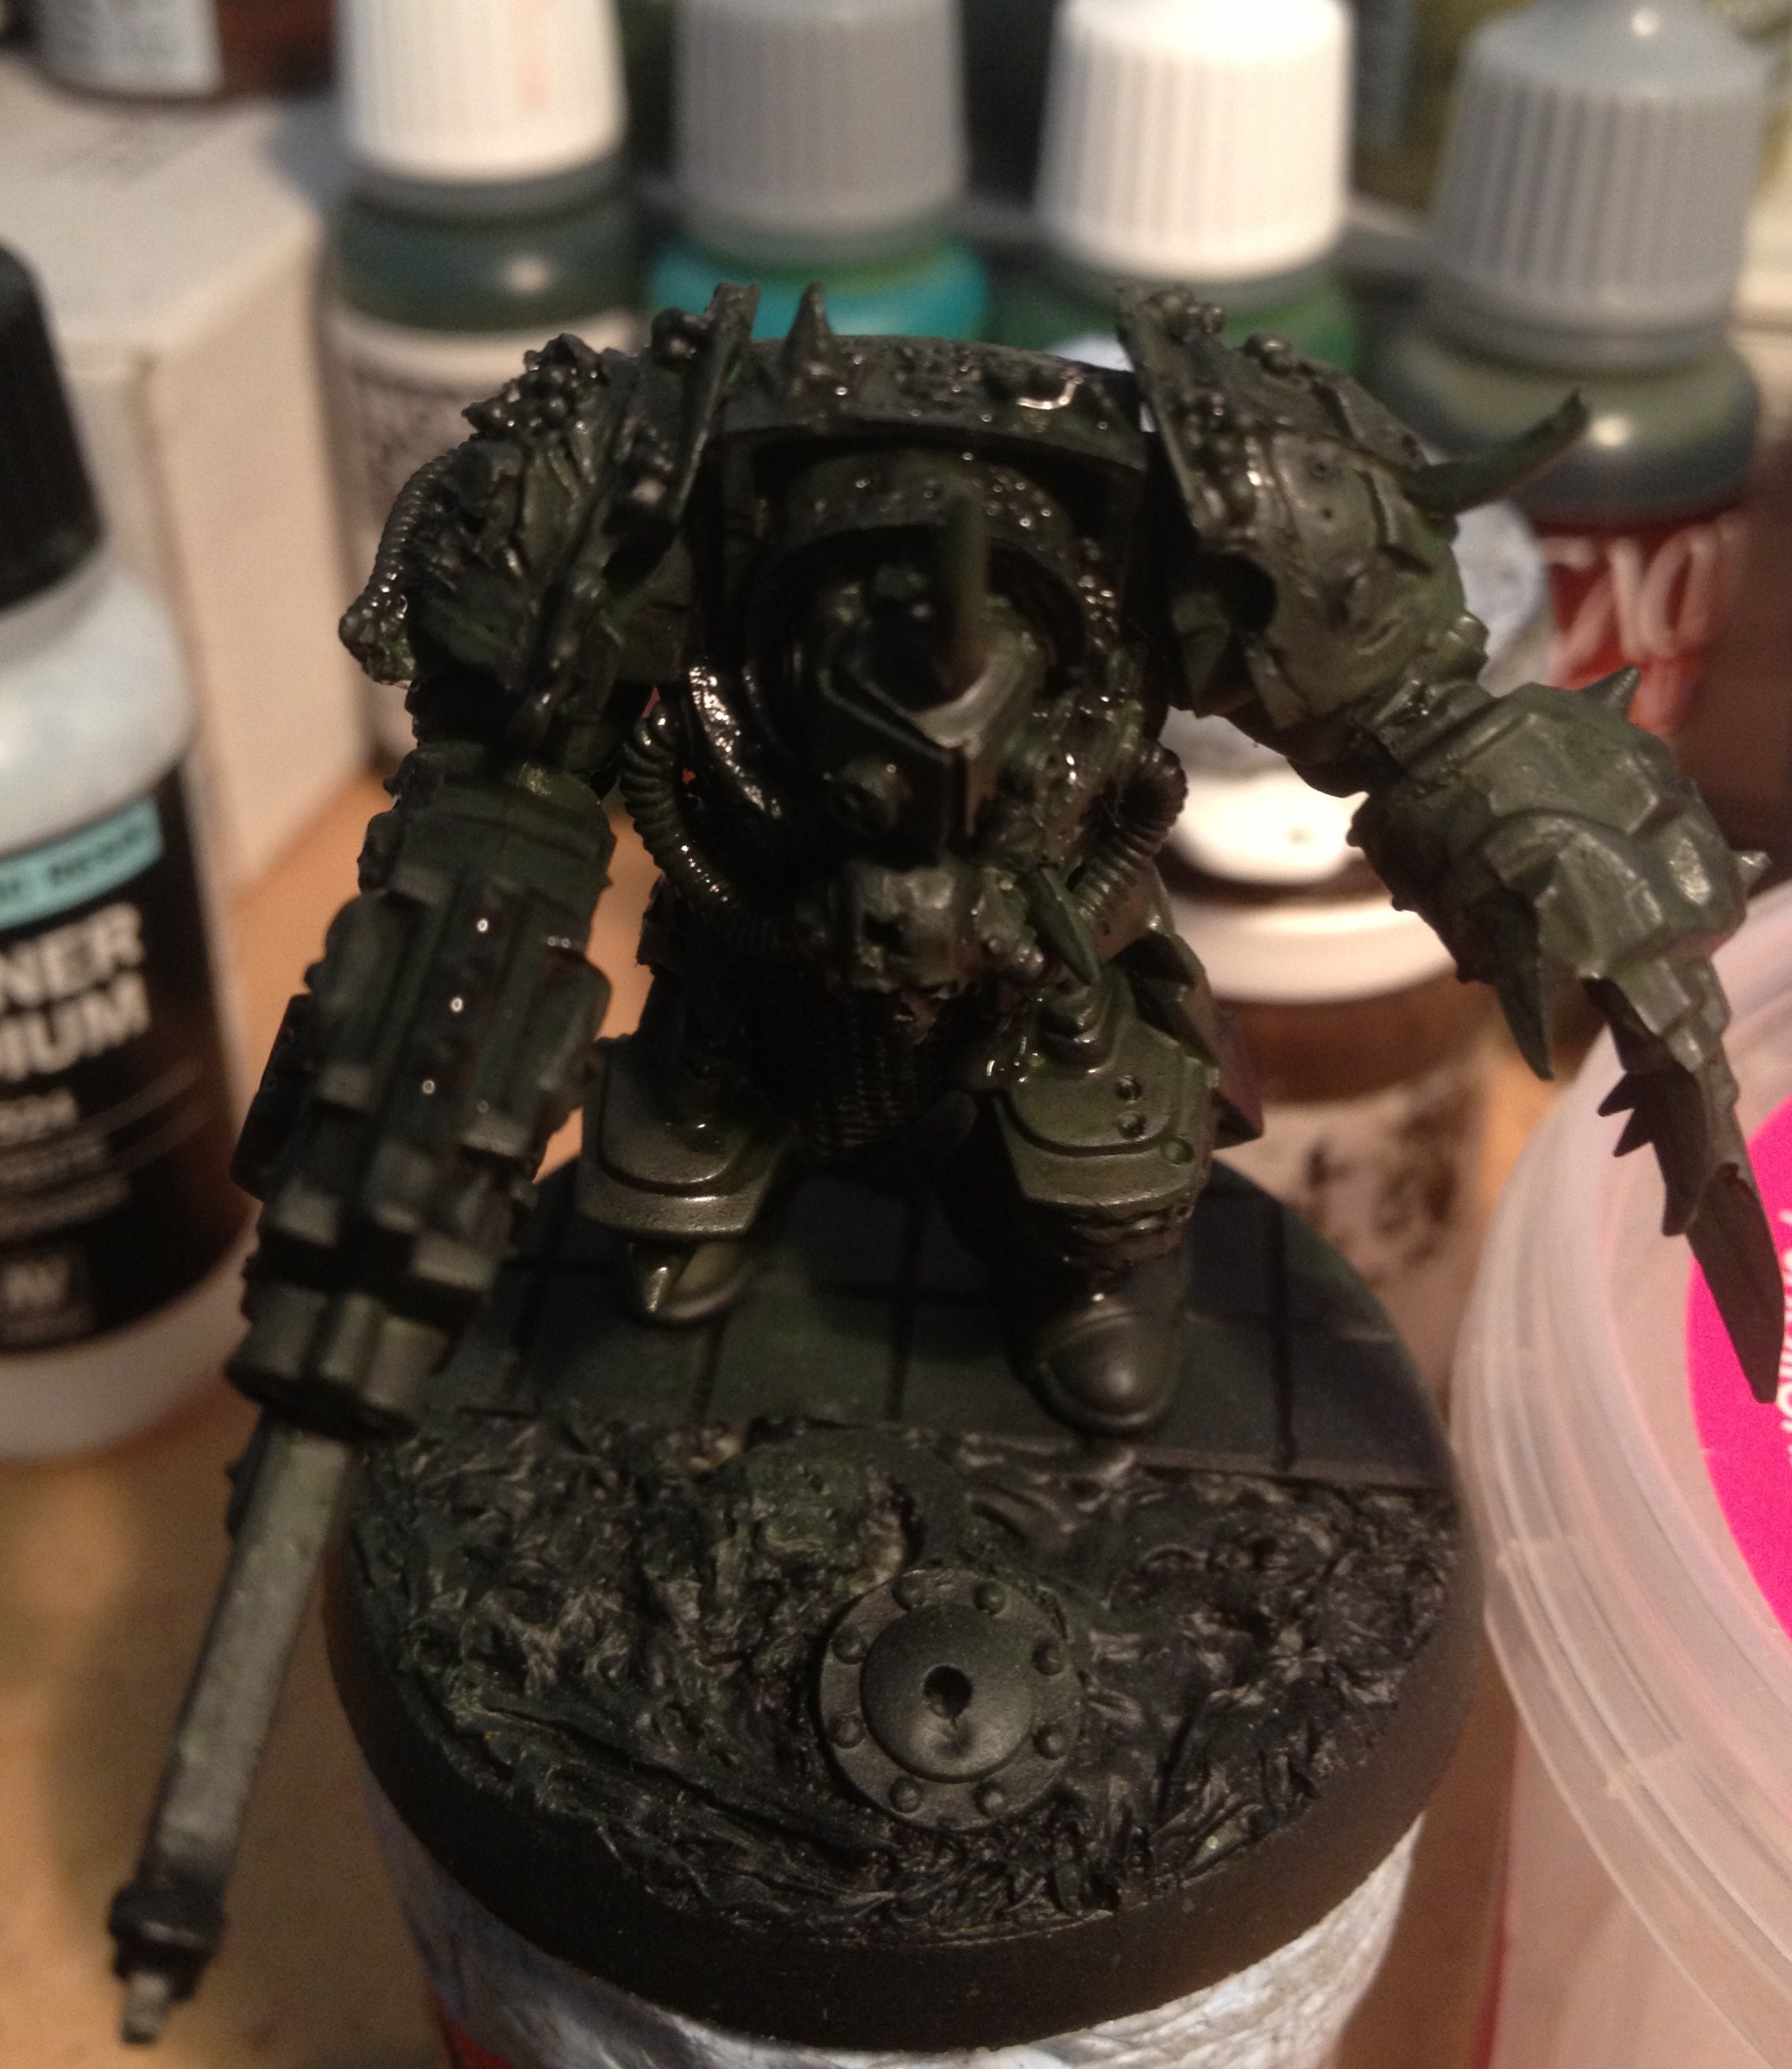
Wash #1 – Devlan Mud
I gave the whole model a light wash of Devlan Mud, basically to help define the edges of the various detail, and help to add a bit of depth in later stages of the painting process. I tried not to go too overboard here, as this stuff pools in the recesses, and that adds to the drying time. All I’m really after at this point is some extra definition.
Step four – Base coat #2
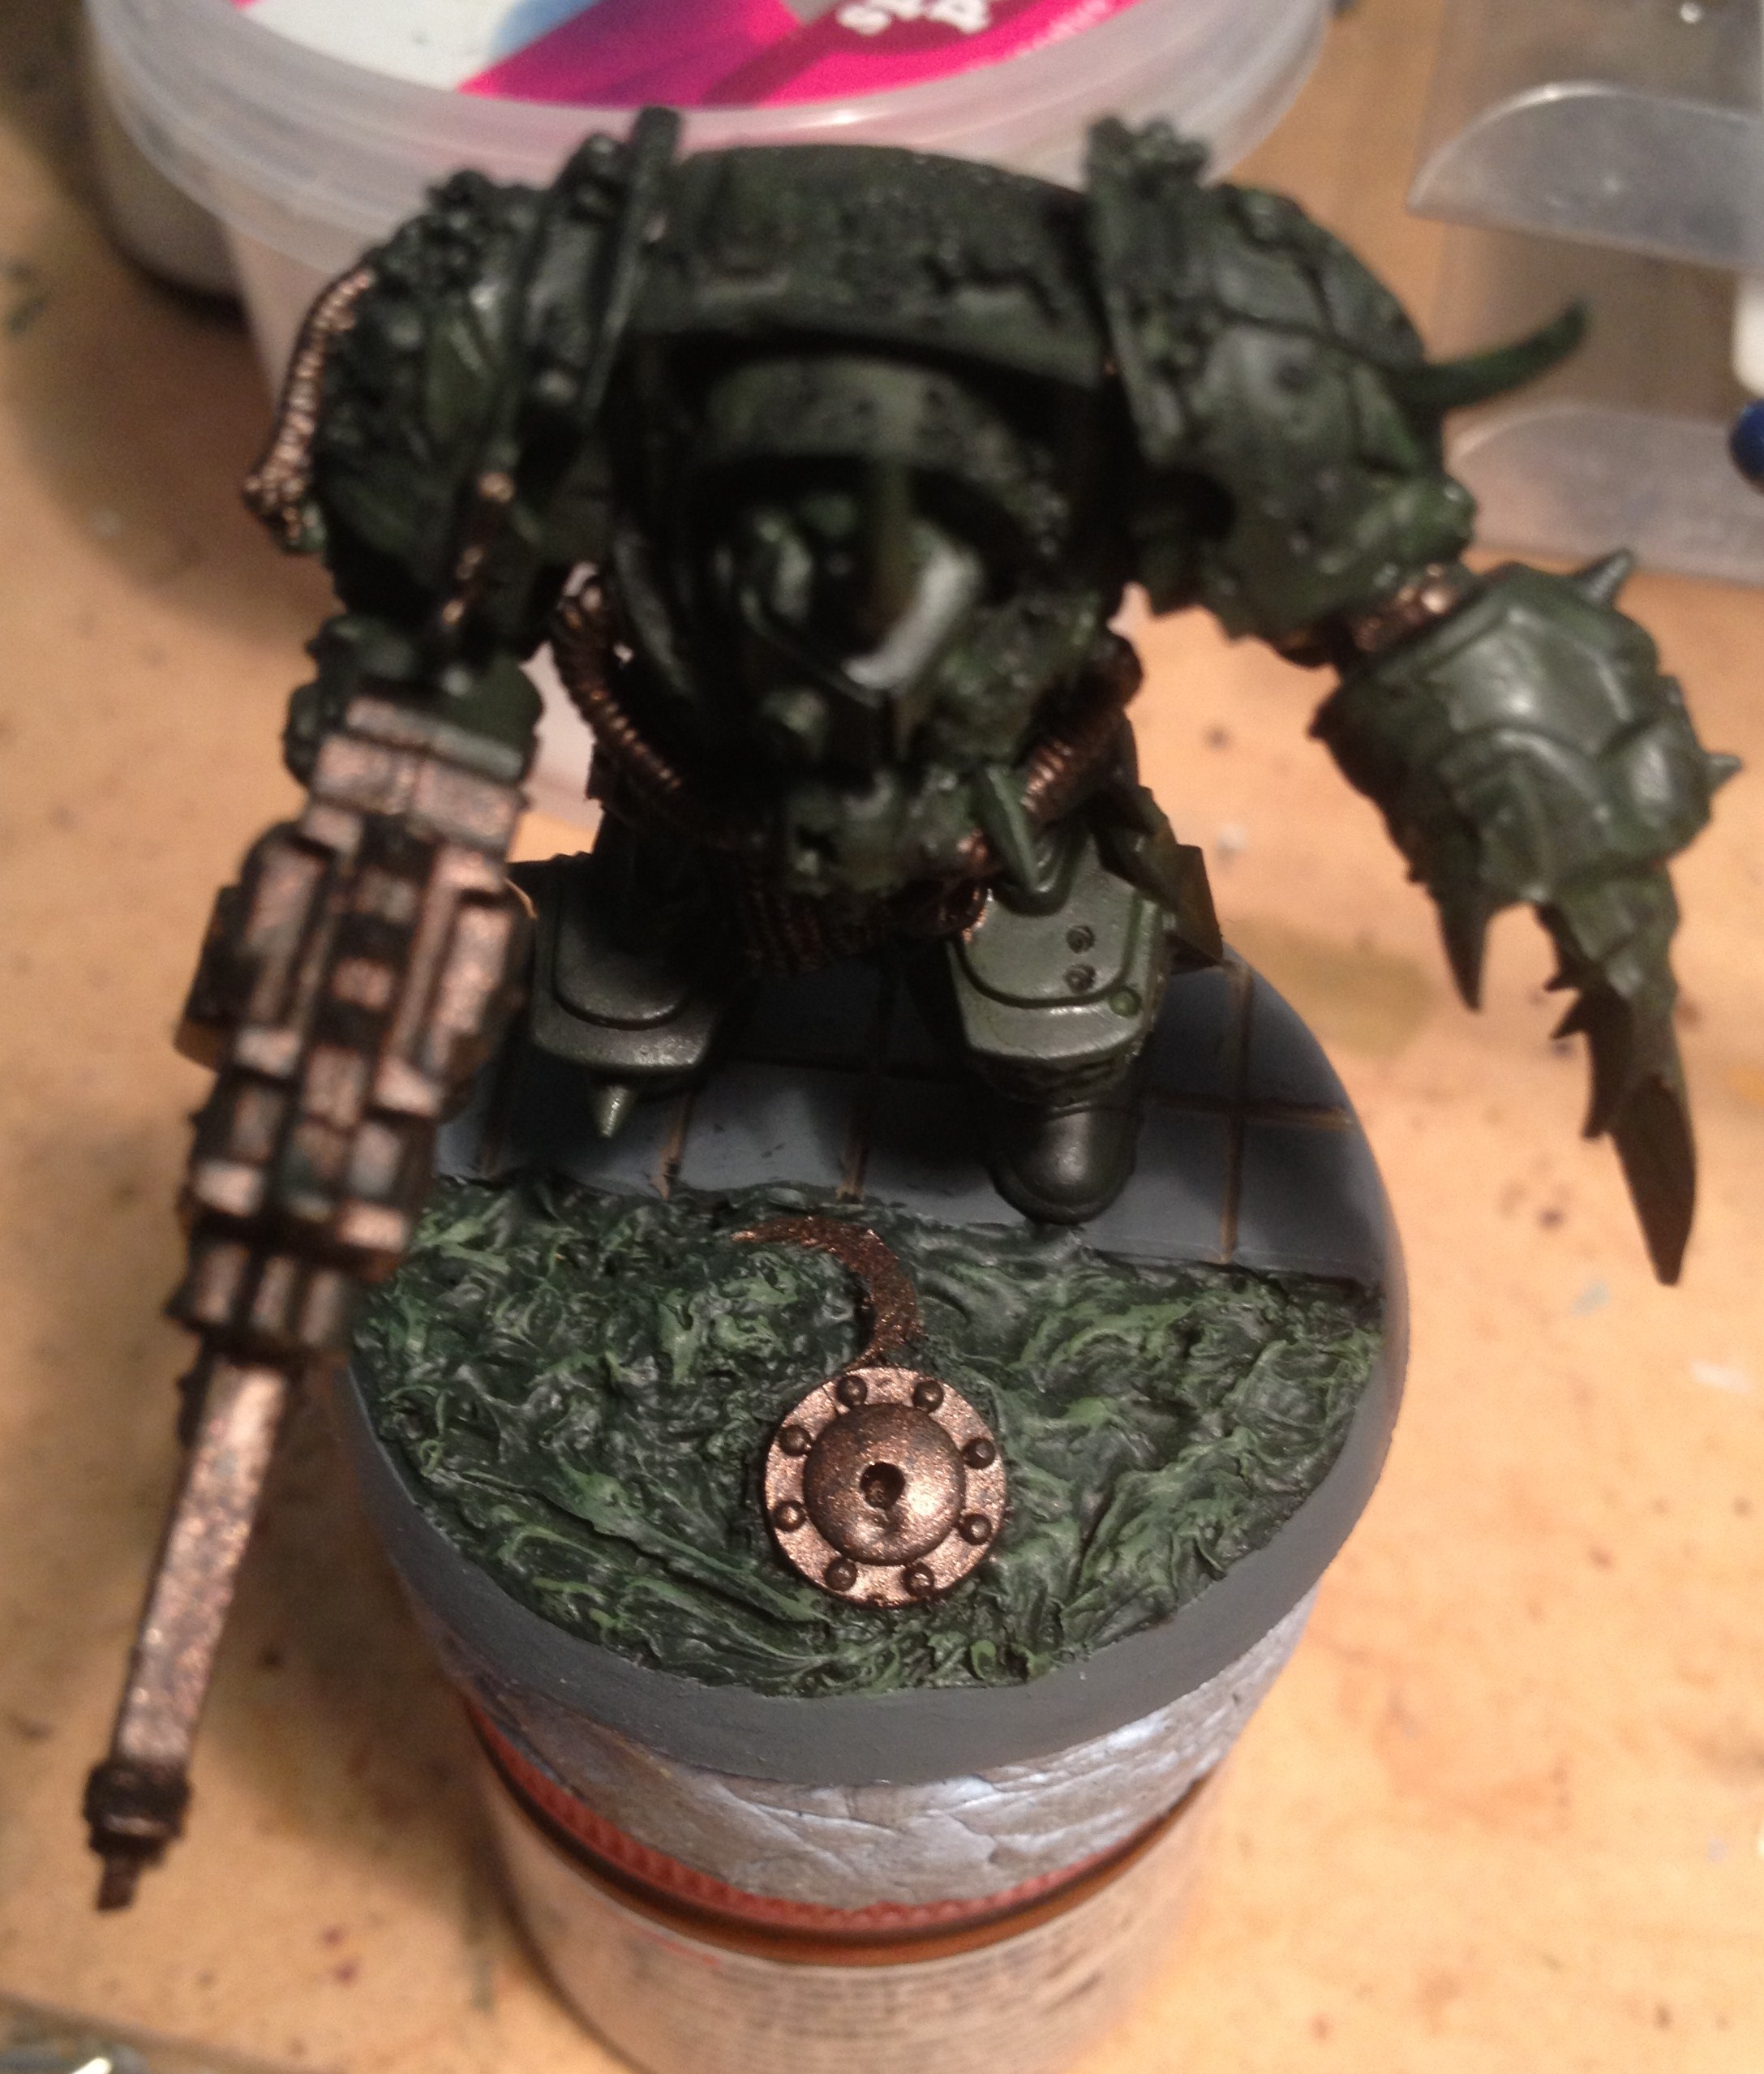
Base coat #2
At this point, I’ll say that I thin my paints out using Vallejo Thinner Medium. For starters, it makes your paint go further, which helps keep costs down, and it means the layers dry quicker as they are thinner. Using thinner paint also helps to avoid rough, lumpy or chalky finishes in your layers, which you can often get with un-thinned paint. It also helps with not clogging up detail on the model.
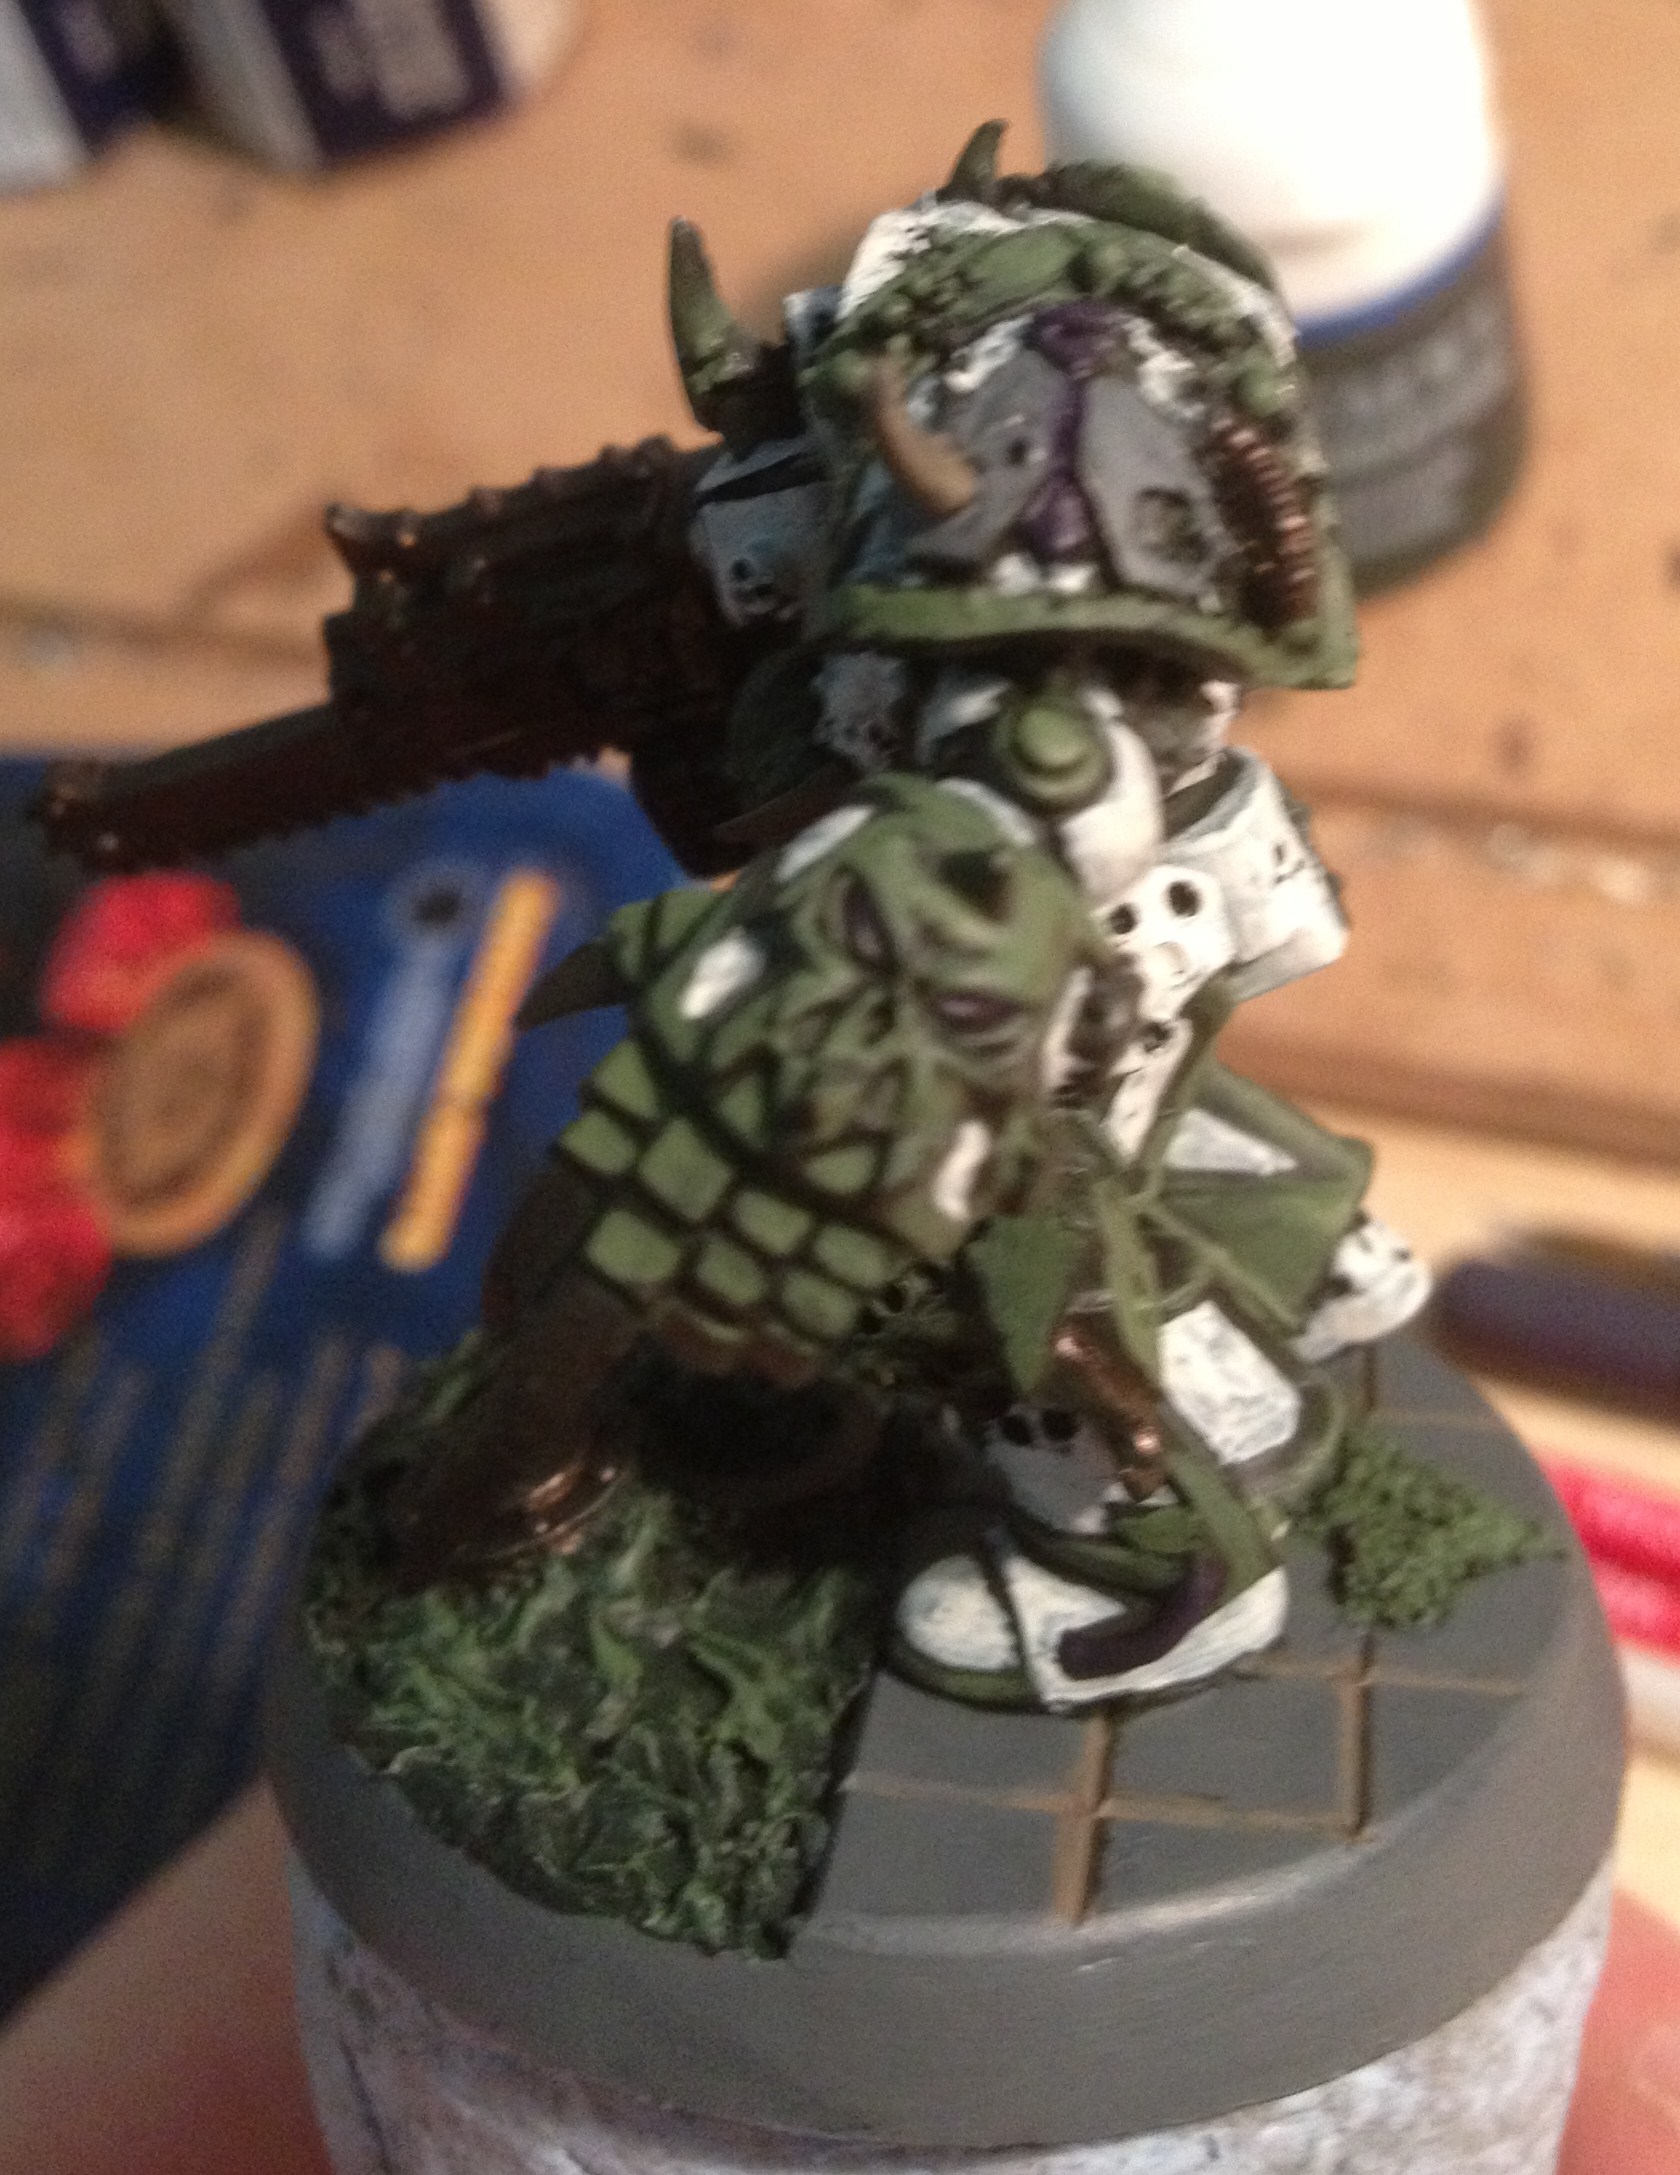
I lay down a base coat on the scenic base. Starting with the cracks in between the paving slabs, I line them in with Khemri Brown. Then moving on to the slimy looking water part, this gets a coat of Orkhide shade for a nice depth adding element. The paving slabs and edge of the base get a coat of Adeptus Battlegrey. There’s a patch of moss at the back of the base that gets a light coat of Knarloc Green, and the chunks of partly submerged ironwork in the water get a coat of Warplock Bronze. The bronze colour sits really well against greens, as bizarrely it contains a fair amount of green pigment. I could try and explain why, but to be honest, I’d be totally making shit up.
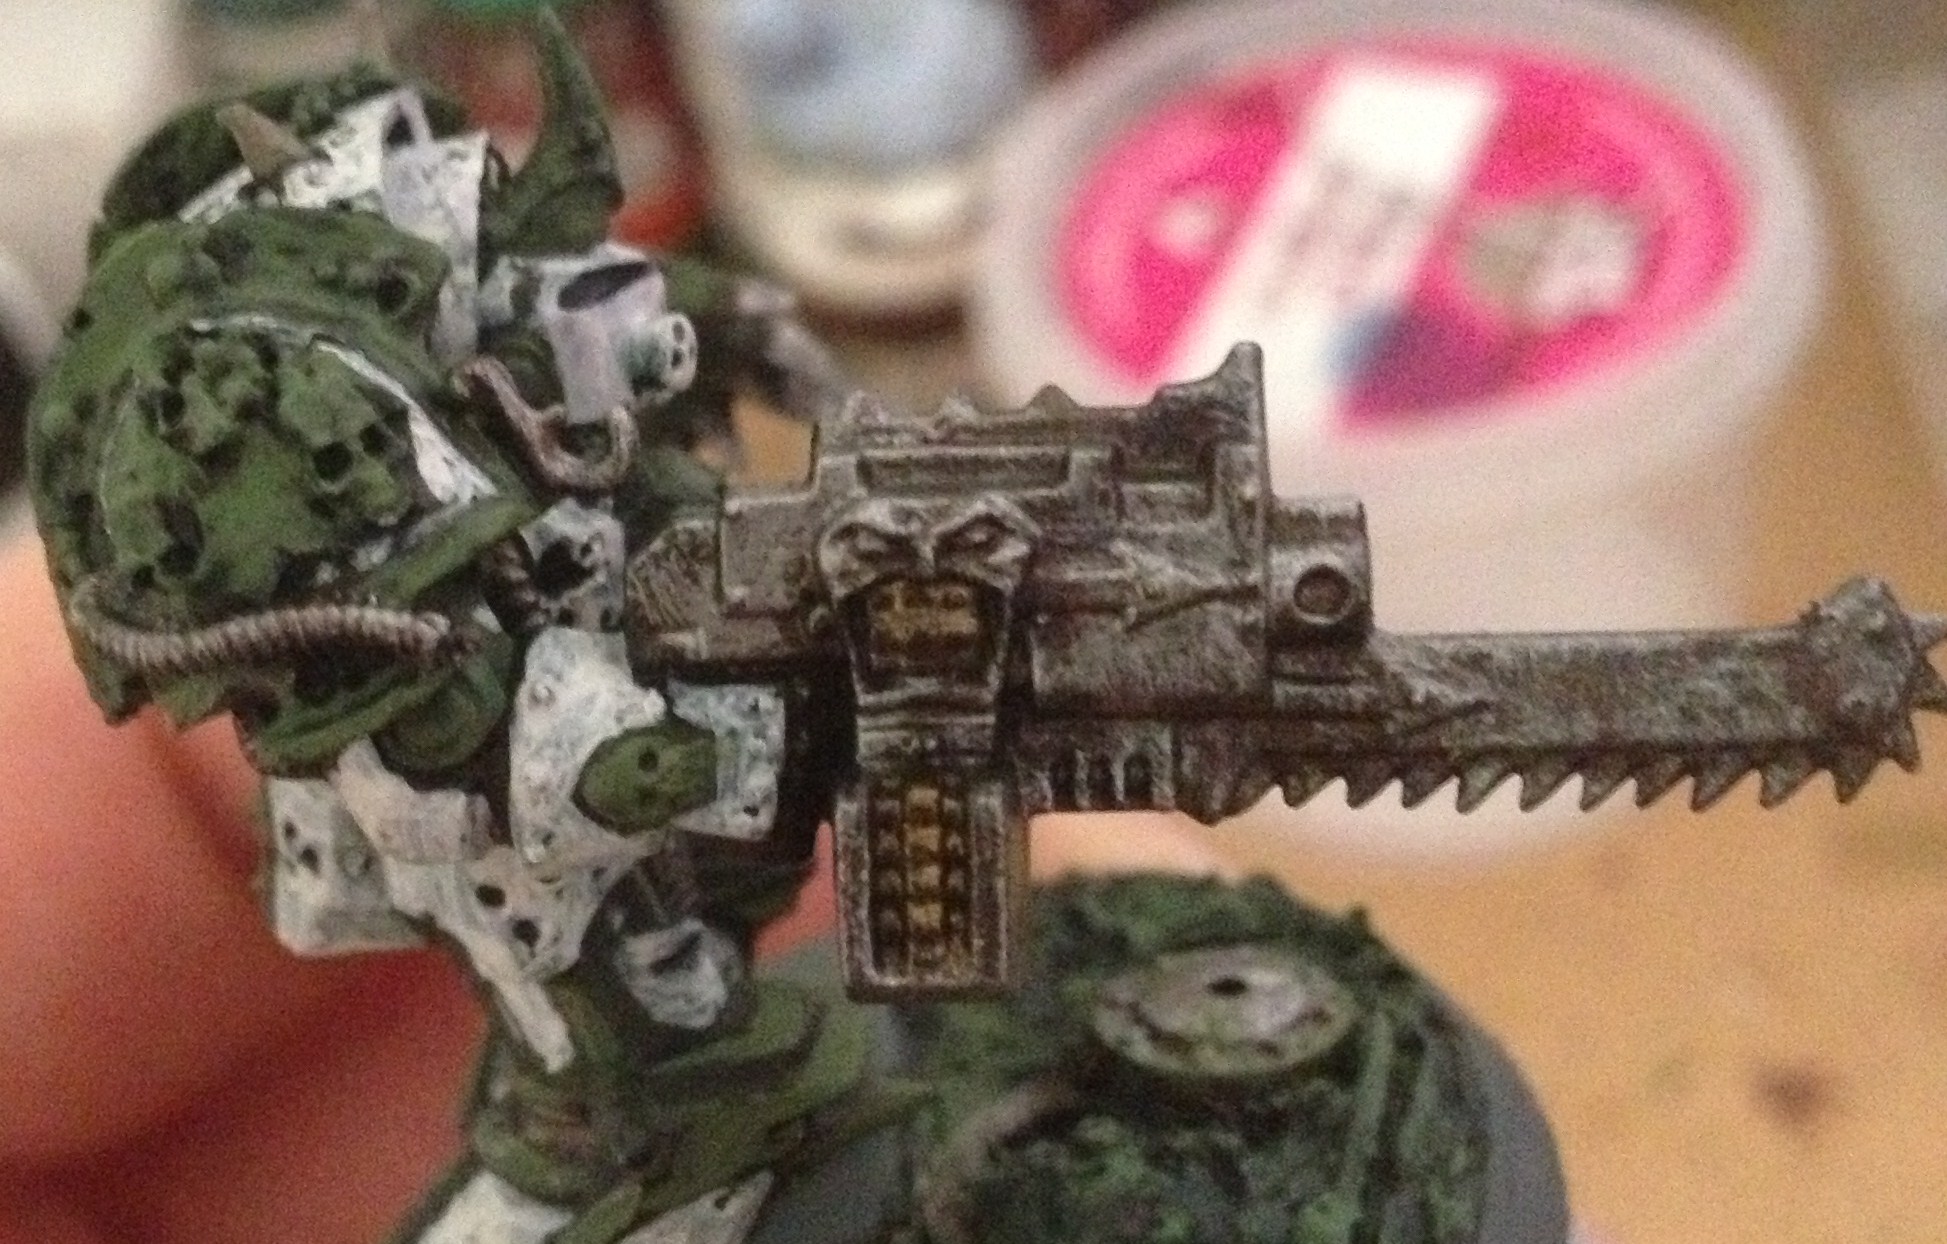
Once the base is base coated, I crack straight on with the metal bits on the model itself, giving them a coat of Warplock bronze. As the dude I’m painting is a follower of Nurgle, and his armour is pretty corroded, it’s safe to assume his bolter and any associated metal work about his person will have seen better days too. This will later on give a sense of rust in the recesses of the weapon, on blades, chains and any corrugated tubing about his armour.
Step five – Layer #1
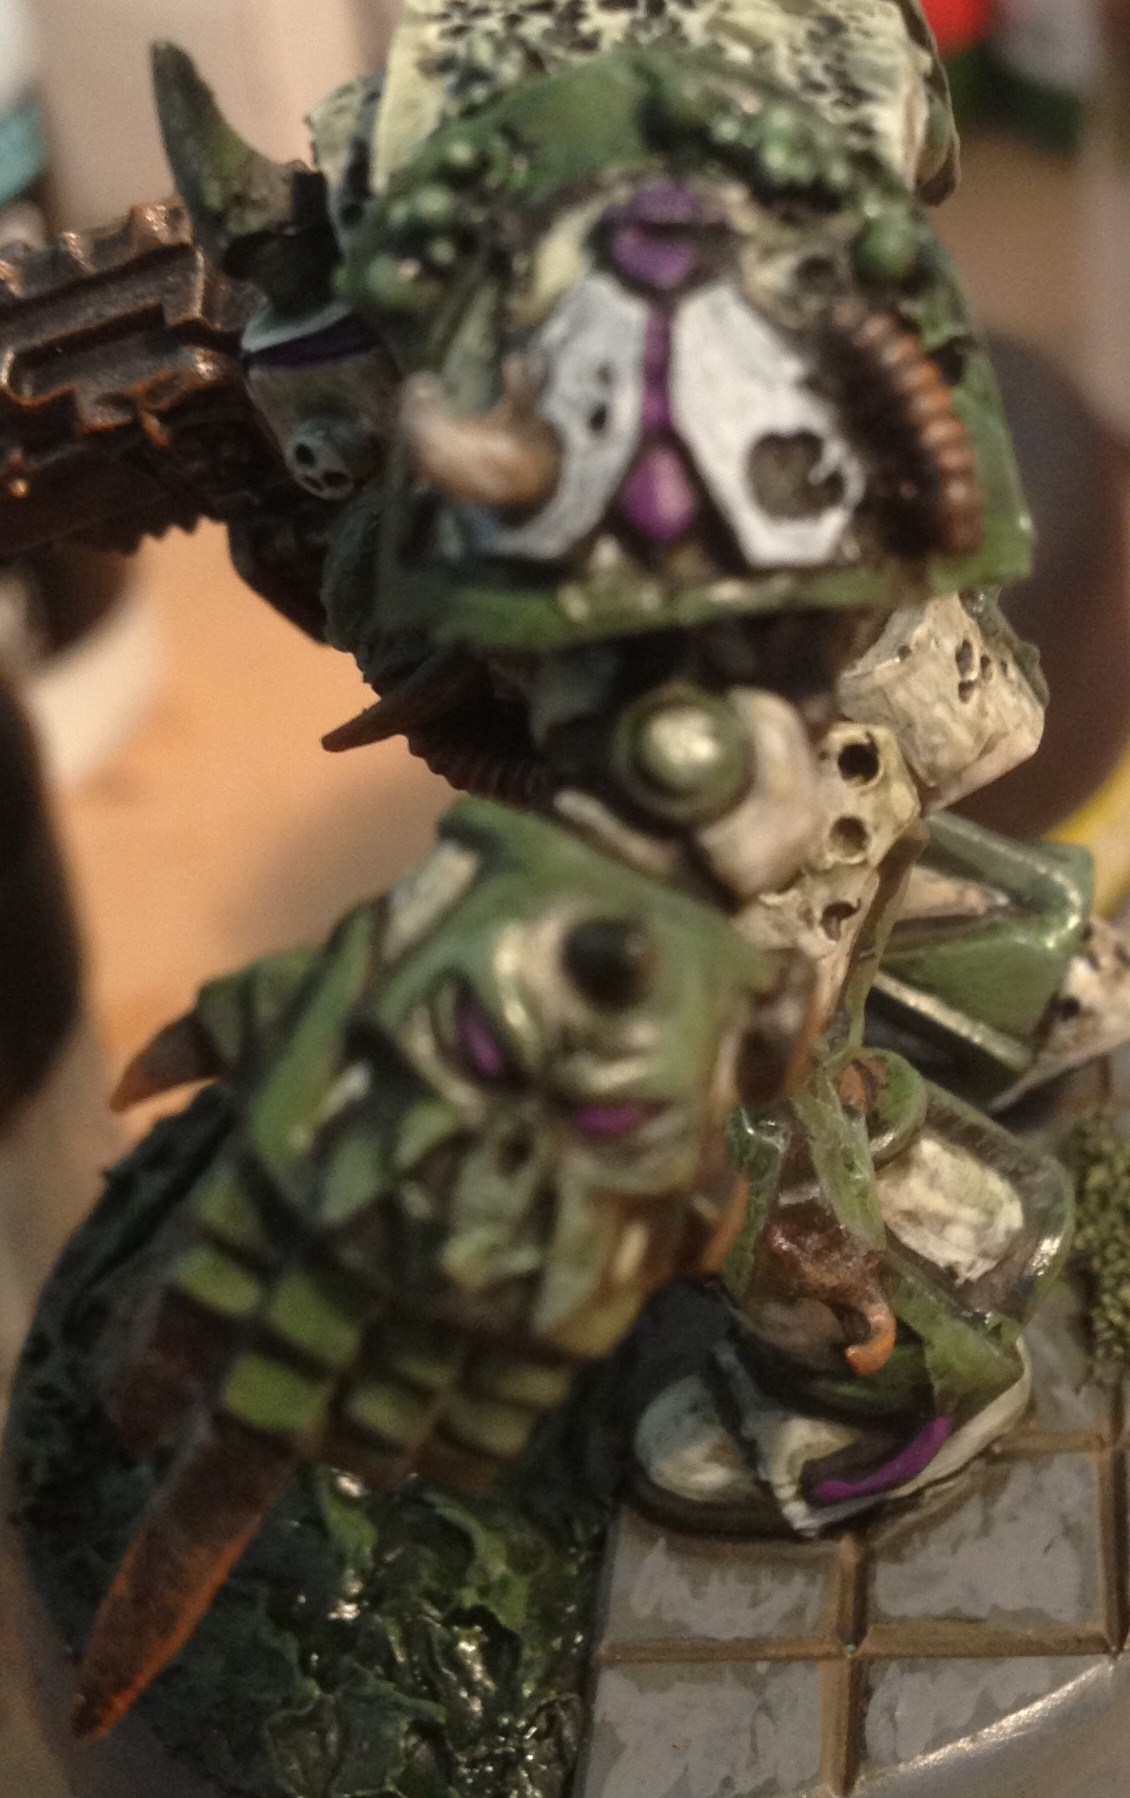
Next, I move straight on to the “white” parts of the armour. The colour I’m using here is a mix of Vallejo Off-white and Dheneb Stone in a 2:1 ratio, then adding an equal amount of Thinner Medium. This mixture is painted on carefully (more because I’m quite pedantic than for any other reason) on the flat areas. On the areas that are more textured (see pictures), I’ve made a rough attempt to follow the contours on the model, leaving the green showing through in the deeper recesses. Thinking back to what I said earlier on about lumpy finishes, you can probably see on the legs where the paint had started to dry out, which is a risk on a hot day like today. For a Nurgle model, this isn’t usually too much of an issue, as it will serve to add a bit of extra texture.
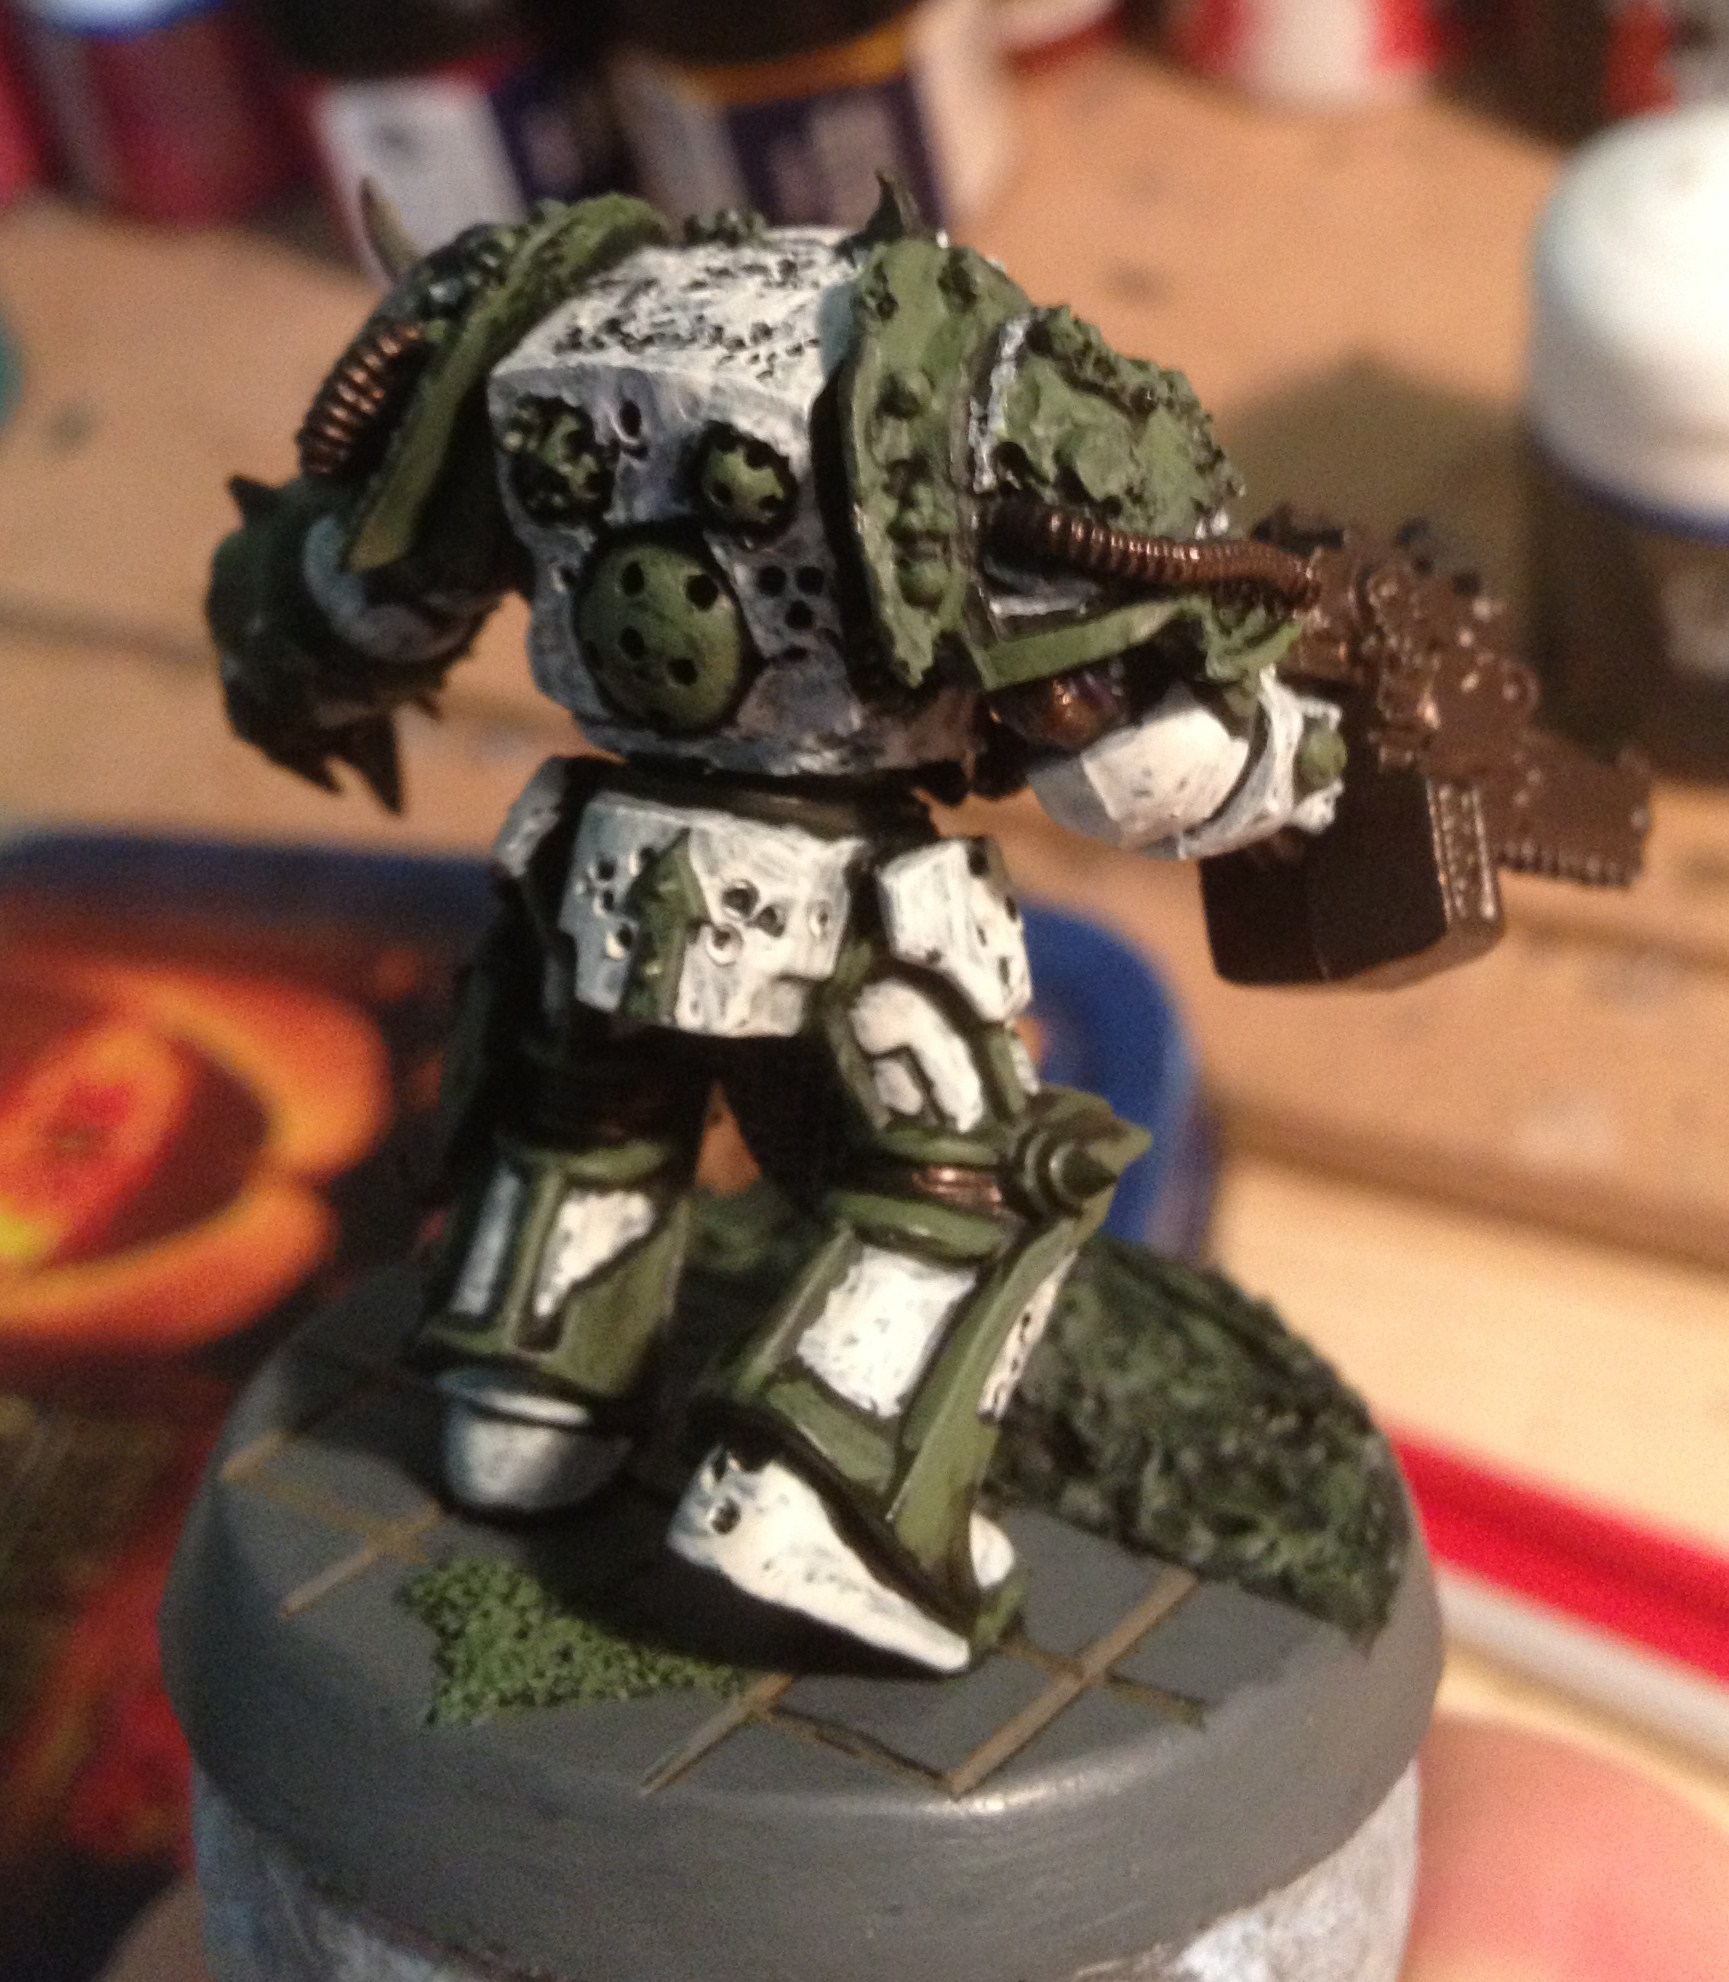
At this point, I also picked out the helmet lenses, the wires, the eyes in the ornate faces of the armour and the body of the fly emblem on the shoulder in Naggaroth Nightshade. The wings on the fly got a coat of Codex Grey. There are a couple of horn-like protrusions about the body, which got a coat of Khemri Brown.
Step six – Layer #2
The metal areas were given a rough over-brush (or heavy dry-brush) of Pig Iron, leaving the underlying bronze colour in the recesses. The belt-fed ammo going into the bolter was picked out in Blighted Gold.
Layer #2
The slimy water on the base was given a rough over-brush of Knarloc Green.
Step seven – wash #2
The whole body of the model then gets a moderately heavy wash with my “Murk” wash (My murk wash is a bit of an ongoing project, and gets topped up with the dregs of any green or brown washes that have almost run out. It was an experiment that went well, basically, so I’ve been keeping it going). As the murk wash contains brown pigment as well as green, it serves well to add definition and contrast on the various areas of the model.
At the same time, I give the metallic areas a wash of Devlan Mud, to dull down the metal somewhat.
Step eight – Layer #3
After the previous stage, the model was left over night. By now the mixture of Dheneb Stone & Off-white on my wet palette has broken down somewhat, as moisture has seeped into the paint mix, and the Thinner Medium has separated out. I mix this broken down mixture back together, and it leaves me with an even thinner paint, due to the additional moisture content. I dot and pull this sporadically about on the “white” areas to create a blotchy mildewed (in my mind at least) effect.
The green trim is then touched up with Knarloc Green.
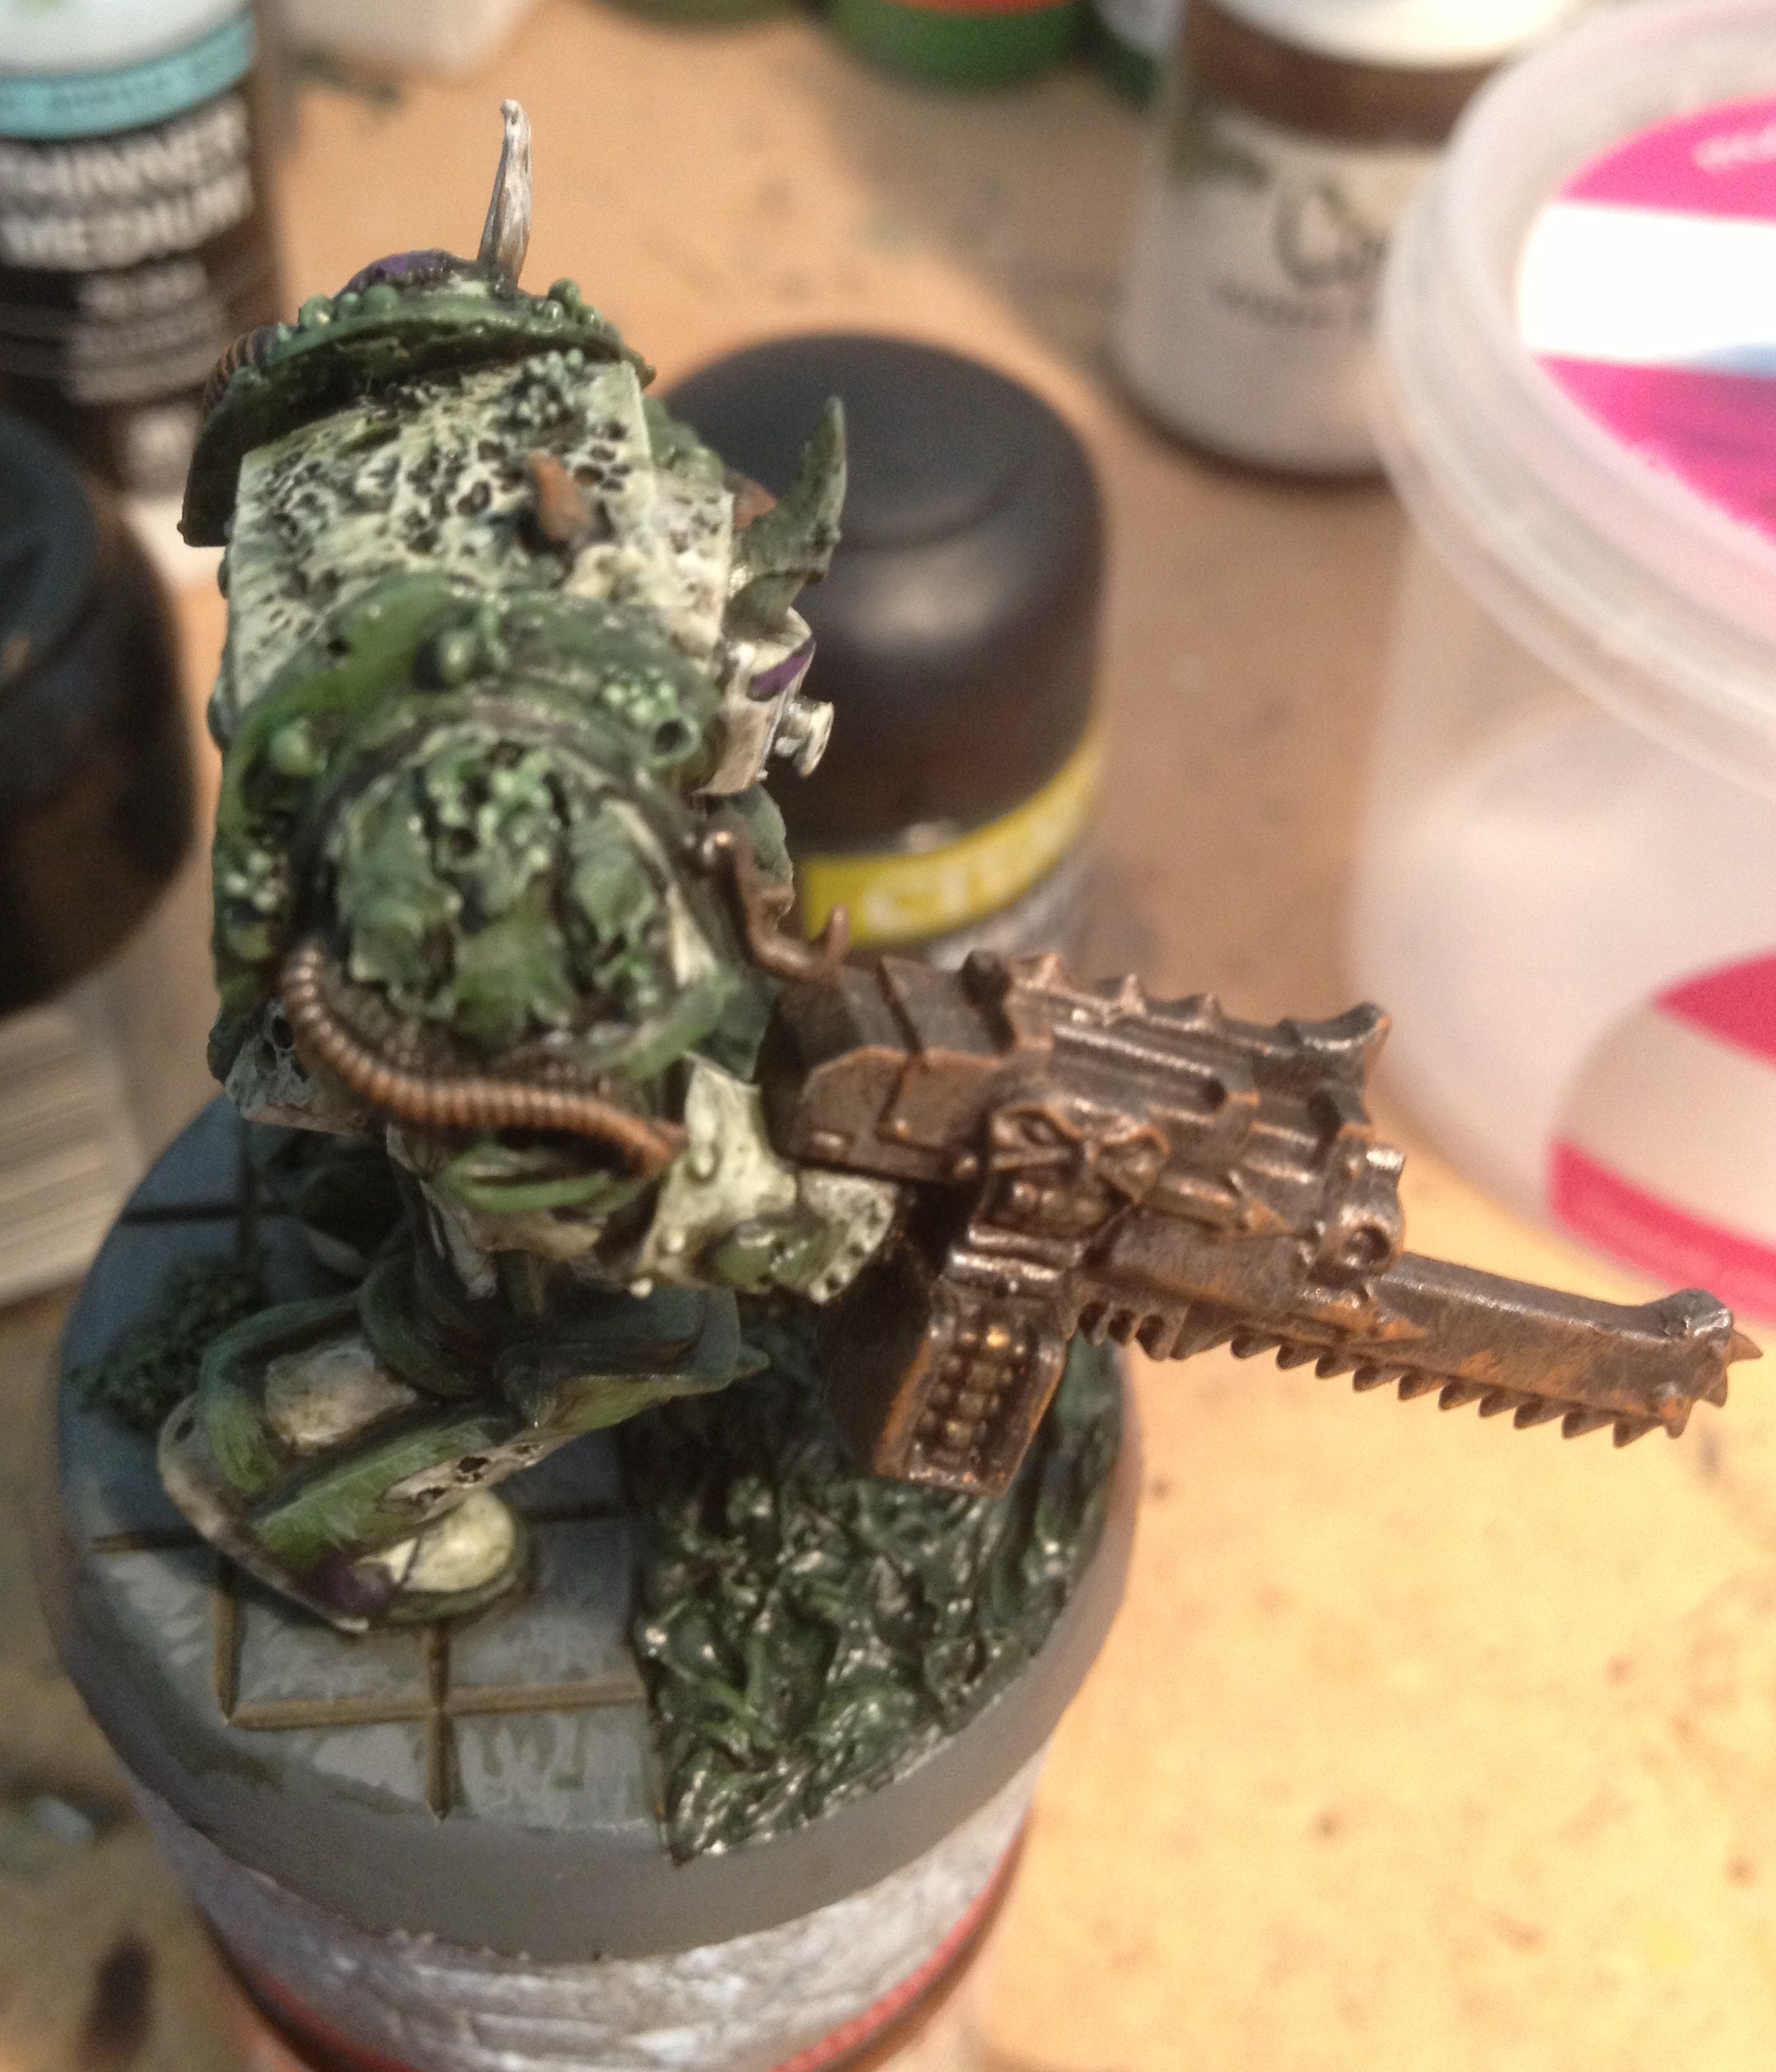
Step nine – Weathering the metals
On the metal areas, I used a Citadel Dry Brush to lightly stipple Calthan Brown in random patches and streaks. In particular on the bolter, I considered which surface areas and edges were most likely to get bashed and knocked about. In these areas, where metal would have theoretically have been more exposed, I figured rust would have taken a stronger hold. On these areas in particular, I repeated the stippling process, this time using a rough 2:1 mix of Calthan Brown and Macharius Solar Orange, for a brighter rust tone.
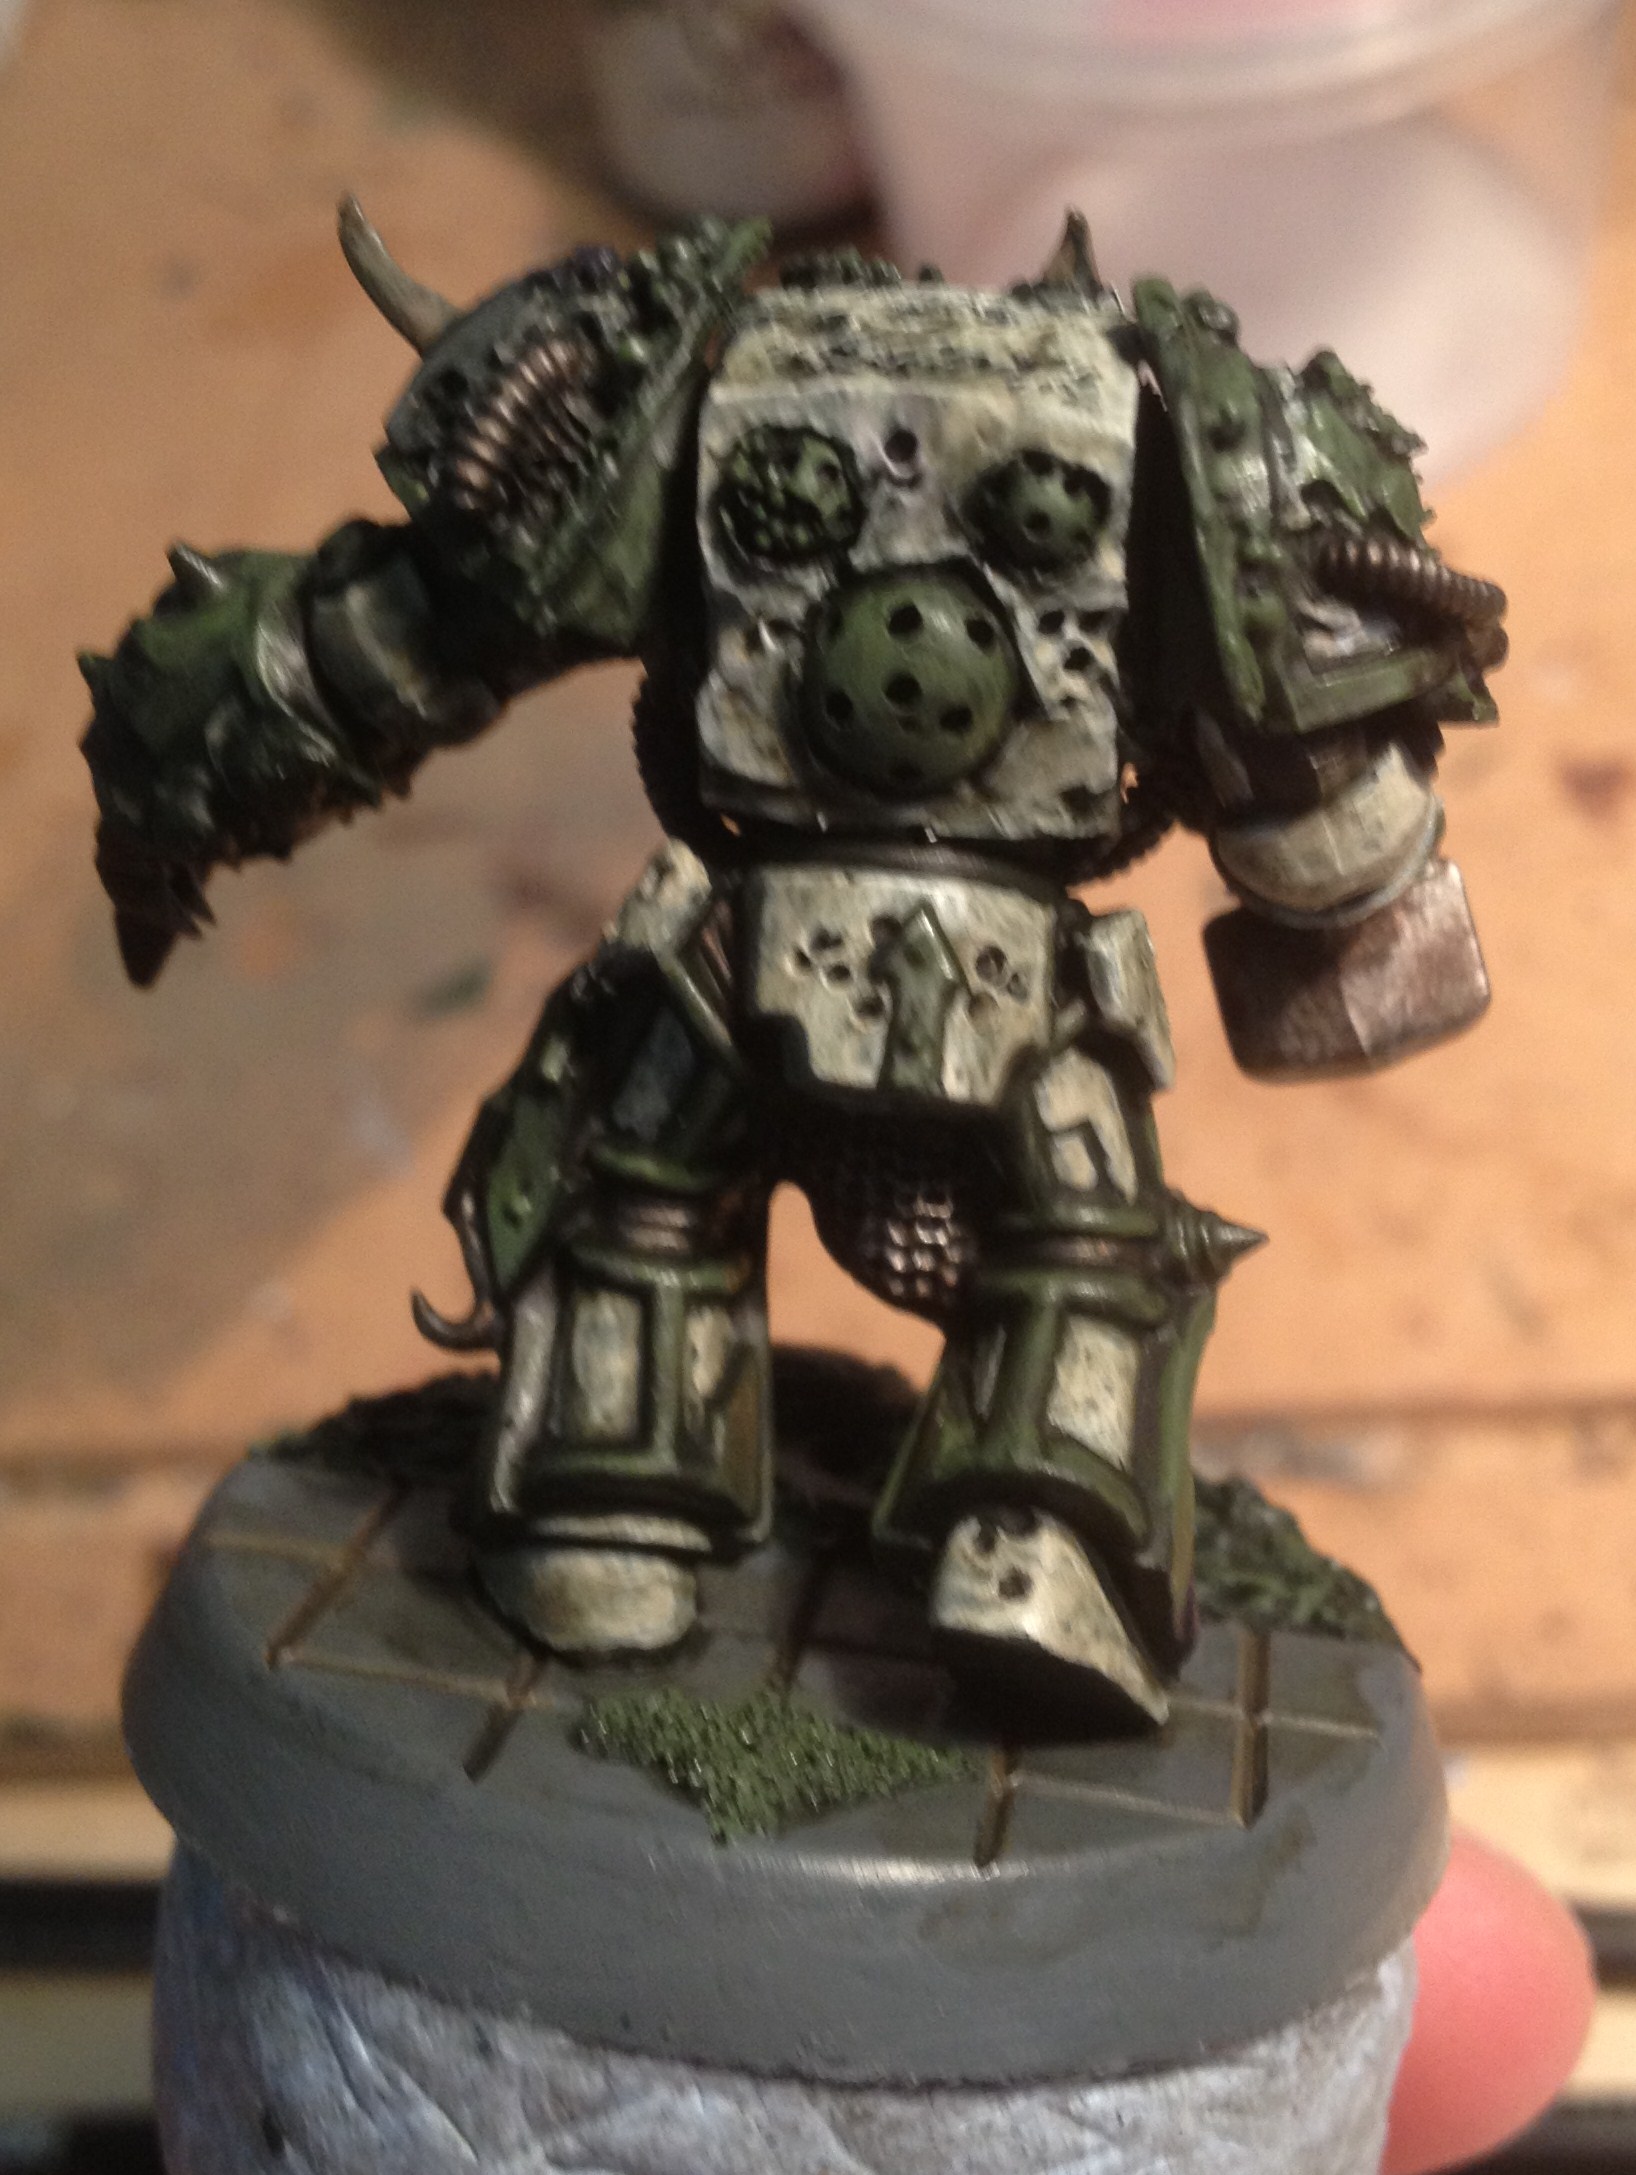
Step ten – Highlighting
I now took some of the Dheneb Stone / Off-white mix, and added some Knarloc Green a little at a time until I got a greyish green colour. If you think of the mould you sometimes get on fruit that’s been left around for a bit, you get the right colour, more or less. This was drybrushed on to the green trim areas of the armour, and any patches of boils or fungus etc.
More of the Dheneb Stone / Off-white mix was added to the mouldy colour to create a lighter shade. This was applied to the boils and fungus patches.
On the base, Codex Grey was dabbed roughly onto the paving slabs. Then a faint drybrush of Gretchin Green was applied to the patch of moss.
The purple details such as the helmet lenses, fly body and wires were highlighted with Xerxes Purple. The fly wings received a layer of Ghost Grey / Codex Grey mixed 2:1.

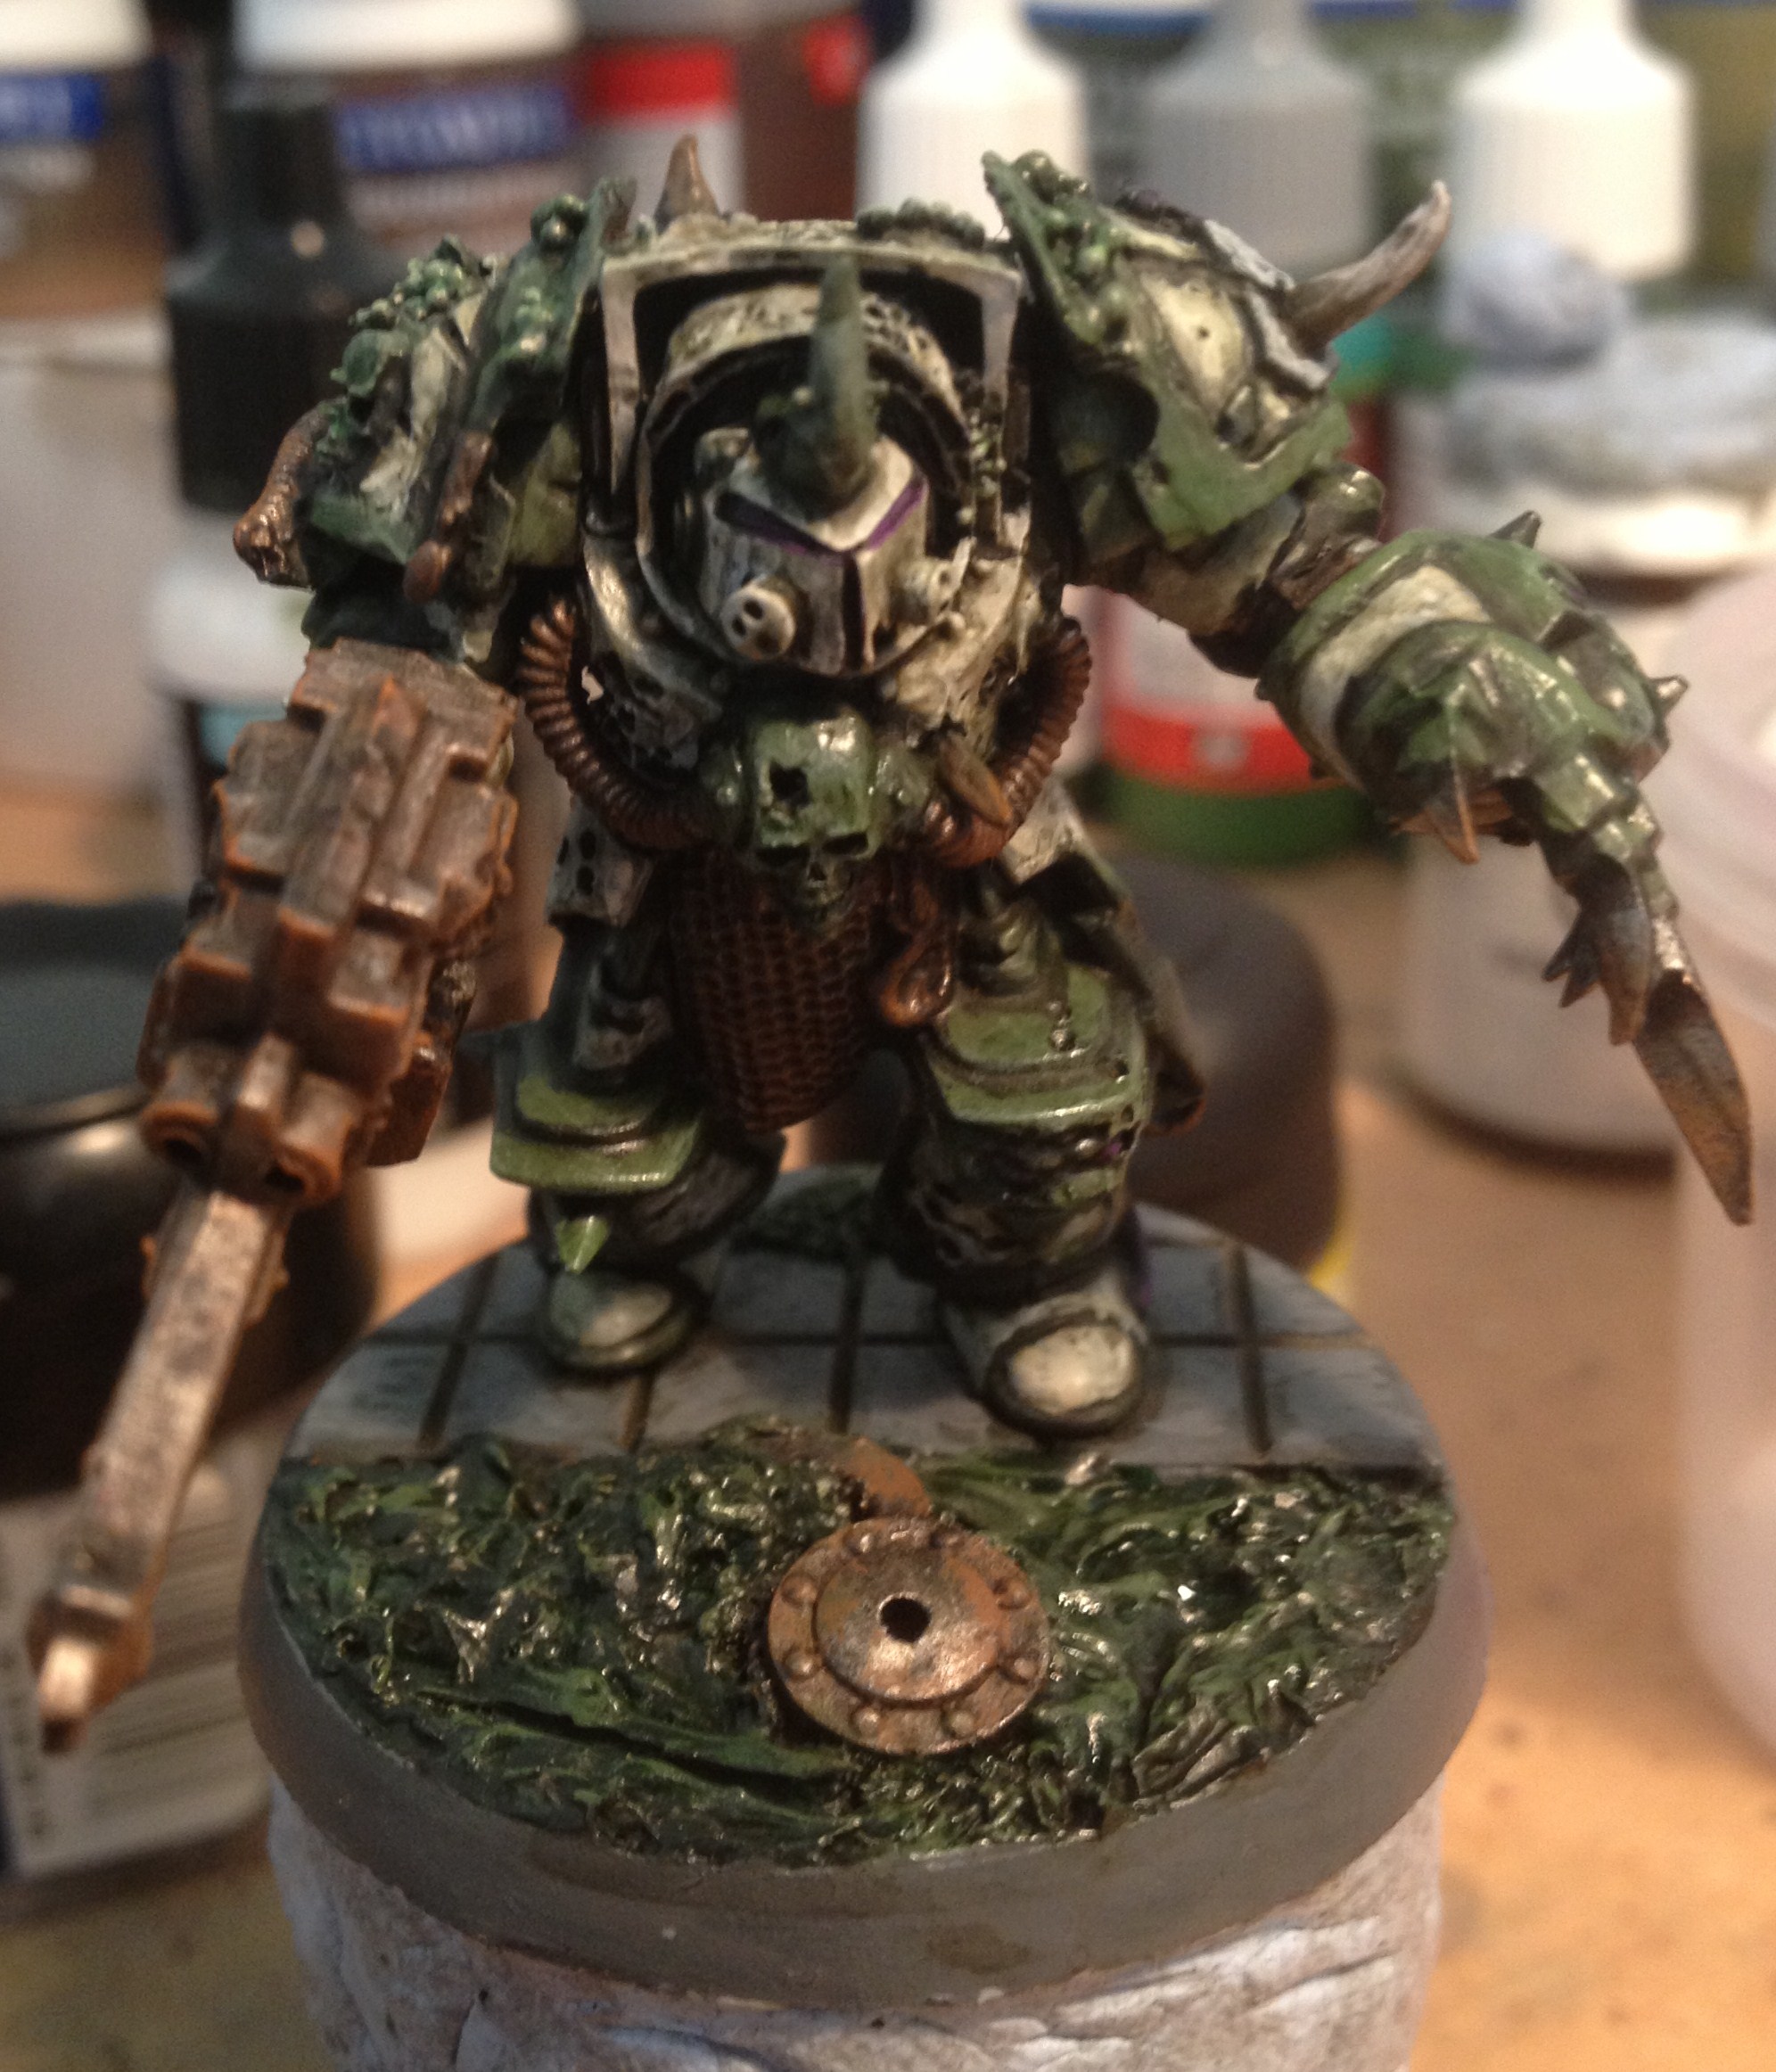
Step eleven – Glazing
The green areas of the model and base were glazed with Waywatcher Green to smooth out any harsh transitions. The “white” areas were given a final thin glaze (a little goes a long way), which was a mix of “murk” and Waywatcher Green in order to tone down any harsh whites.
And that, as they say, is that.
[contact-form][contact-field label=’Name’ type=’name’ required=’1’/][contact-field label=’Email’ type=’email’ required=’1’/][contact-field label=’Website’ type=’url’/][contact-field label=’Comment’ type=’textarea’ required=’1’/][/contact-form]